Completion of the ‘Bound-heart Lovespoon’

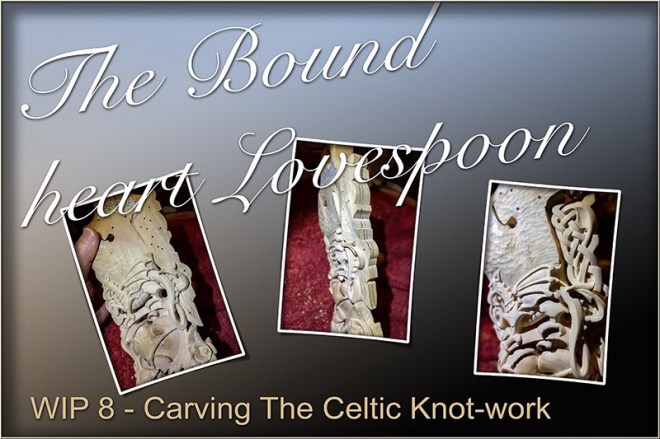
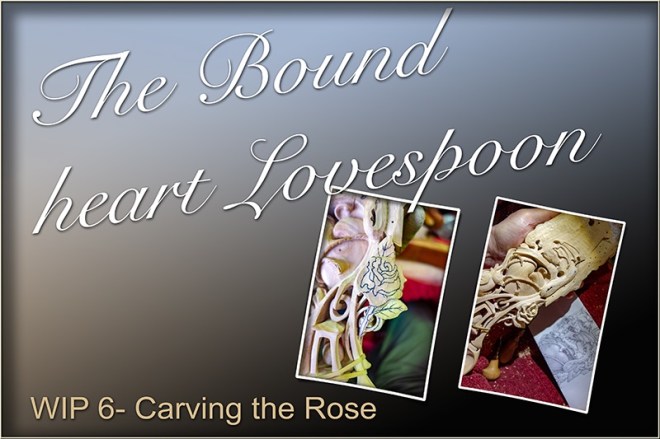
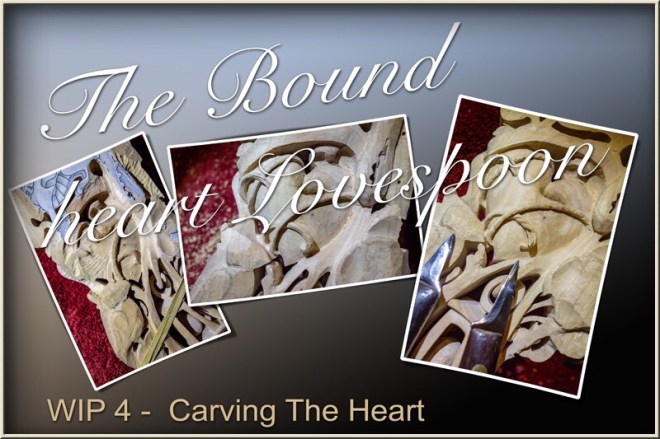
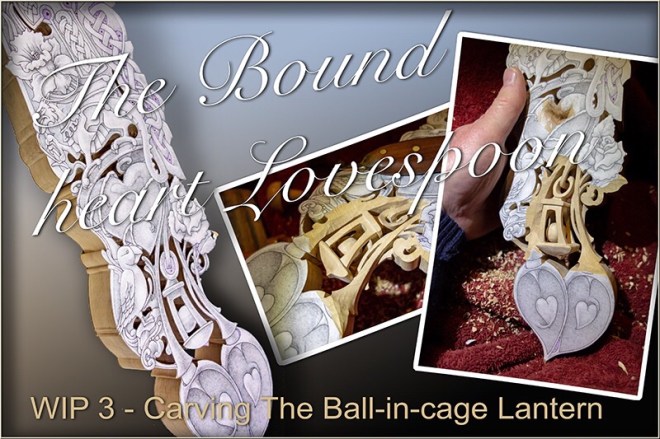
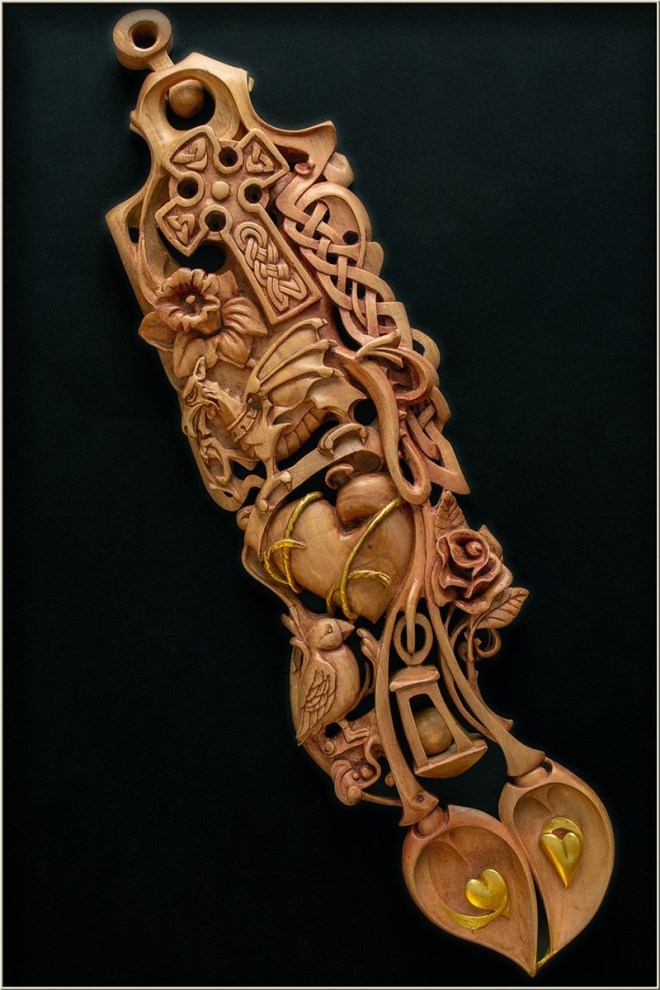
In preparation for yet another attempt at making more regular posts on this blog in this new year, I will wind up the description of the carving and finishing processes used in the bound-heart lovespoon.

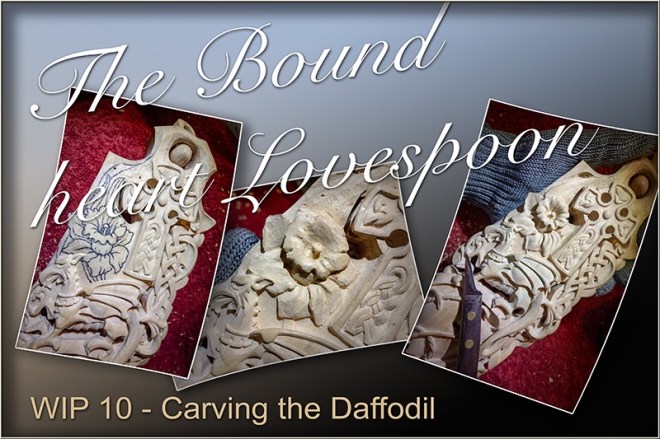
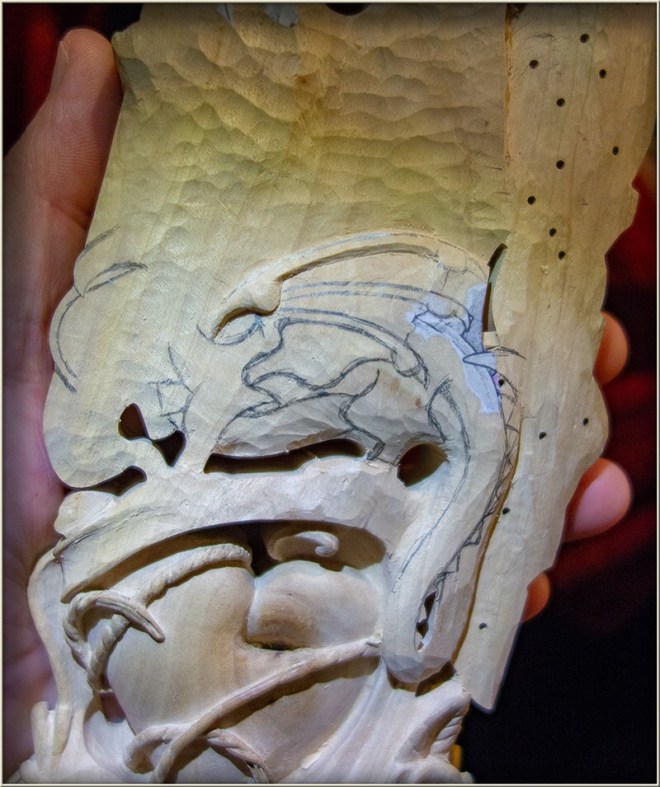
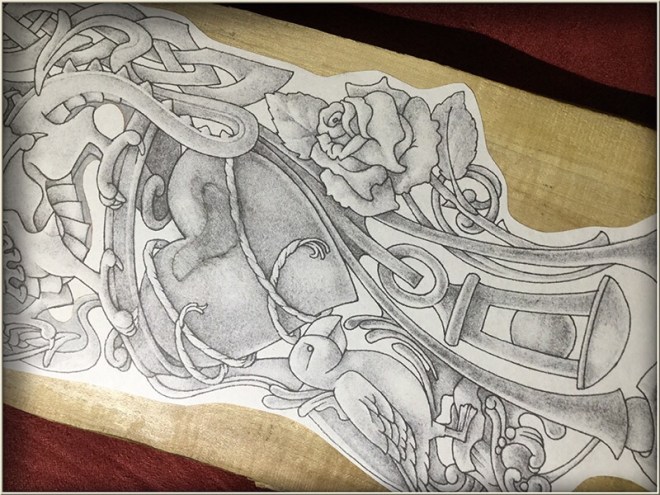
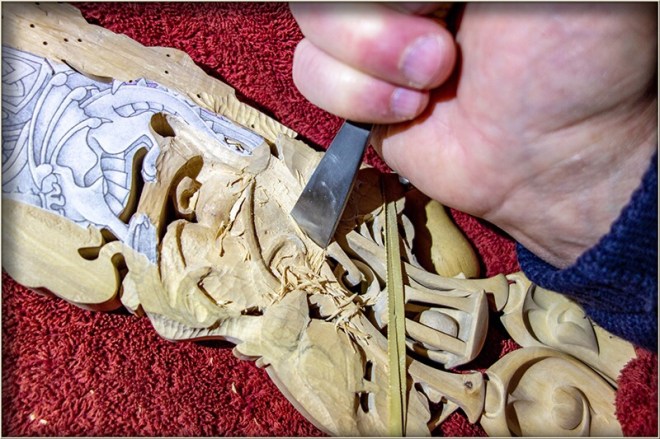
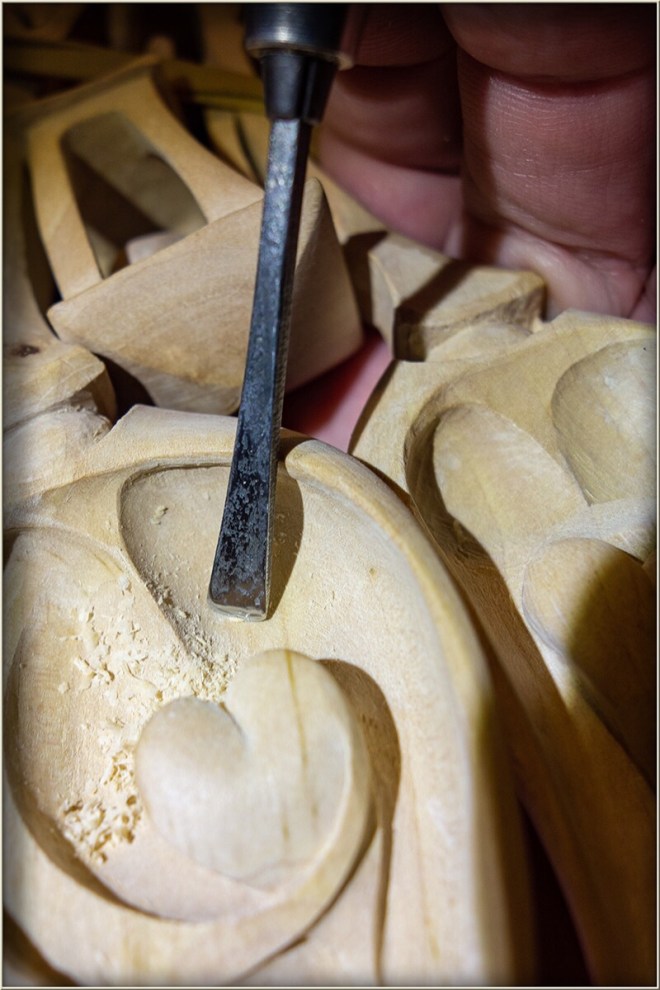
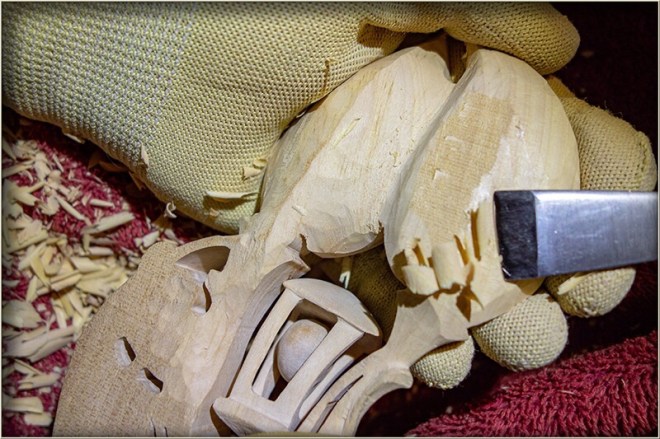
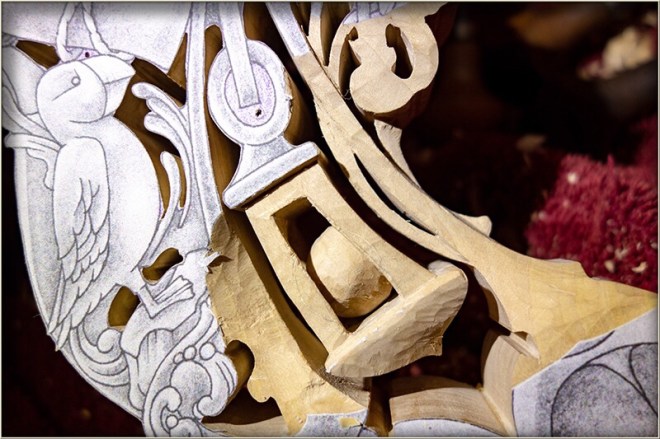
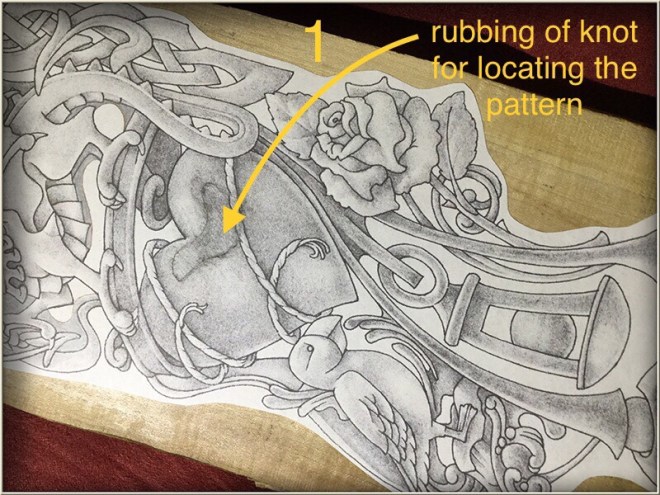
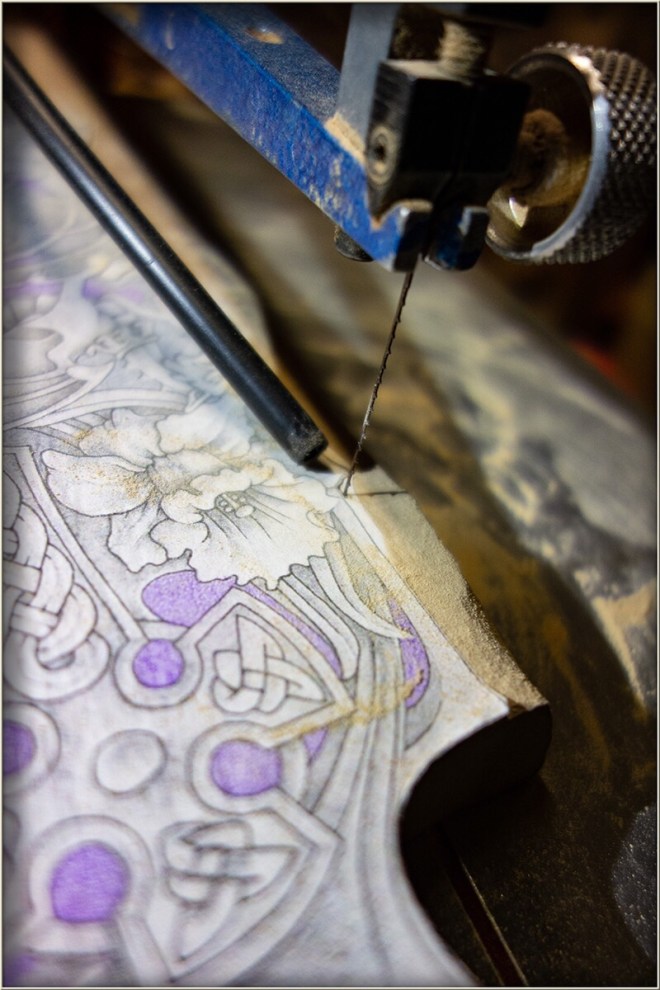
Carving the daffodil motif, begins with drawing the main shapes on the prepared area. Some indication of the lines that will link behind the leaves into the top area of the spoon where the swivel inserts is also made so that this area might be organically related to the various elements as the whole takes shape.

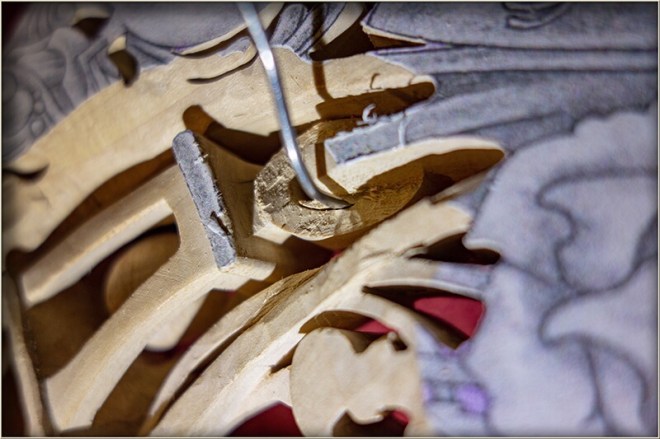
Gradually stop cuts are made along these boundary lines using micro-chisels, working in small increments or various gouges that happen to fit the curves of the lines. Flat gouges making slicing cuts up to these stop cuts enable the timber to be removed down to the necessary levels. The raking light of a properly positioned light source provides descriptive shadows of the forms as you progress to ‘draw’ the dimensional aspects with the projected shadows that are produced.

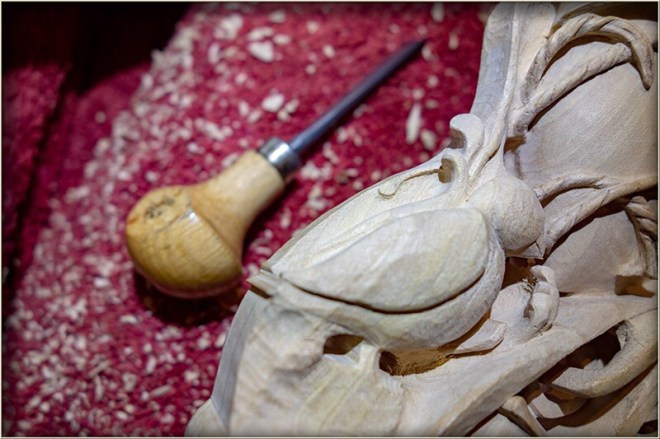
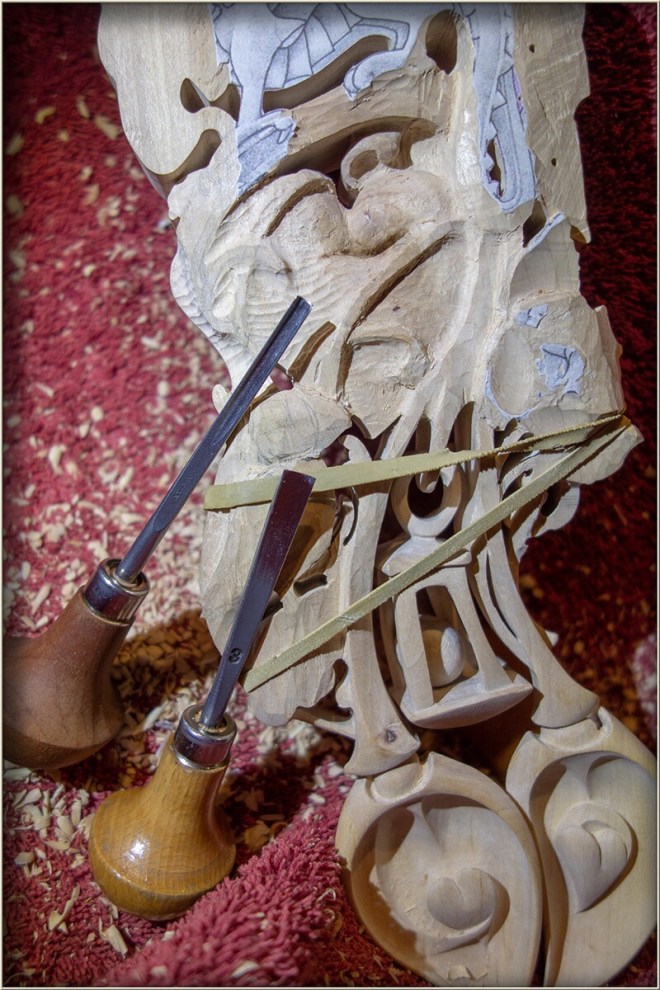
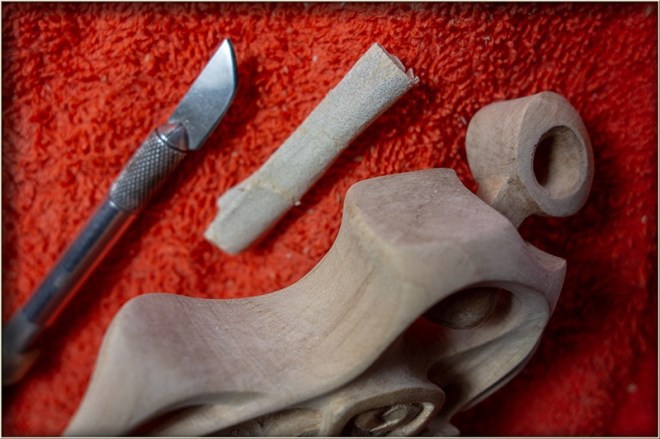
Above are some of the micro-chisels made from piano wire, that can be used for fine detail areas.

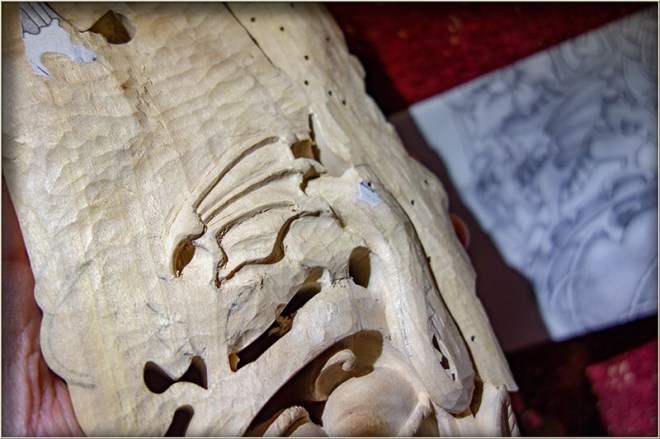
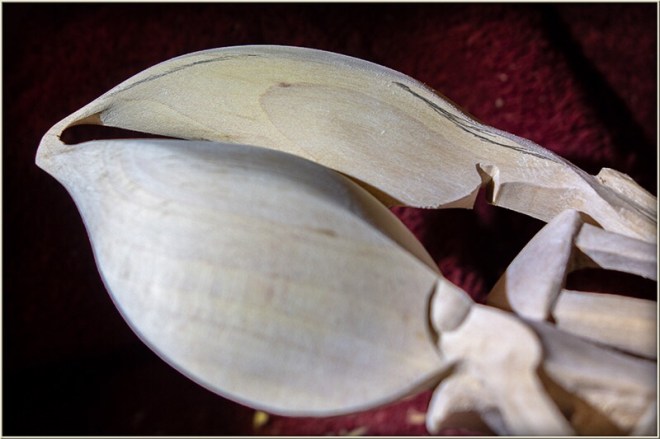
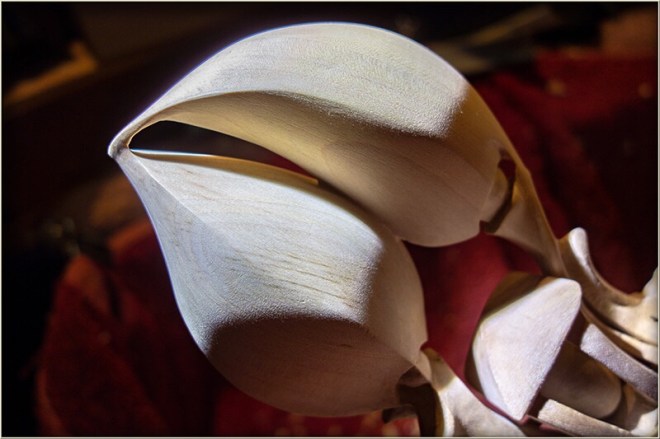
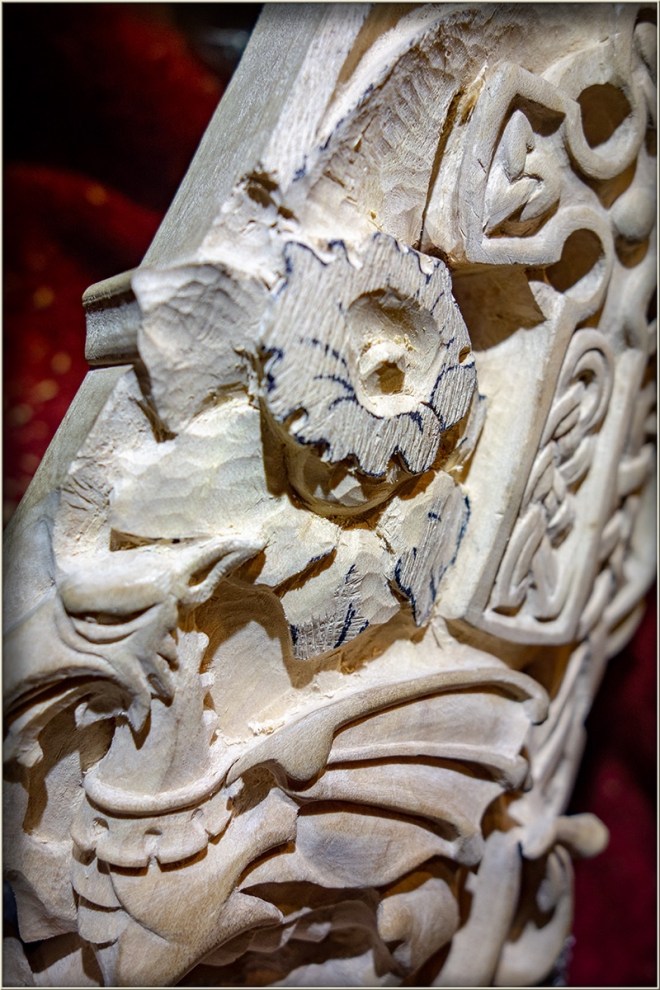
As the levels of each flower part are reached the roundness of their forms can begin to be shaped. The shear depth of a daffodil flower makes it a difficult subject to carve in a Lovespoon where the motifs have been carved in high relief.

It proves to be quite a balancing act when carving something with such natural depth, to ‘flatten’ the form sufficiently for fitting to available dimensions, retaining a relatively undistorted appearance when viewed from a variety of angles, as a Lovespoon invariably is, and not deviating conspicuously from the depth of relief established in the rest of the design. This requires proceeding cautiously and yet boldly at the same time. The necessary caution can’t be allowed to ‘stunt’ the final forms into a timid, half-way-there result. The required caution should be a matter of pace not extent.

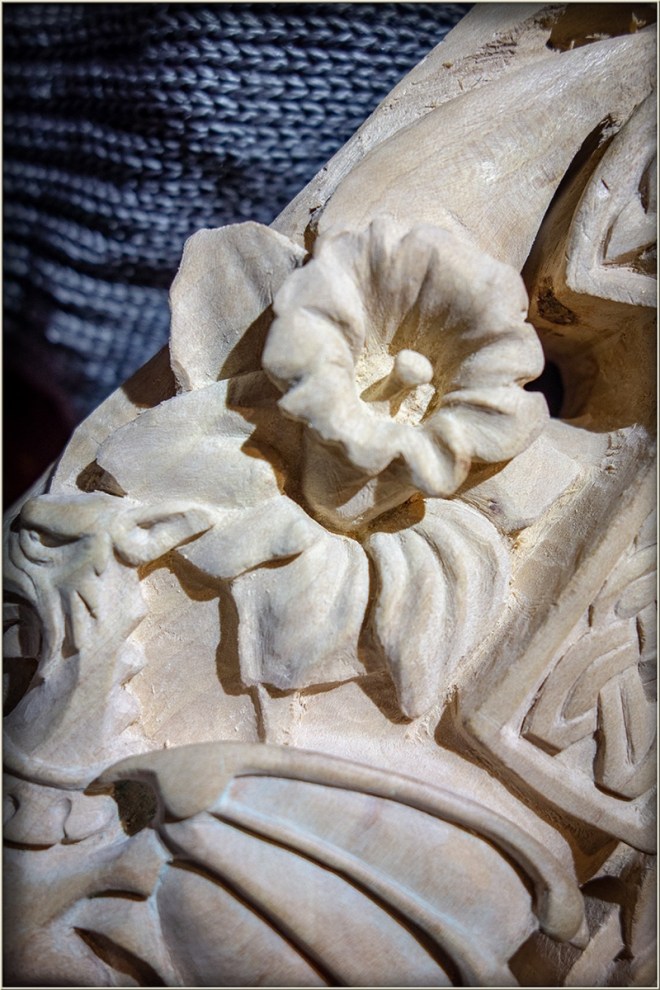
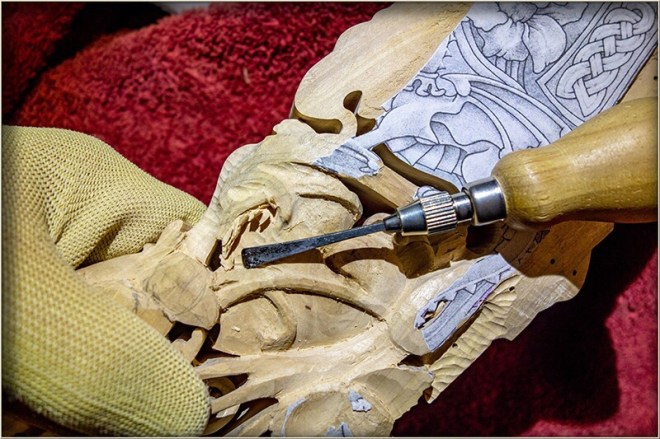
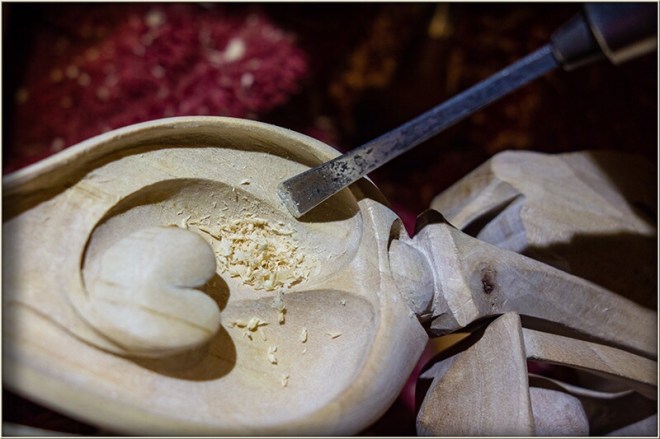
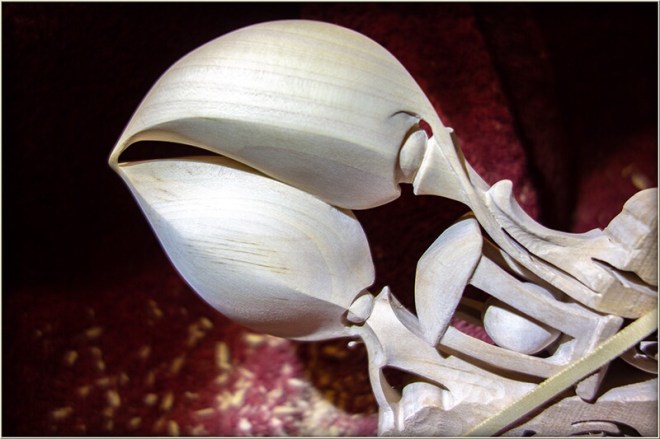
The structure of the pistils is gradually established by carving deeply into the flower trumpet while also producing the internal fluting detail on the interior sides. Likewise the topology of the petal surfaces can be detailed and given form by using a micro chisel to trace definite vein lines radiating and curving from the base of each petal.

A ‘veiner’ gouge would be the traditional tool to use for this but I find it safer and more positive at this scale to use stop cuts along the lines and then go in to carve mounds and hollows along the lines. This way you also have the option of transitioning along the vein line from a broad rounded groove to a steep crease where two convex mound walls touch near the base of the petal.

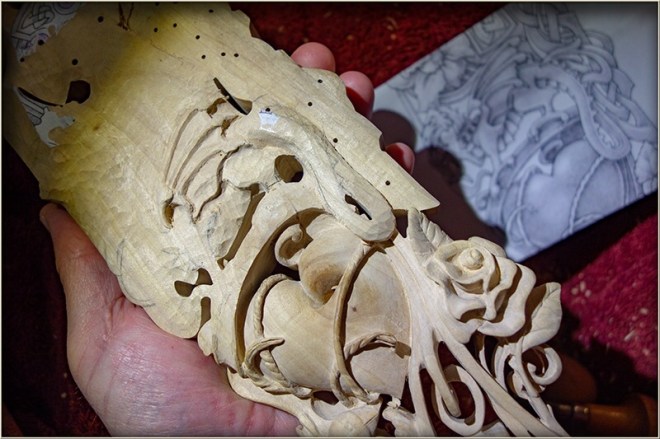
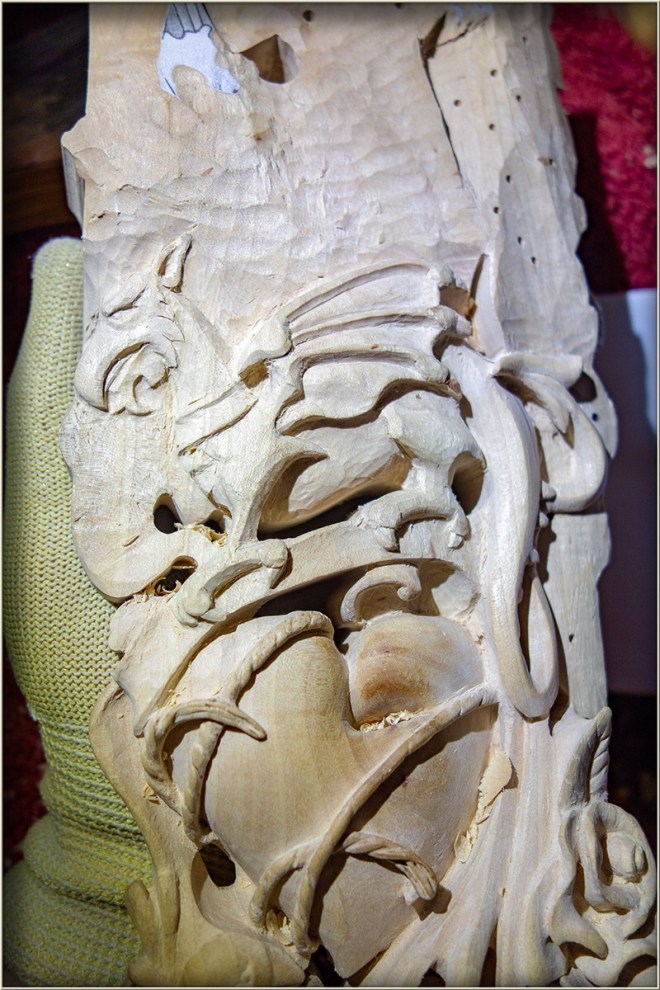
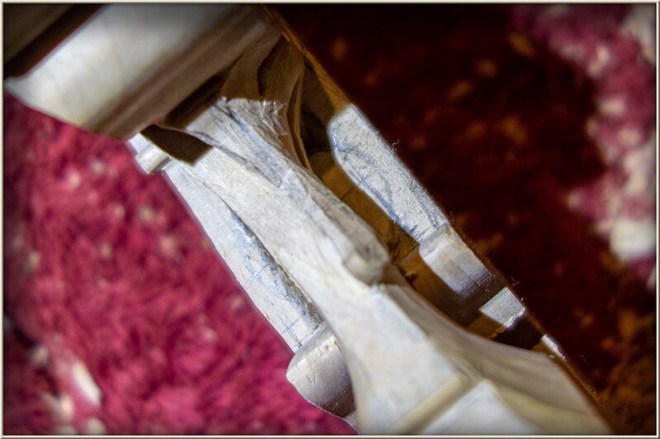
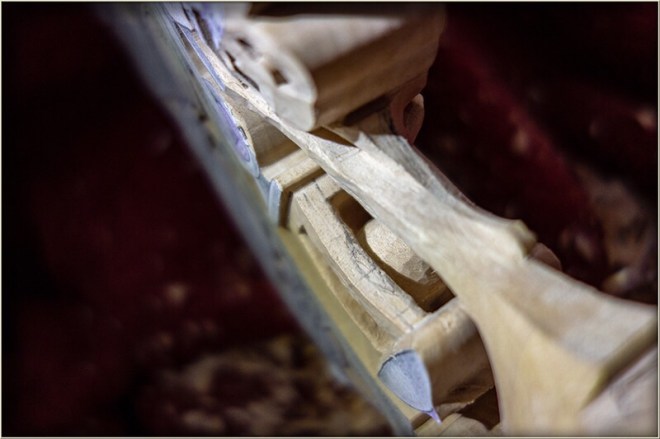
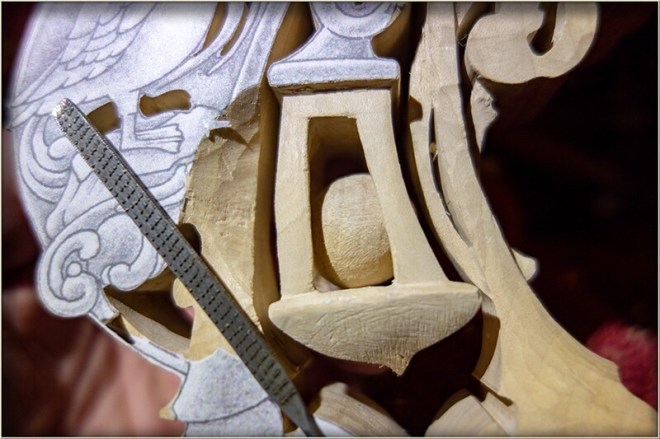
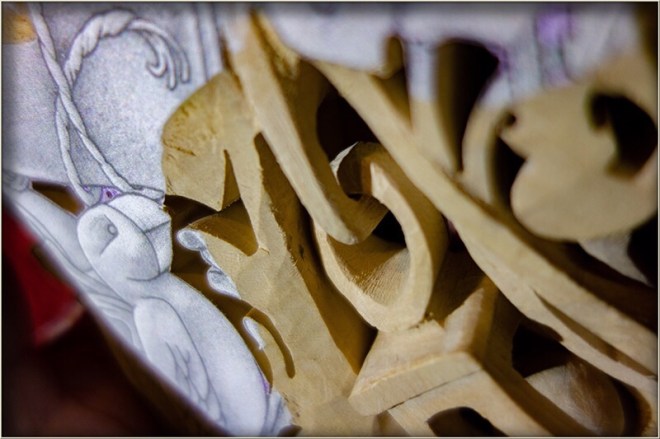
While the form of the daffodil is taking shape the leaves above it and the flowing lines that lead up to the top of the spoon enclosing the swivel are blended into the larger design.

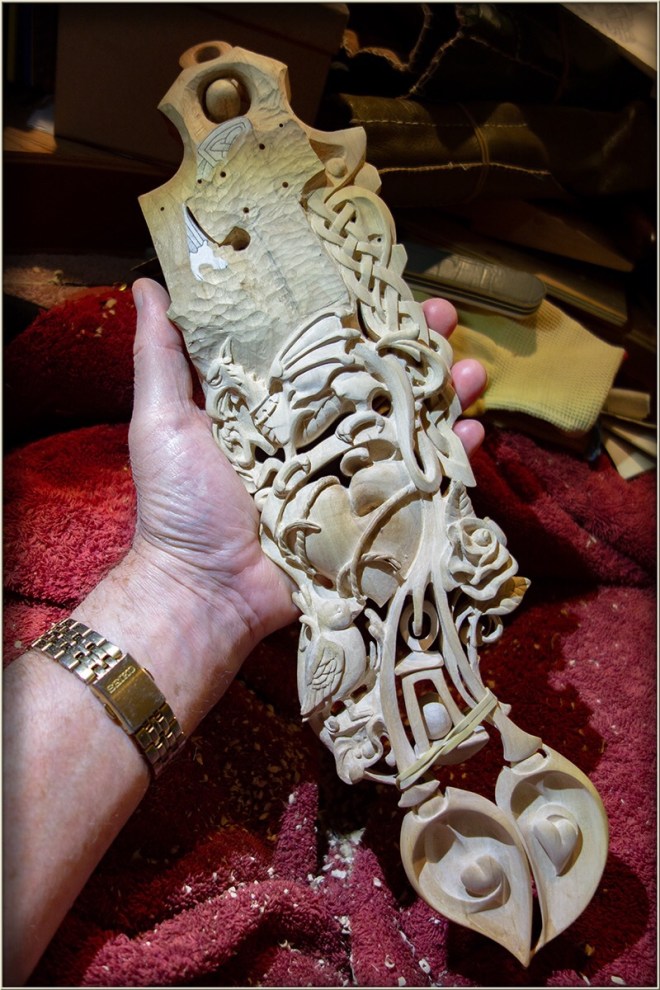
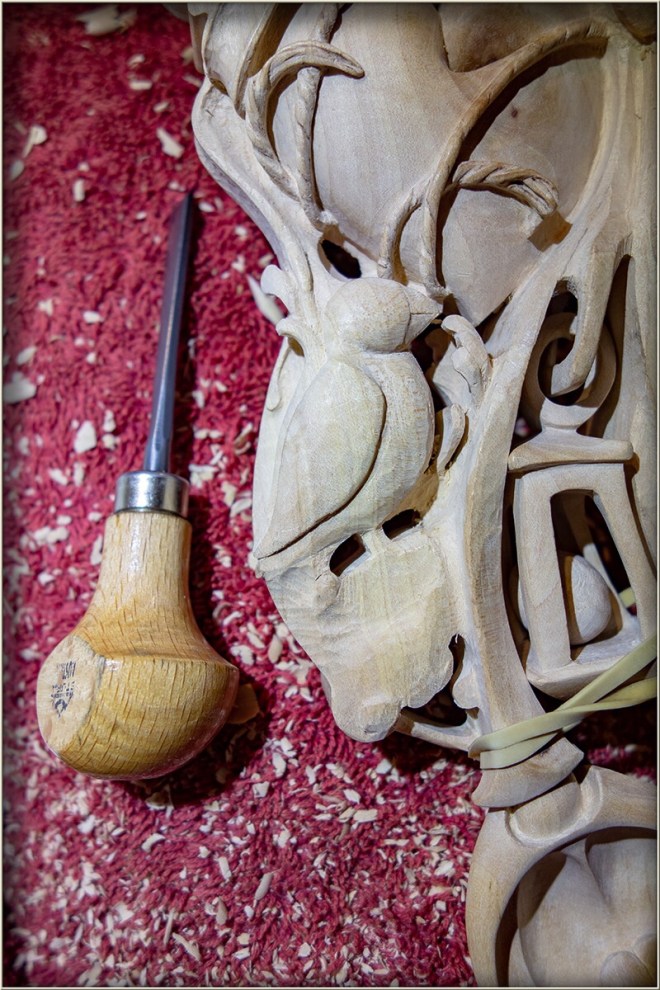
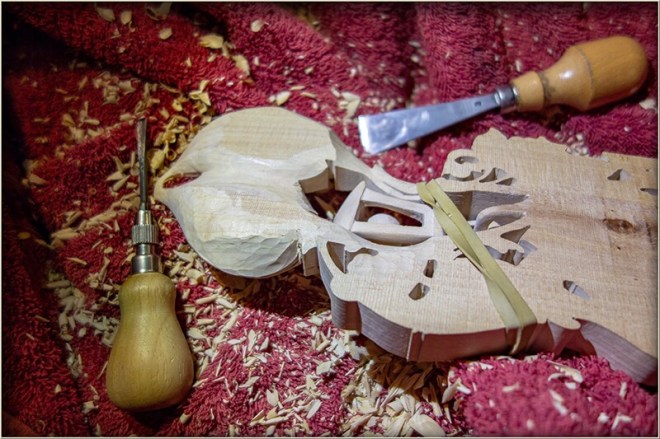
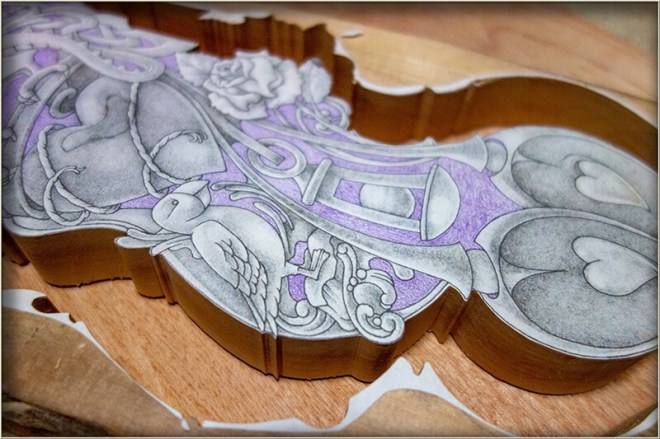
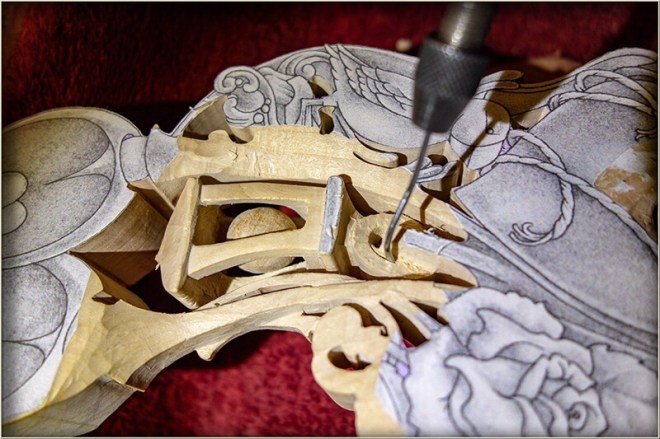
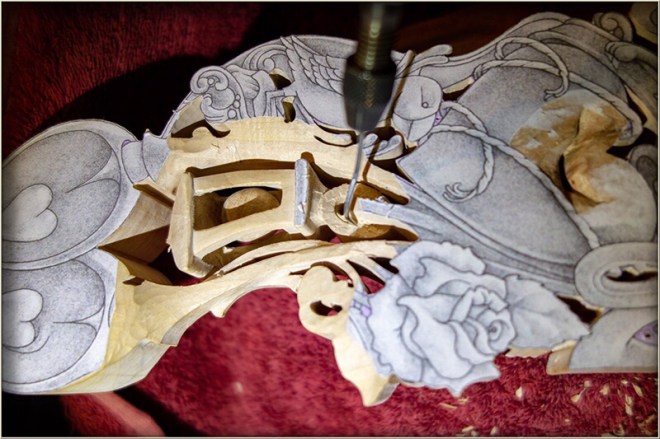
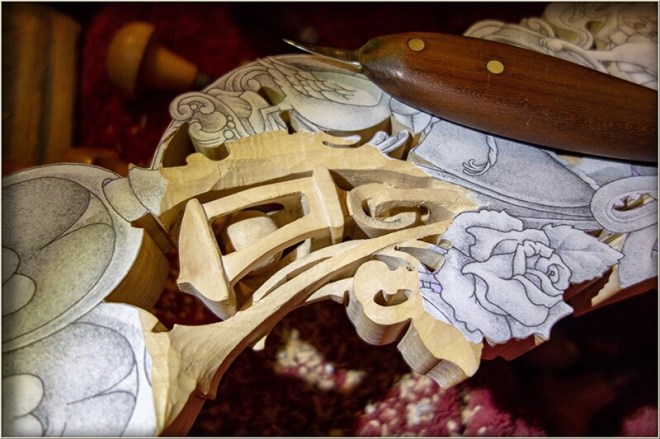
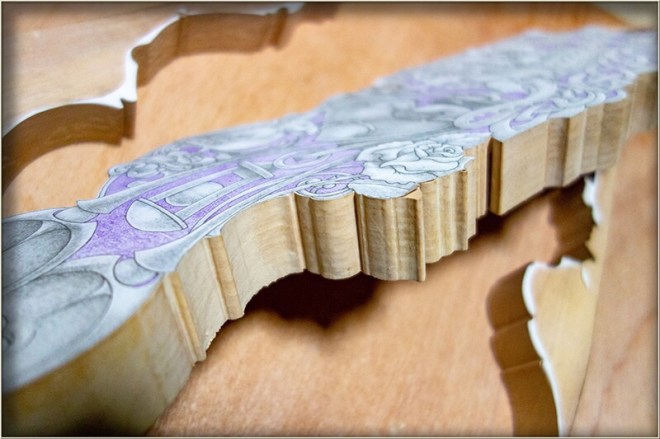
With all of the motifs now completed on the front of the Lovespoon it is time to commence work on the back of the Lovespoon and return to the front for refinement later.

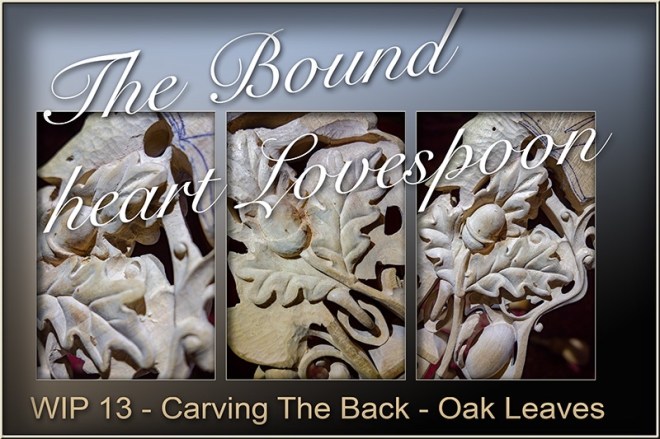
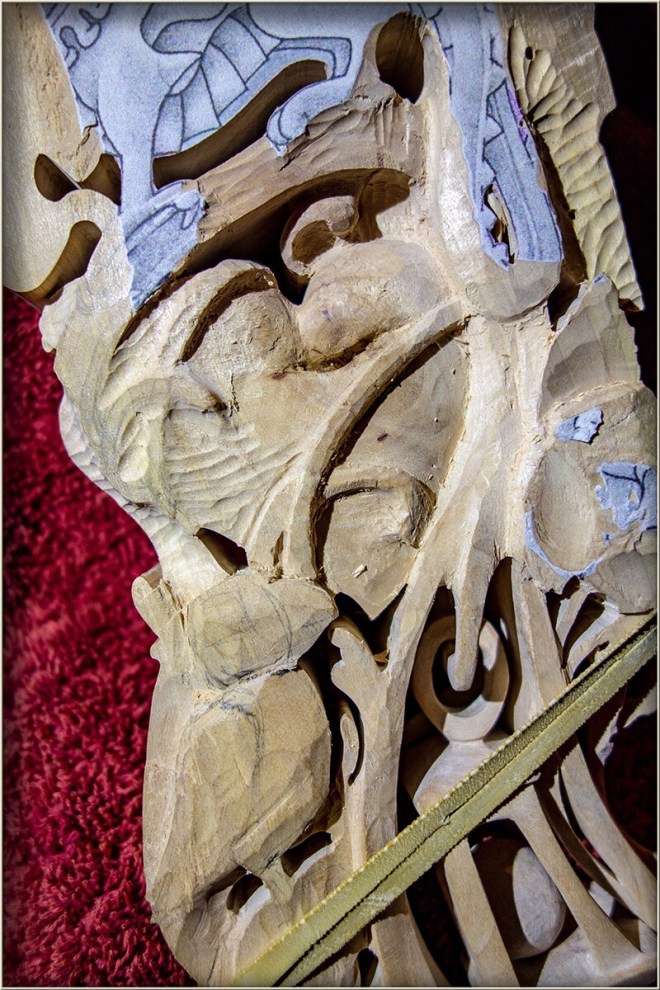
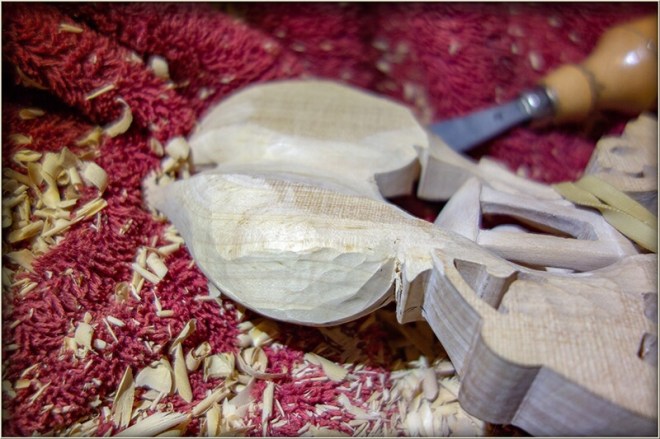
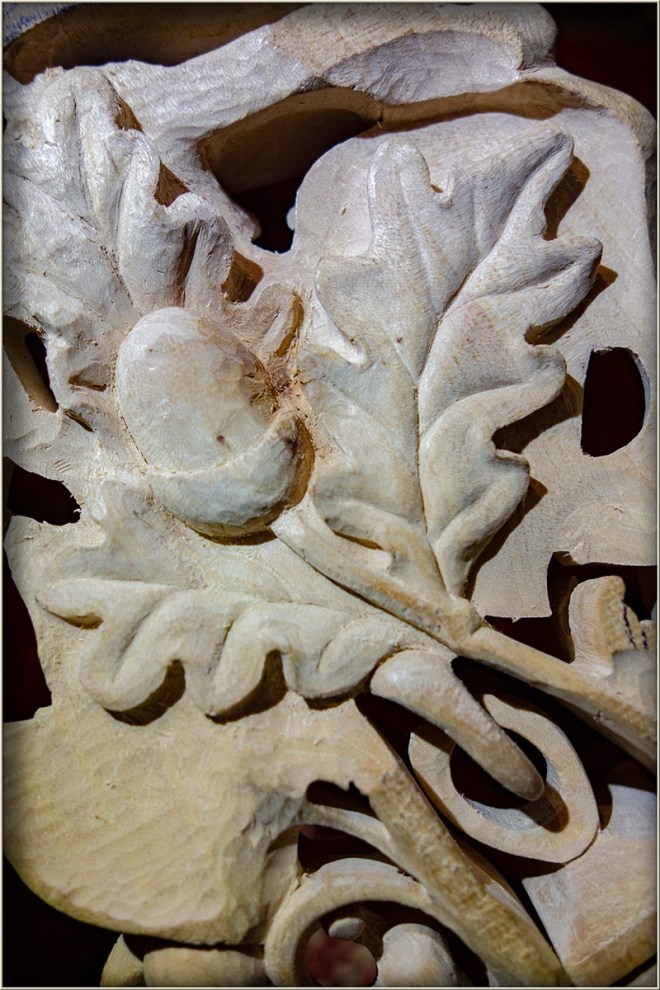
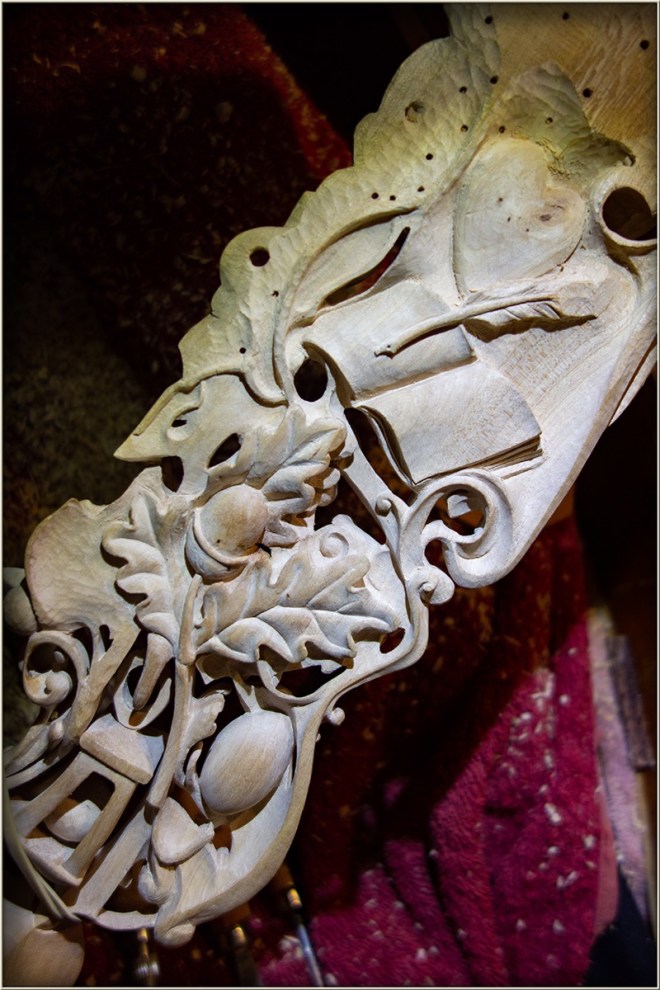
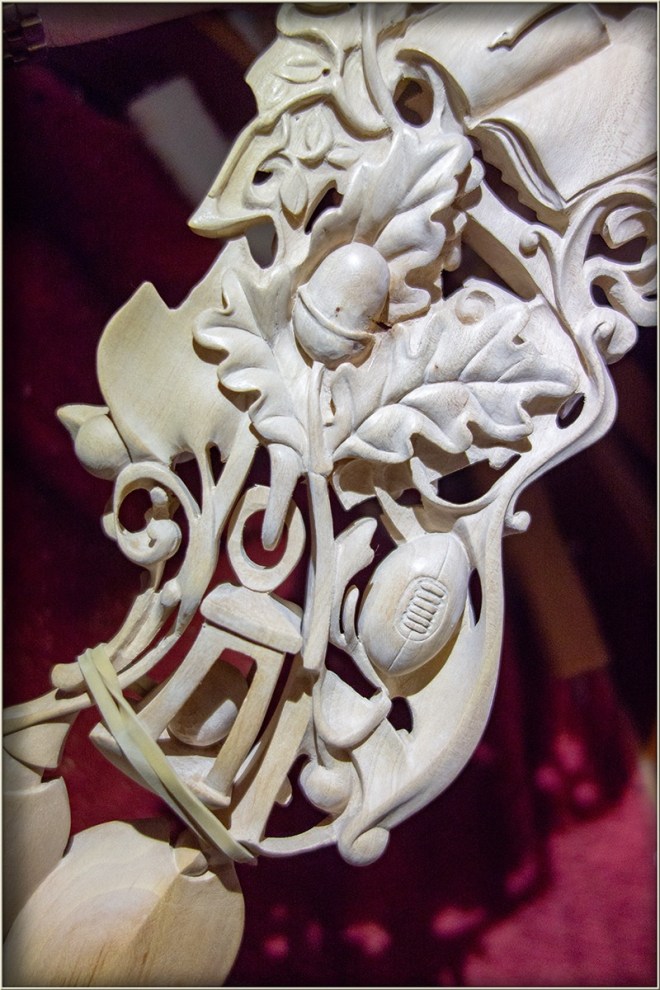
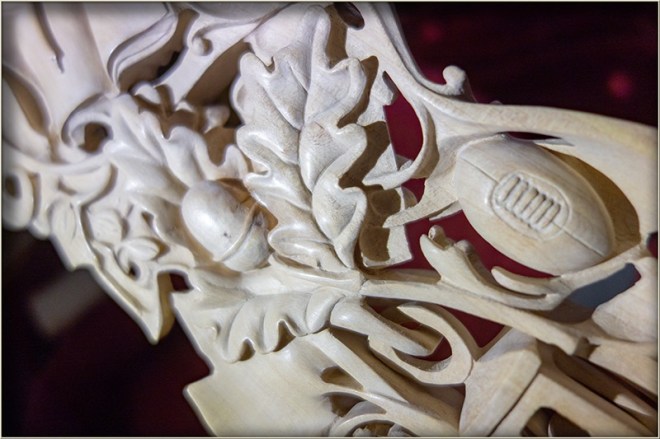
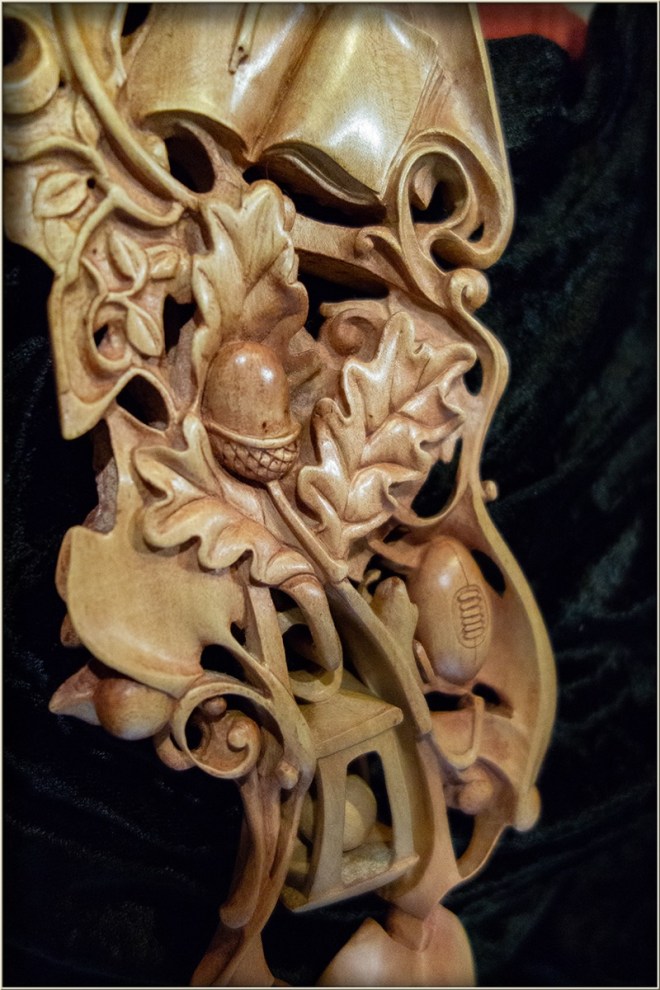
After marking in the various motifs to be carved on the back of the lovespoon, and then after some of the relative levels have been established, at least, partially, the first element to be brought close to its final form is the group of oak leaves and acorn.

The usual procedure has been followed – Stop-cuts along bounding lines of the constituent shapes and forms and then removing material to create those forms. The veins of the oak leaves are all shown as steep creases where the lobe-like sections of the leaves touch with a quilt-like effect, and so using stop cuts along the vein lines seems the best approach.

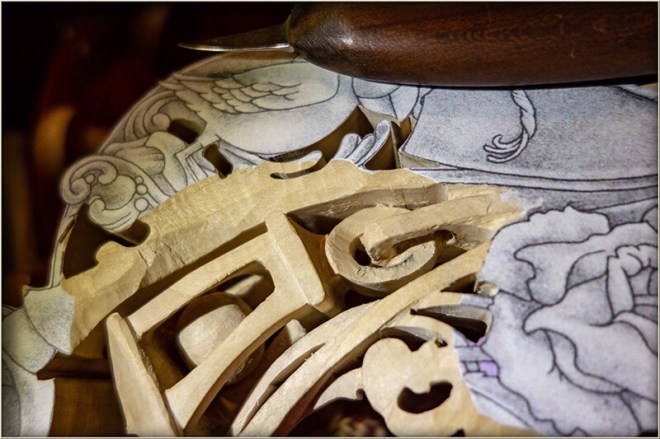
As the carving proceeds the forms are gradually given enough depth with descriptive shadow, to suggest a little refinement in their individual character. Even in the process of getting each leaf and the acorn properly located at their various levels, it may be that some of this ‘pre-emptive’ detailing will become redundant and be removed when more important overall or global design considerations dictate a change, perhaps in level, shape or inclination.

But this is the nature of what is still, a design process that happens to be developed in tandem with making. Intuitively finding its way amid the emerging forms tossed up in the wake of a keen cutting edge. I am not sure if rotary tools also facilitate this but it is the clean intersecting facets made by sharp tools that I find to be beckoning their use, now or later, for the adding of interest to the forms they work toward.

While this way of working is far from practical or efficient in, a utilitarian sense, it has to be remembered that lovespoon carving is not a practical or potentially lucrative art form, it is pre-eminently a labour of love. I can imagine that someone with decades more experience than I have, might use the same ‘impractical’ process in a manner approaching efficiency but with the resultant work being the most important thing, I must use the resources I have, even if they are only time and stubbornness.


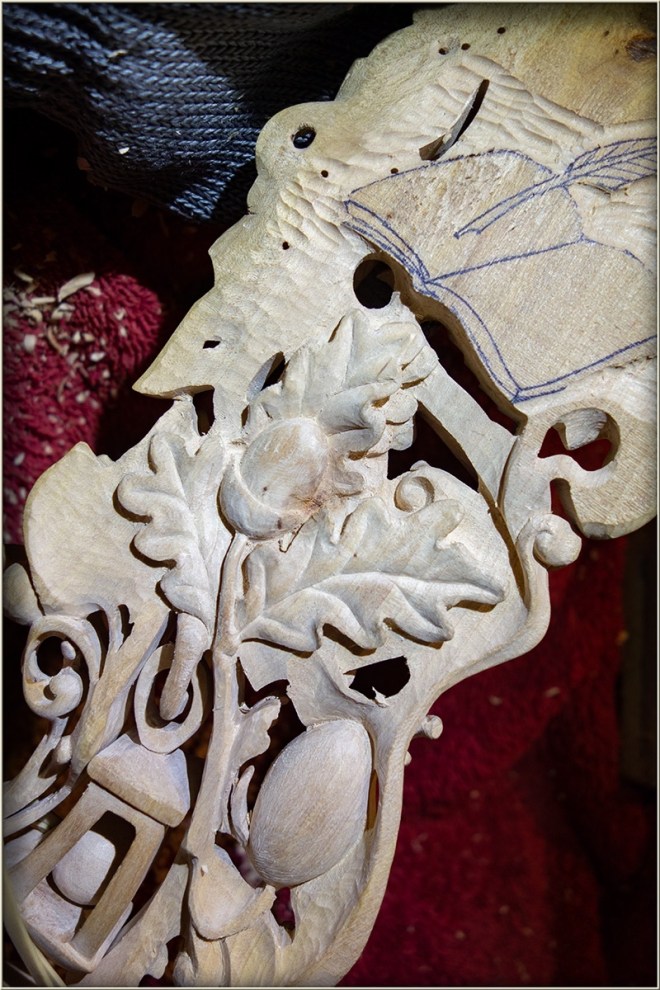
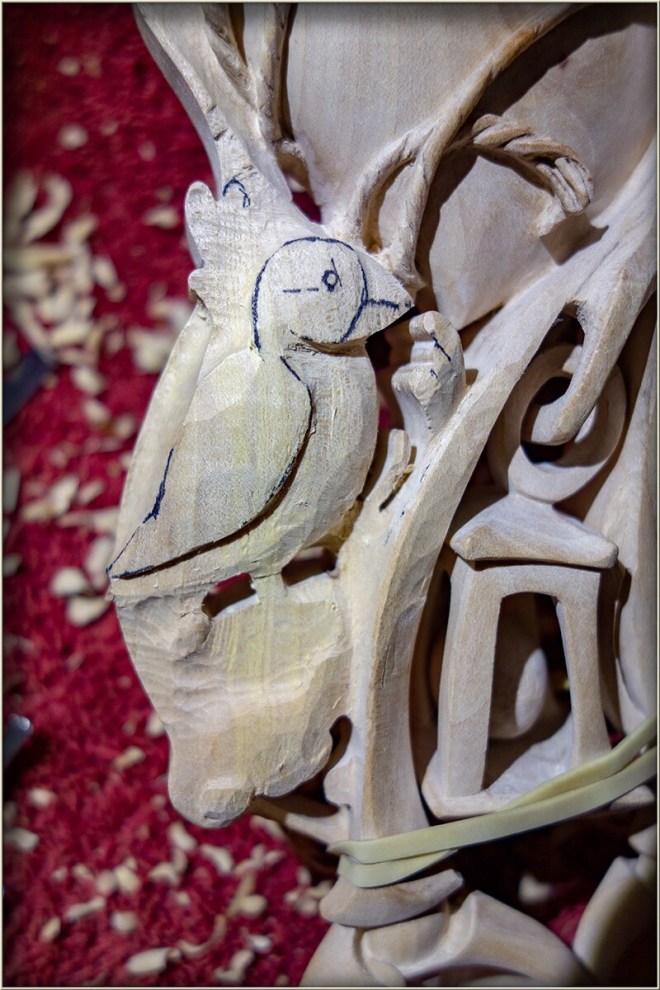
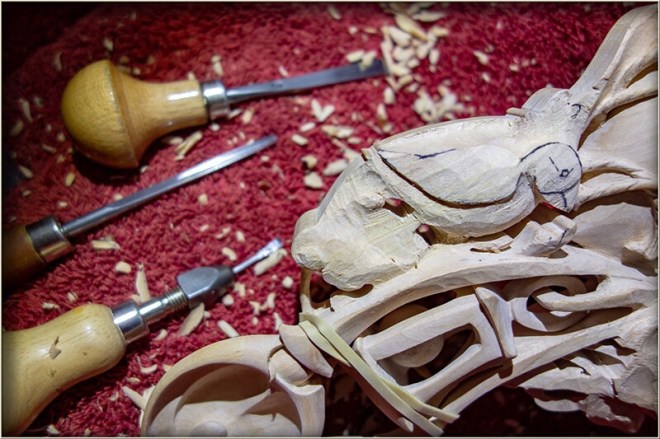
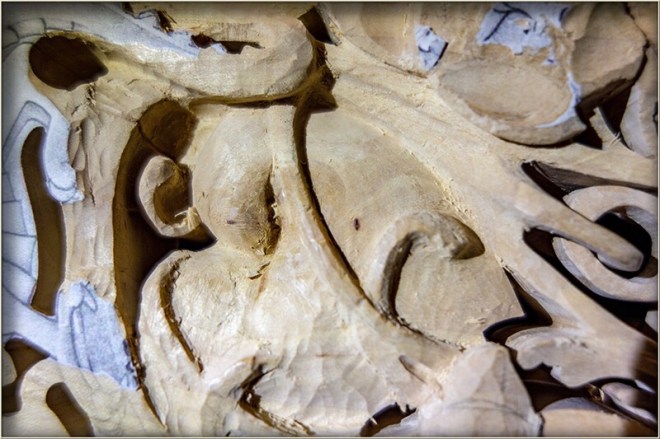
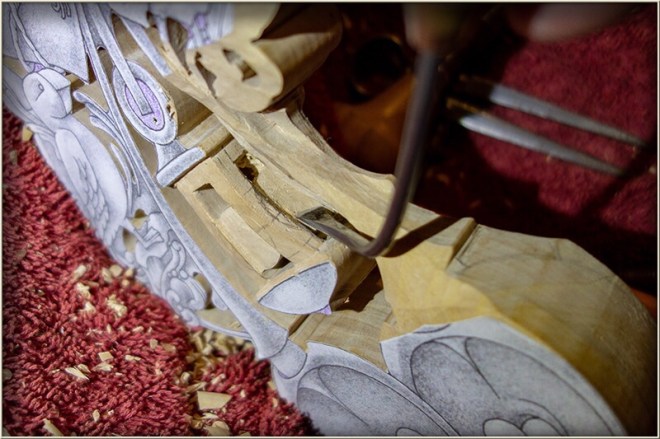
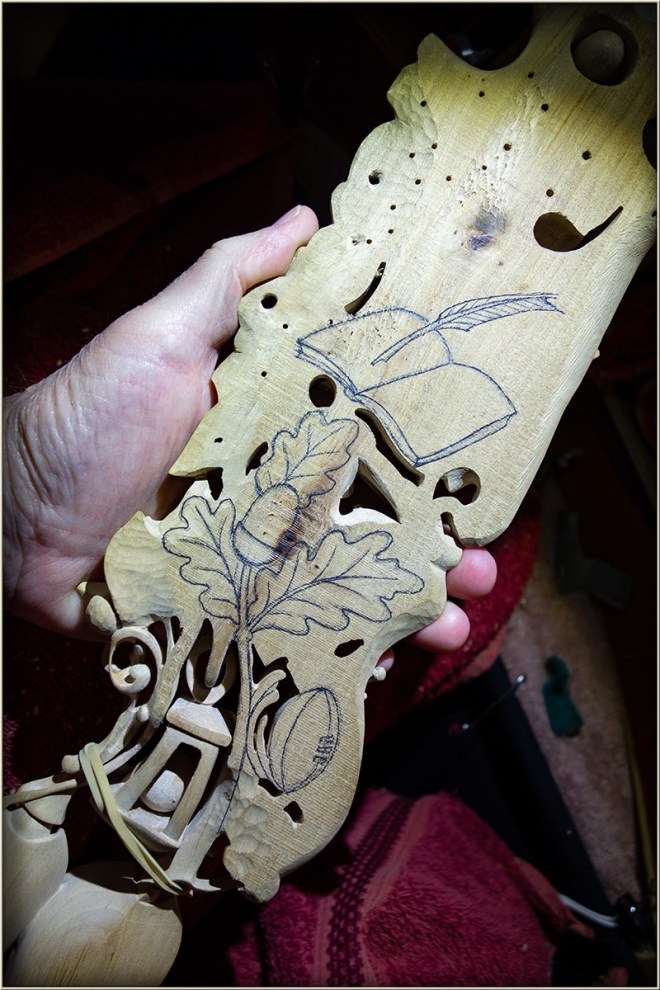
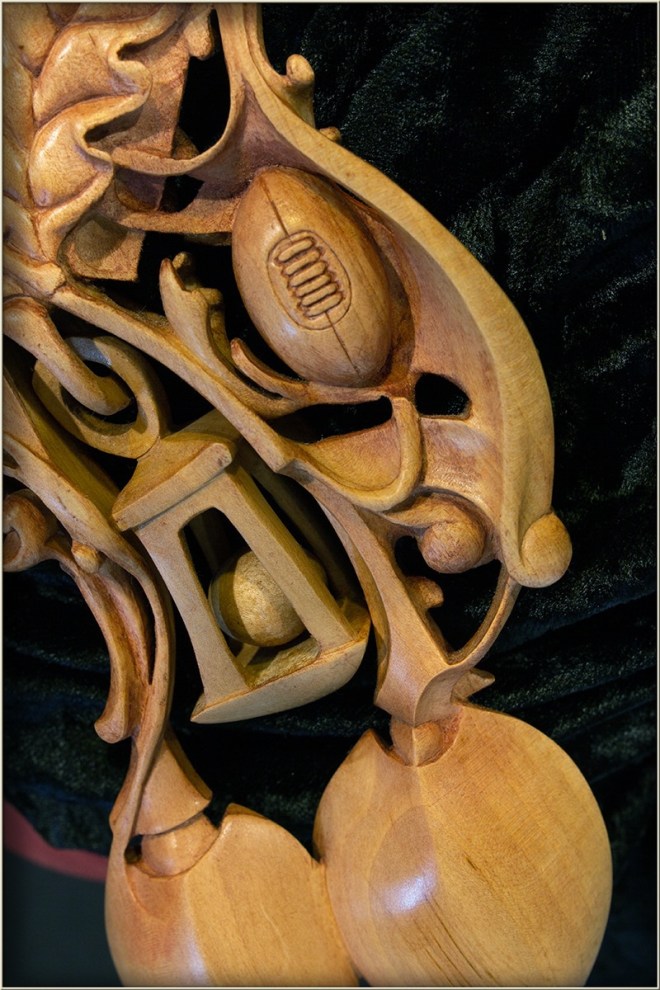
With the oak leaf and acorn forms established, the background art nouveau lines are indicated and some of the other motifs, like the rugby ball plus the book and quill are drawn in and partly shaped. While sharp edge tools are so useful especially in their suggestive results already mentioned, it is files, rasps and scrapers of various kinds that are useful to do the best job when clearly defined less organic forms are being worked. Forms like the rugby ball for example need smooth and accurate shaping. Flat files and rasps in particular lend themselves to shaping smooth convex surfaces like these. Next we will turn our attention to the carving of the book and quill.

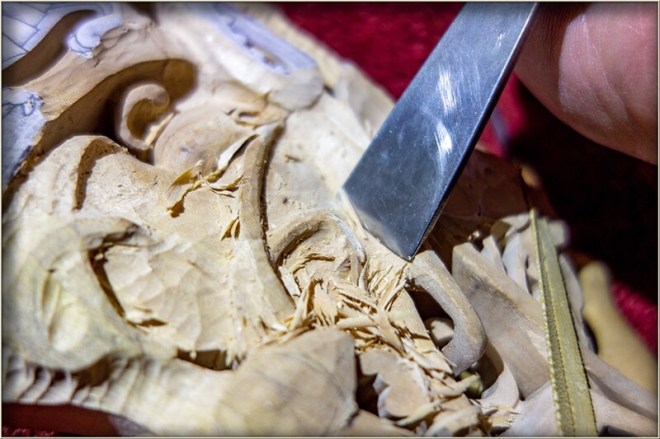
As usual the first task in carving the book and quill will be to establish levels by using stop-cuts and shallow gouges to remove the material up to the boundary wall they form. Sometimes when the bounding lines of the form are relatively un-interupted smooth lines, a small deep gouge can be used to remove the material up to and around them without tediously stabbing shop cuts around the whole outline

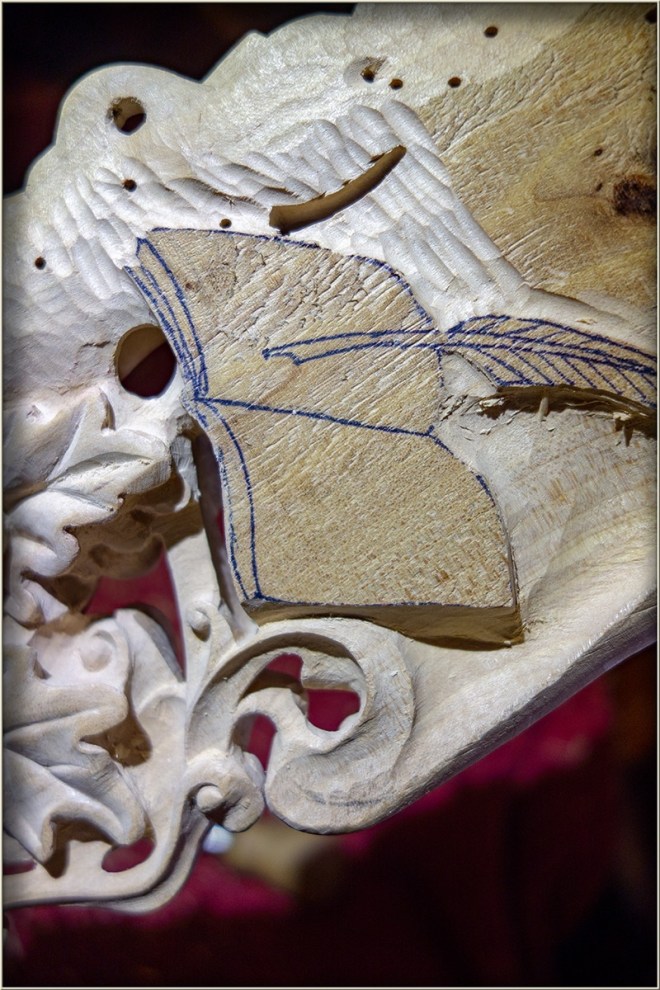
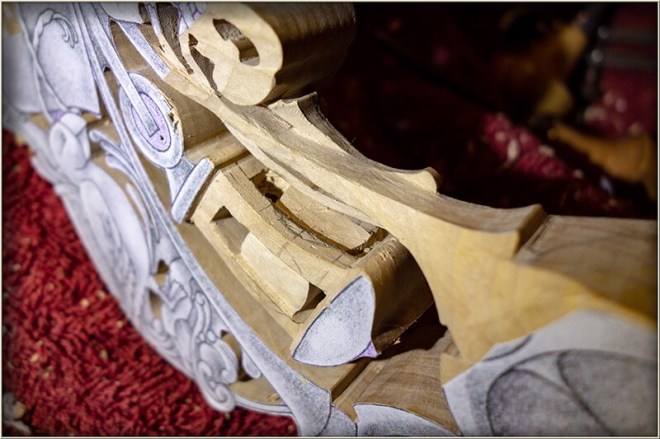
In this way the book and quill are outlined and material is removed around them until reaching the lowest level upon which the book rests. Now the quill can begin to take form and the upper surface of the book pages established. From here the more detailed forms are worked forward incrementally.

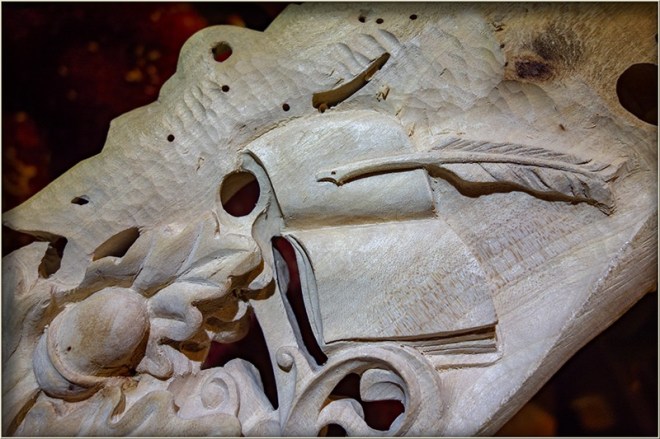
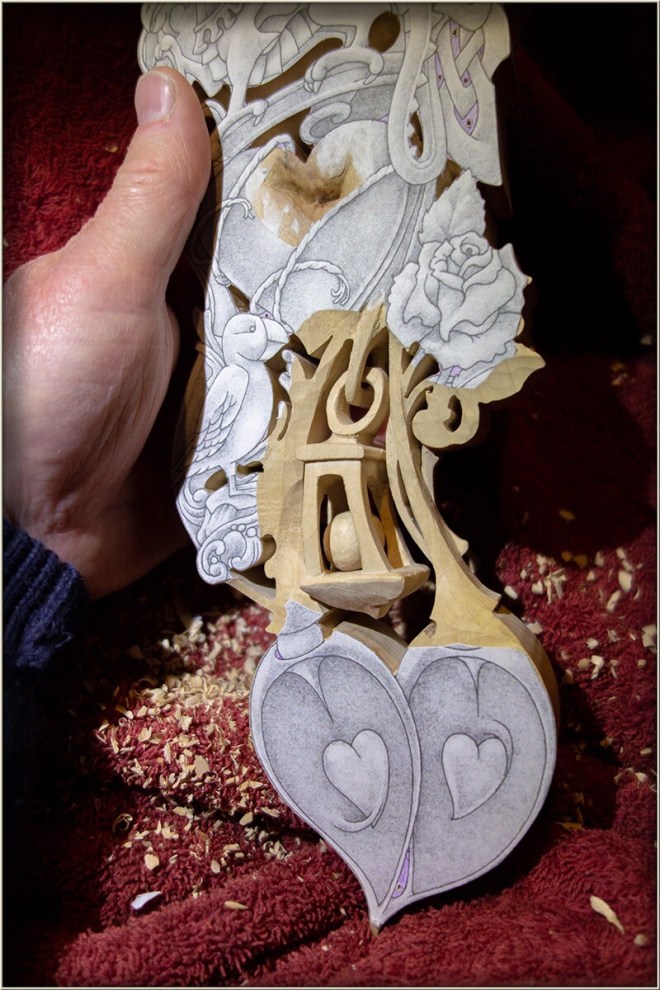
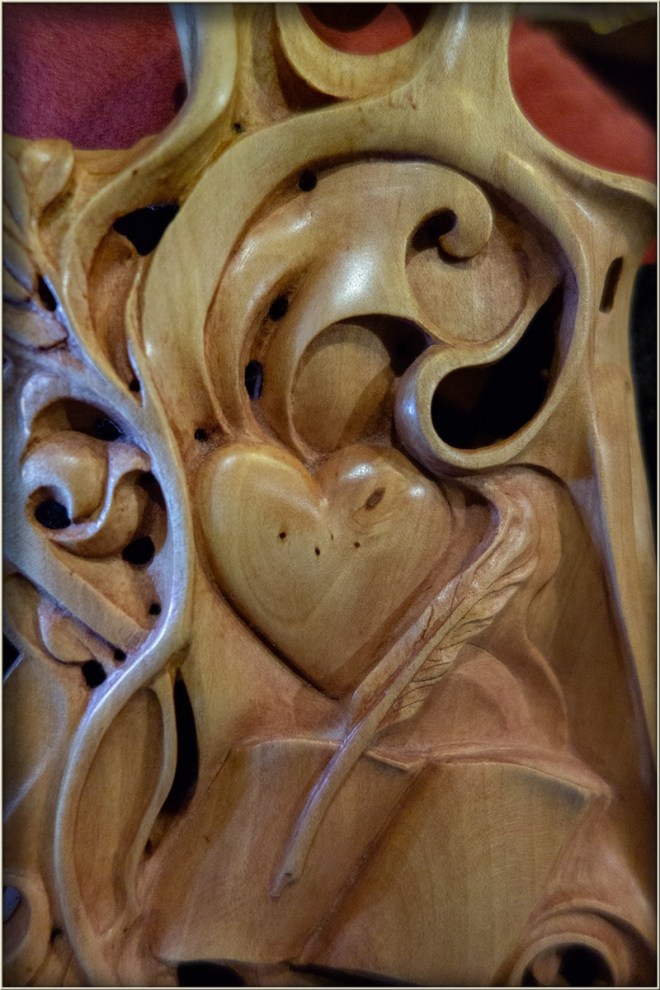
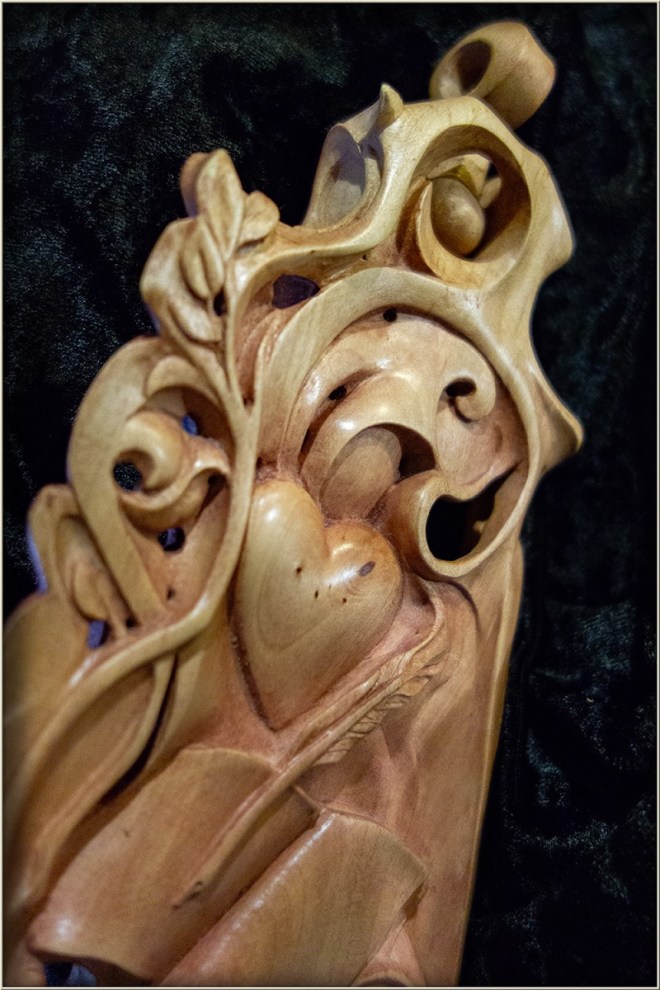
There is a heart shape to emerge above the book and quill, together with some abstract passages of slow curves melding the motifs with the overall design. In this case the top of the quill had to be reworked to take it to a lower plane and allow a fairer and more natural flow of the book page surface below it.

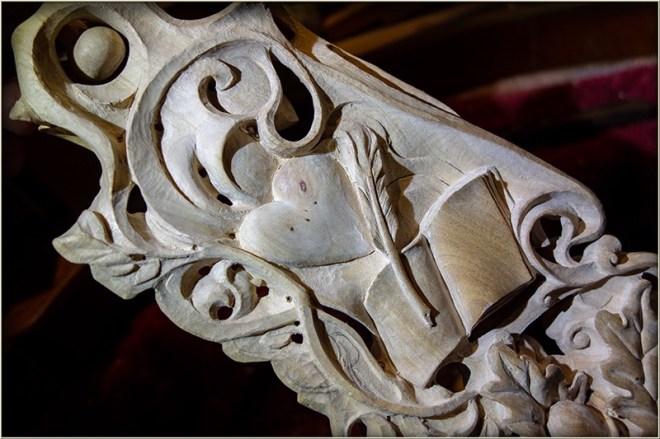
Before finessing the details of the book and quill motifs we will turn our attention to the rugby ball below the oak leaves.

With the basic form of the rugby ball already worked, the details can be worked upon its surface after first drawing them in. The details to be added are the lines that form the ball panels and the lacing on the top.

A more antique style of rugby ball with its leather panels and an inset section enclosing the lacings, less proud of the ball’s surface, than they would be without that inset section, serve more than just increased interest and detail in the simple ovaloid form of the ball.

The more detailed style, happily, reduces the amount of work that would otherwise be needed. This is because, reducing the level across the entire form would be necessary to reveal the lacing. Instead the little inset area alone, needs shaving away around the laces.

This requires some careful work, but not near as much as very accurately carving away the whole convex surface minus the lacing, and doing that without the greater ease that the flat micro-rasp provided earlier, by arriving at a uniform fair surface without the lacing in the way.

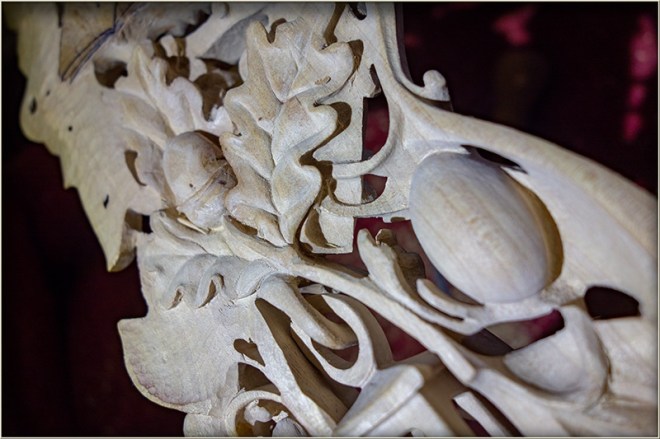
A very small Veiner is used at the edge of each lace to indicate the lace holes and the edge of a needle file helps separate the laces without collapsing the short grain.

With the rugby ball completed some finessing of the various forms can be done with suitably shaped blades used as scrapers to tidy up and fair surfaces.

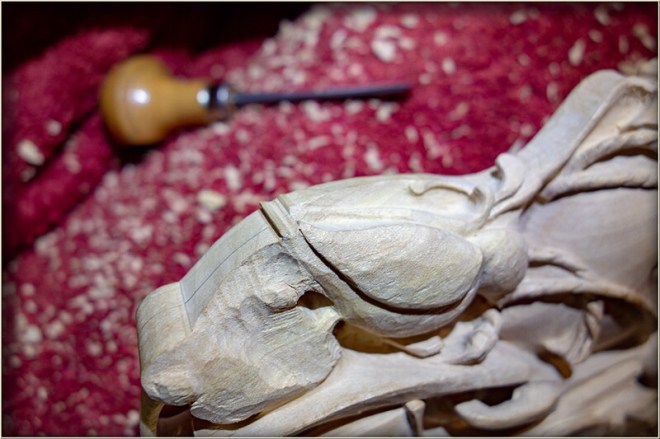
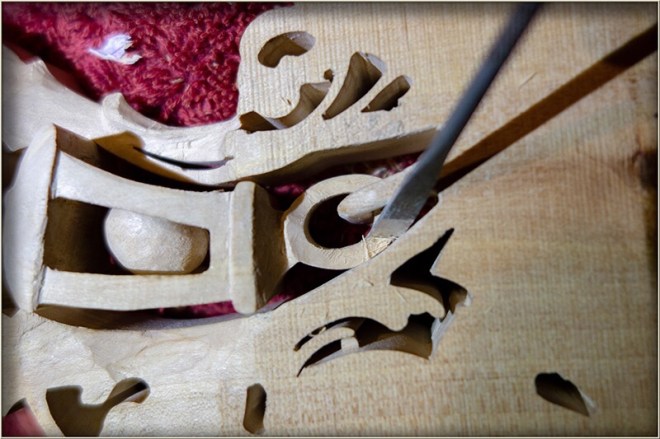
The next task now that all the main forms with their details are complete, is to tidy up the forms with scraping sanding and burnishing in preparation for the necessary fine finishing.

Even at this almost finished stage, sanding and other smoothing techniques will reveal a need to modify some parts of the carving. Smooth surfaces begin to reveal their true form, which may not be as fair as they first appeared, now that the camouflage of texture is removed. Tear outs will also become apparent and some surfaces may appear bland and in need of some interest by way of added detail.

The sanding process itself can degrade the crispness of sharp arises which will tend to cheapen the appearance of the work and design. A general rounded softness can develop during sanding, and if this happens it might be necessary to re-establish the clarity of the forms with edge tools again to bring back an all important crispness to the whole carving.

Having used sanding as a final shaping and blemish removal tool, together with scraping and some more work with edge tools, the work is now ready for fine sanding and polishing of all the forms with very fine grit abrasives in preparation for the final finish process.

It will not be practical to sand and polish every surface in a complex, deeply relieved design, but it is best to work ‘as if’ that is what you are attempting. Eventually even before the final finish with oil, (polyurethane or whatever) a good sheen will appear on all the more accessible parts of the carving.

The work will have a variable degree of polish and fortunately it is those parts that will reflect the most light that will have the hardest shine, helping to show the forms in the carving to their best effect. When the final finishing medium is applied to the timber, it is important that whatever sheen the medium imparts to the carving, it is best that it does not alter the variable sheen effect that has been obtained in the finishing prep. The variable sheen that models the forms by reflecting the light most from the highest points and also provides unblemished shadows in the lower areas.

A thickish, in this case a normal thickness coat of varnish, covering the carving will tend to pick up specular highlights in recesses, disrupting the overall modelling that describes the forms. For this reason the finishing medium needs to be extremely thin, merely accentuating the timber colour and grain, not forming a perceptible layer. An actual layer of finish would require an almost perfectly uniform, ultra fine sanding over every detectable surface or a very flat almost matt finish.

The carving has now been prepared for the final finish as described, however there is to be some gilding on parts of the lovespoon and in preparation for this the gilded areas are painted with acrylic ‘gold’ paint, a micaceous pigment combination that will allow a soft edge where the gold colour blends and gradually emerges from the timber. This paint will not tarnish or otherwise change and of course the overlay of twenty three carat gold leaf that is to be used will always retain its colour and provide a higher degree of brightness at the highest points.

With the areas to be guided prepared with suitable gold acrylic paint, feathered into the surrounding timber in some places, the final finish medium can be applied.

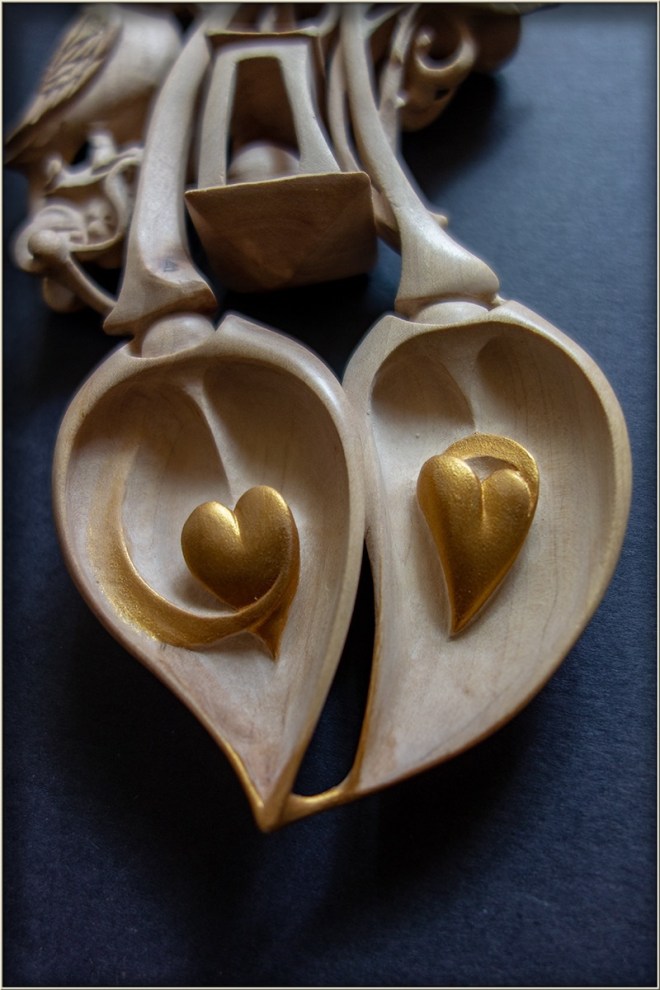
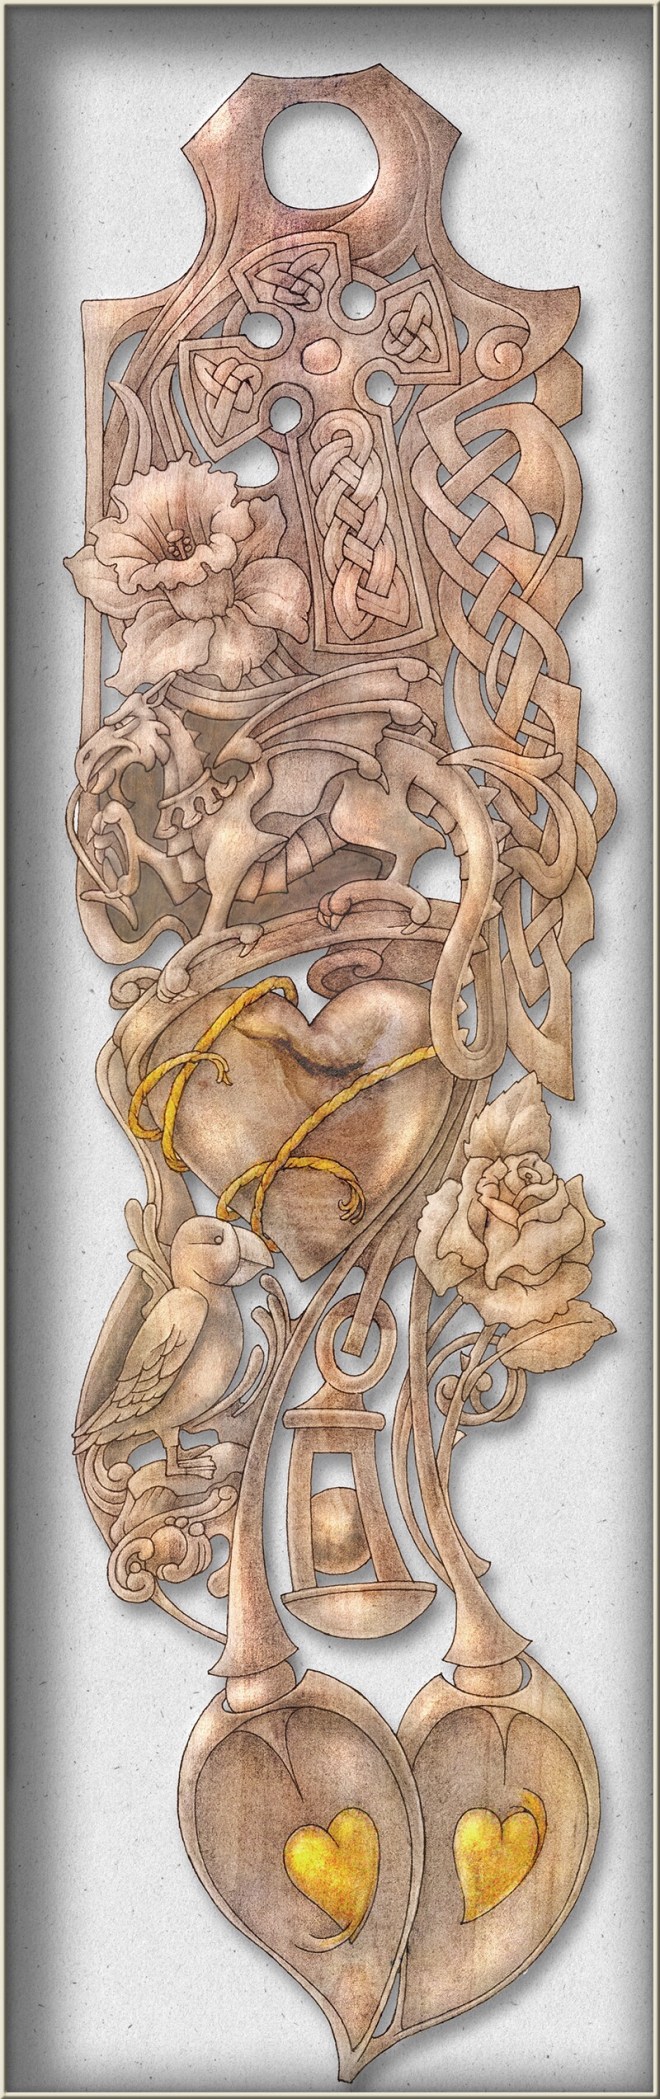
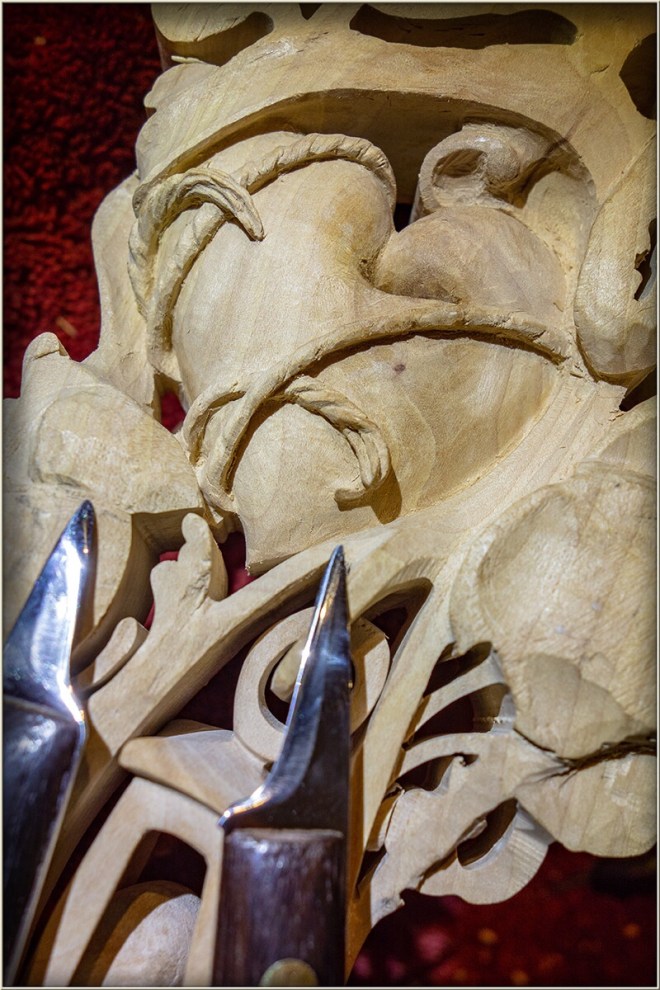
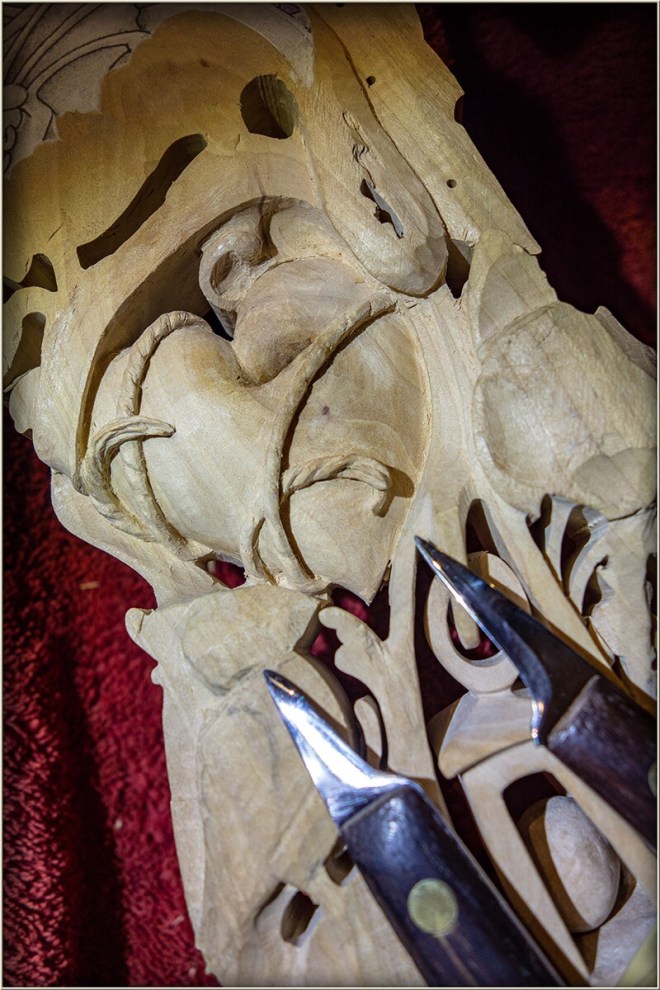
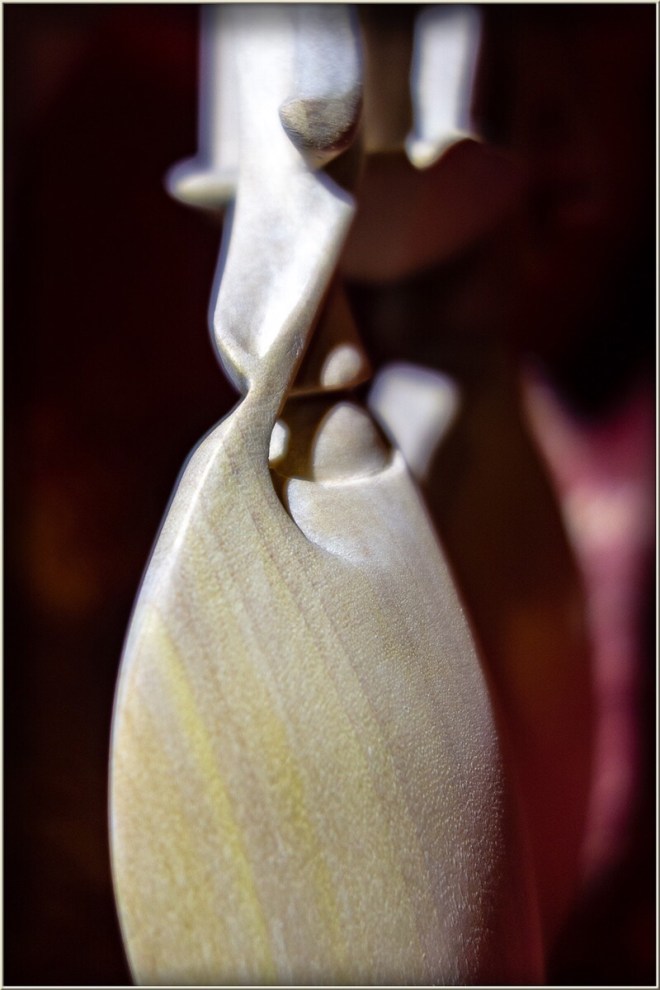
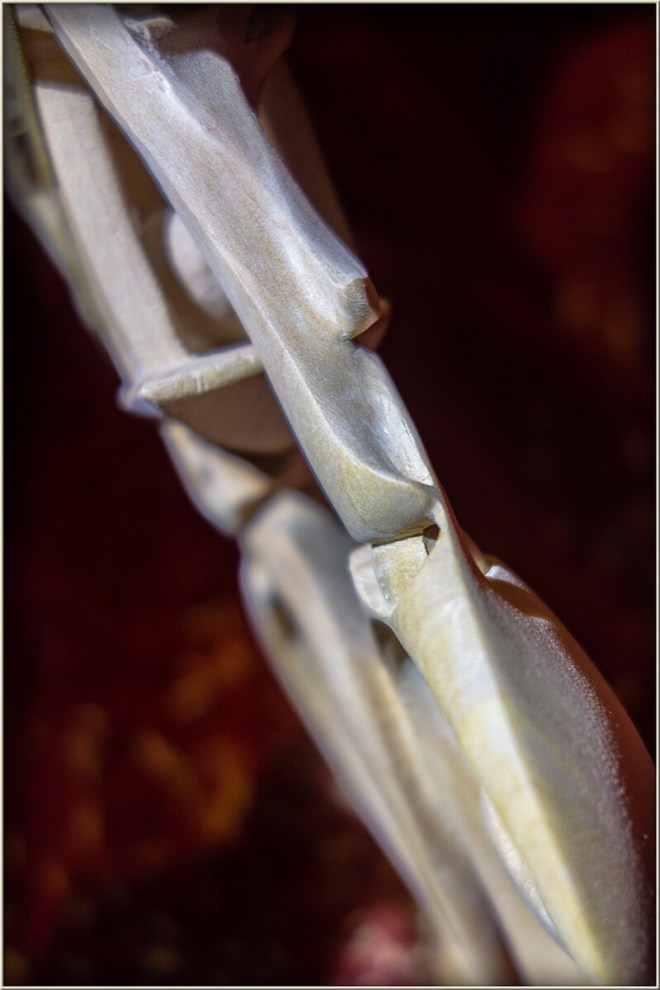
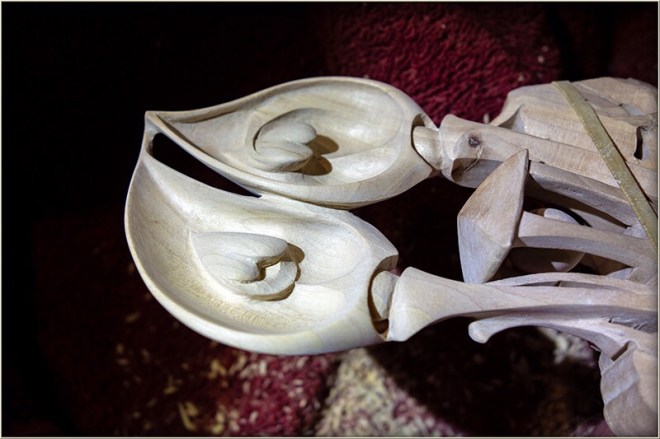
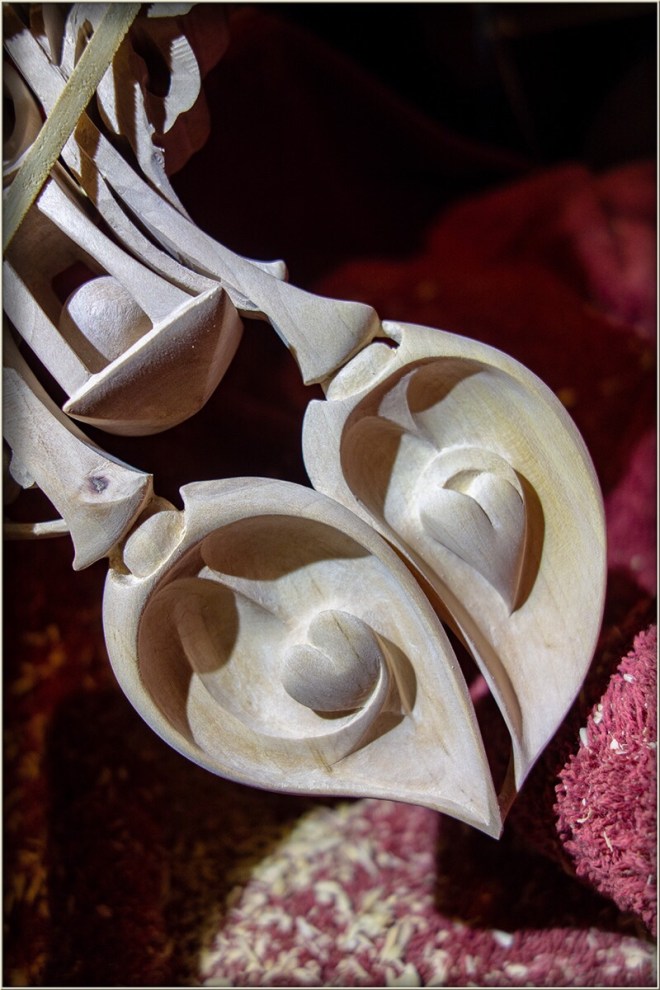
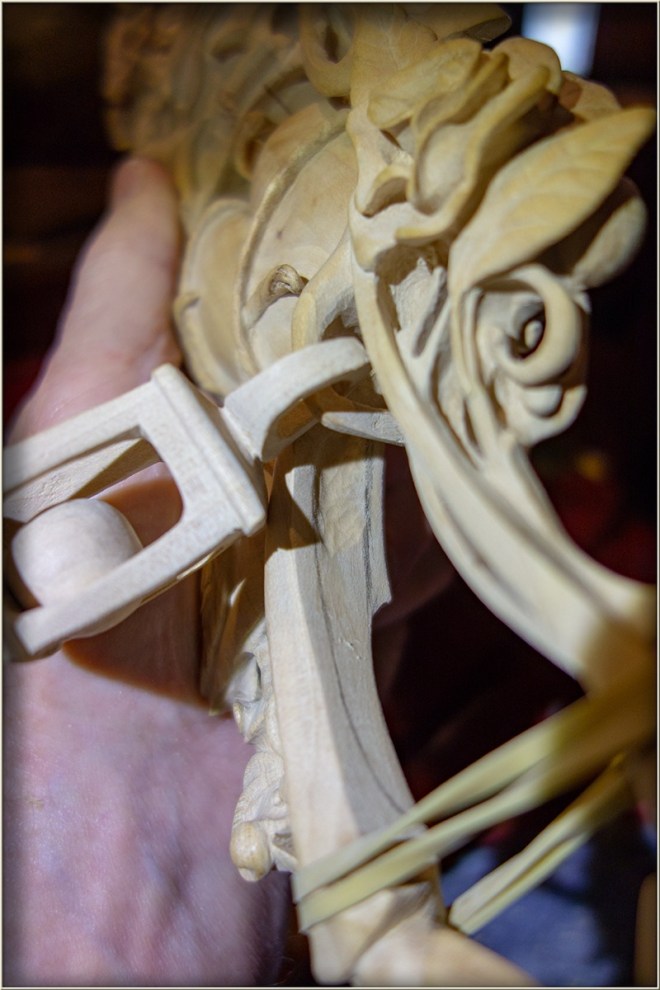
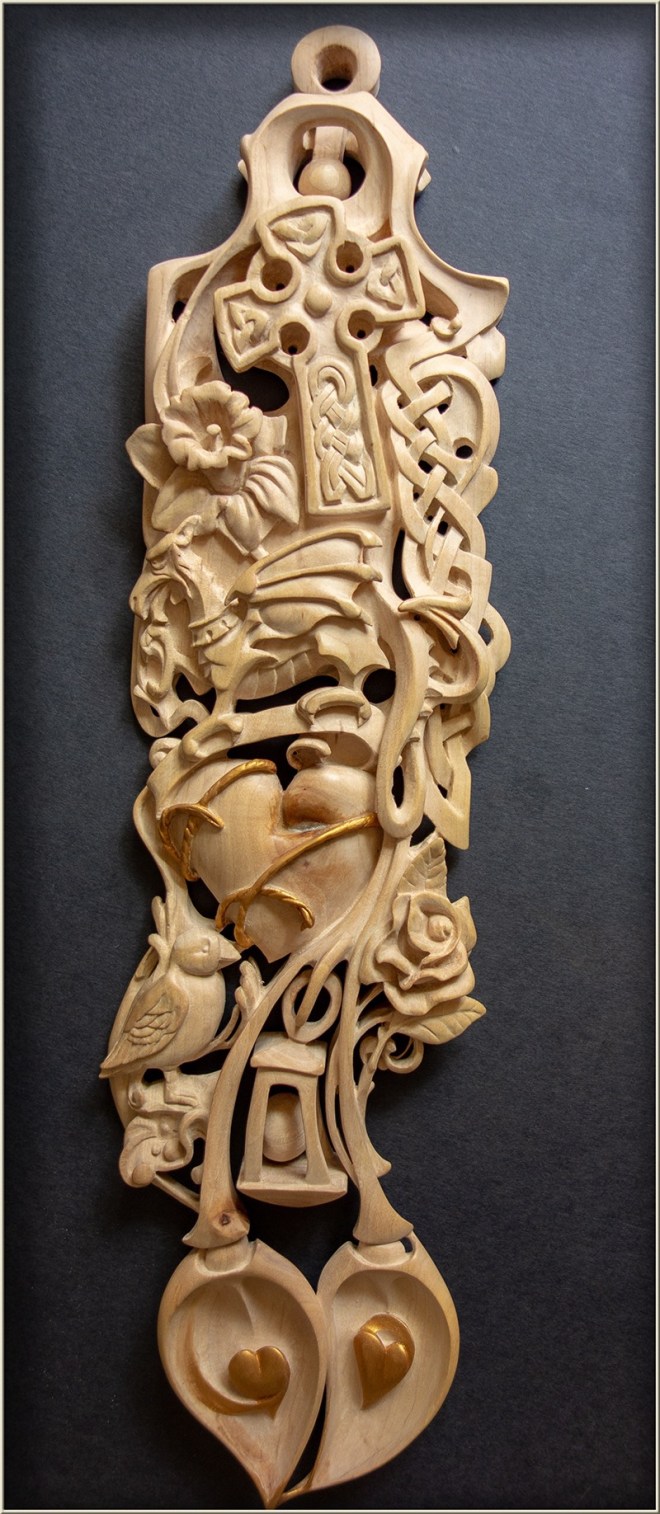
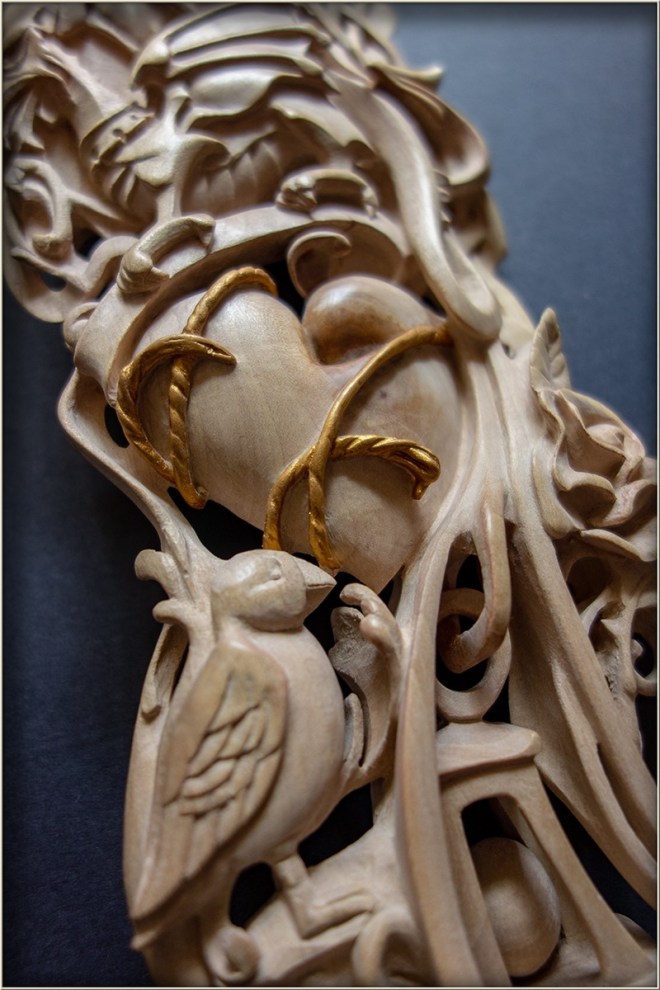
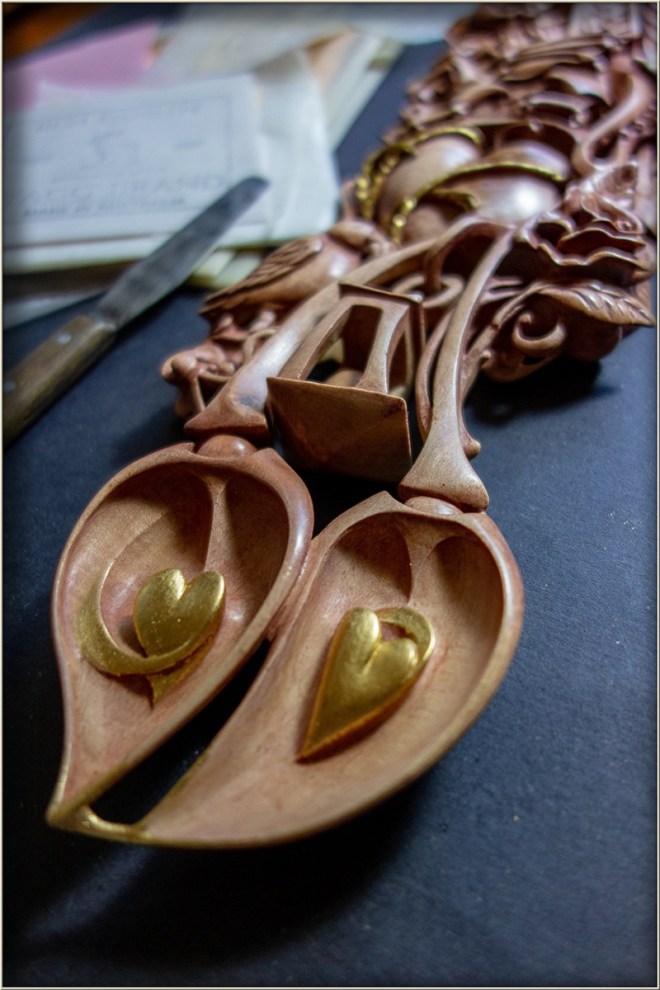
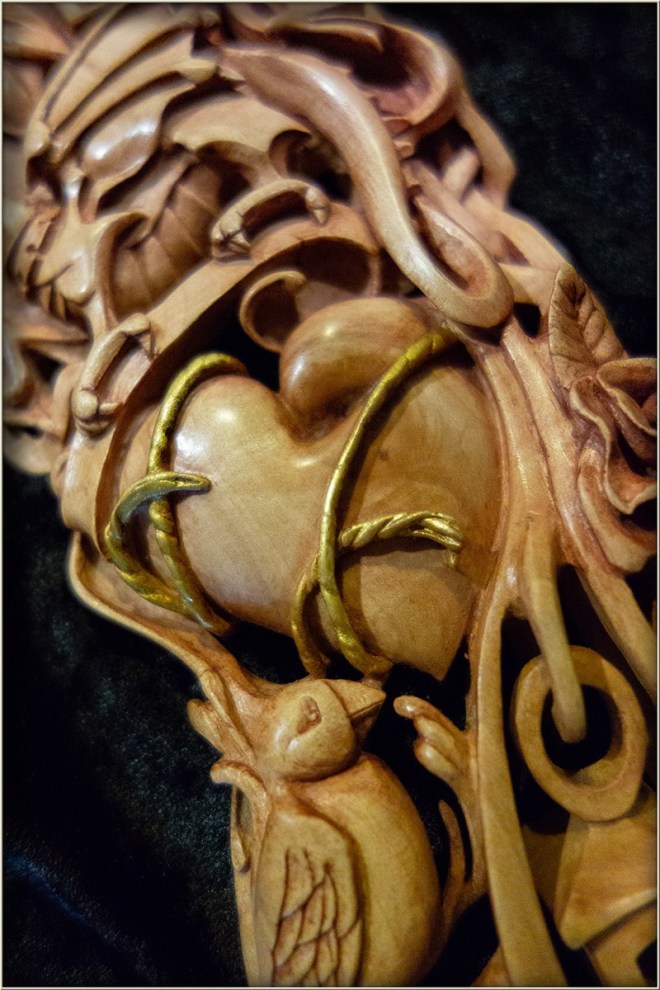
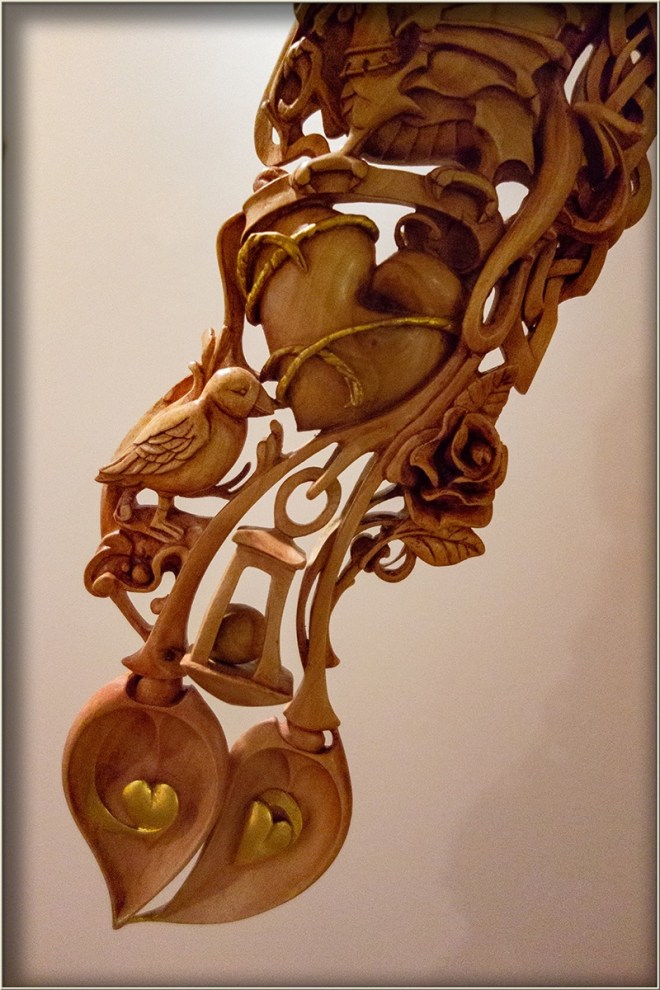
The gilding is to be applied to the two hearts and connecting swirls contained in the twin bowls, the very tip of the bowls and the connecting swirl tendril and the cords that bind the main heart motif in the centre of the lovespoon.

The finish medium is to be thinned polyurethane brushed over the carving and into the recesses and subsequently wiped off by brushing and wiping. The thinning of the polyurethane is achieved not with a measured proportional mix but by dipping the application brush occasionally in turps to thin the medium on the go.

The process is a continual, labour intensive one without a wait to dry phase. This removes any settling dust problems as the medium is continually moved over the surfaces distributing a very thin layer over and into every part of the carving. The process might be thought of as first trying to comprehensively penetrate and cover the carving with thinned polyurethane and then to comprehensively remove by brushing and wiping away ‘every’ trace.

An old tooth brush is useful for the dry-brushing of the medium in the deeper parts. In the later stages of the brushing/wiping off, the brush or cloth is dipped in a little Tripoli powder, also known as rottenstone brushed and wiped continuously as part of the wiping away stage. This working of the carving’s surface can continue until the whole carving feels dry to the touch and a pleasing sheen, even hard shine, develops.

The carving is now ready for the gilding of the hearts and cords. Transfer gold leaf is applied over those areas that will receive it by rubbing on the gold leaf over a slightly tacky layer of finish has been applied to those specific areas.

First the hearts receive their gilding , then the tips of the twin bowls. Then the cords binding the main heart.

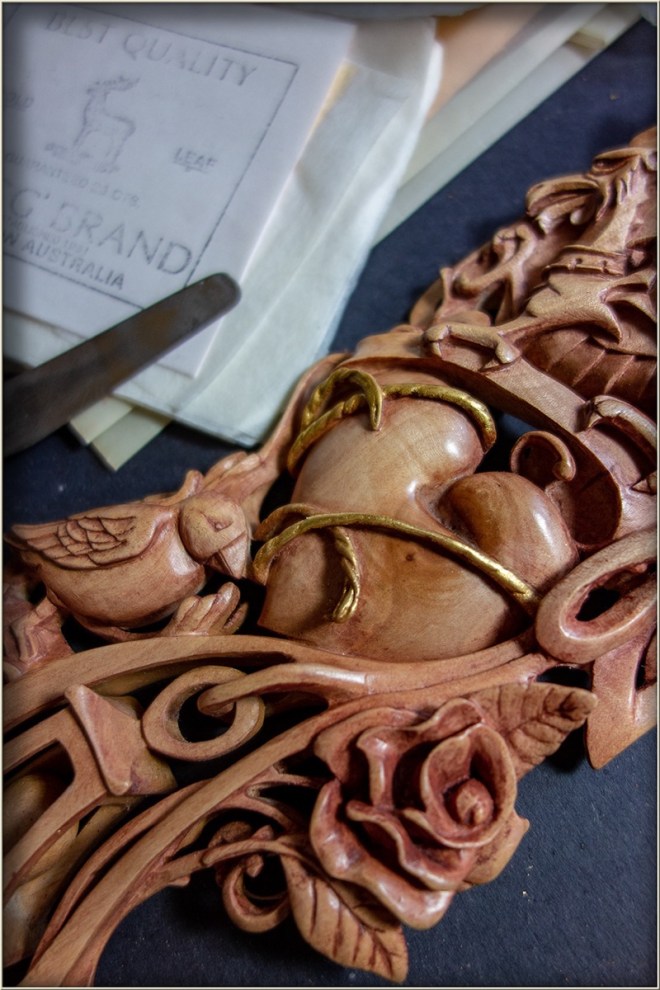
The transfer gold is applied to as much of the area of the gilded features as possible but finally the gold leaf will highlight these features with the brightest gold effect at the high and middle points and the gold paint transitioning the gilding into the body of the carving.

With the gilding work complete a little glazing to accentuate the forms is carried out using some dark tan boot polish wax. This process can be carried out as part of one continual finishing session but in this case the work has been left overnight.

To use the boot wax it is brushed with a bristle brush or tooth brush, reserved for the purpose, liberally over the carving but particularly into the deepest recesses. It is important that the staining polish reaches all these areas, so the carving is examined closely from all angles to ensure every depth is reached. If necessary some turps can be added to the brush to wash the staining polish into deep cracks and fissures where the bristles cannot reach.

As with the application of the finishing medium this process can also be thought of as applying thoroughly and then, as if trying to remove every bit of it with a large polishing brush and cloth. A slight dampening of a cloth with turps can finally be used to remove all stain entirely from the highlights over the whole carving.

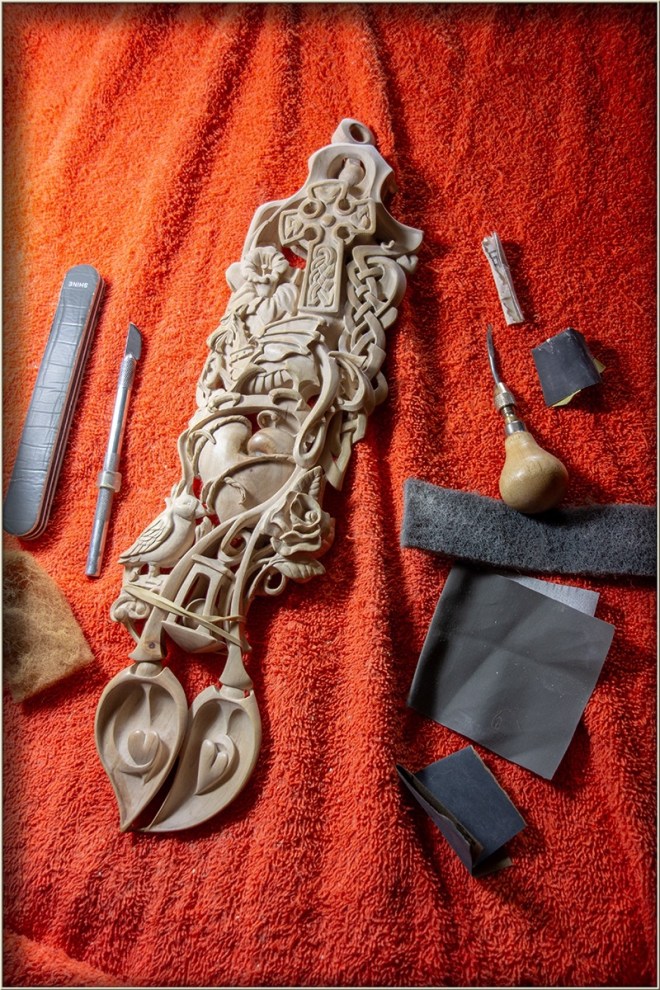
The final process in the finishing of the carving is to use a hard finishing wax. I have used the ‘traditional Wax’ product made by ‘U-Beat” finishes. On larger less deeply carved detailed surfaces I would use the “EEE’ (Tripoli) wax (by the same company) first before the traditional wax, but in this case the intricacy and depth suggested there would be little benefit in using it and there might be a risk of leaving a residue.

Buffing with a soft cloth brings the whole work to completion. The cloths used for the waxing and final buffing can be kept and re-used. However any cloths or rags that I have used with turps or oil, polyurethane etc I always place spread out, outside until dry and ready for the bin.

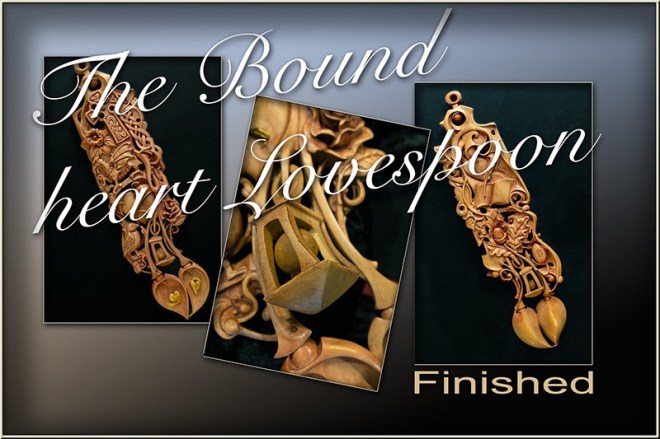
Here the ‘Bound-Heart Lovespoon has been finished ready for final photographing prior to packaging. The packaging itself is quite a process to help ensure a safe delivery. Postage is quite expensive from Australia an there is usually a bit of paperwork to be done for insurance, customs etc. For an overseas delivery a sturdy, rigid but light weight box with suitable fitted padding, is needed. For this lovespoon a purely functional plywood box was constructed to be quick enough to meet the deadline. On some occasions I construct a more finished frame/box intended for housing and displaying the lovespoon.

When photographing lovespoons I mostly use a black paper background with just a little light spilling onto the paper on one, usually the upper left edge, to show the paper texture. Daylight from a window is a useful soft light source for photographing carvings like this.

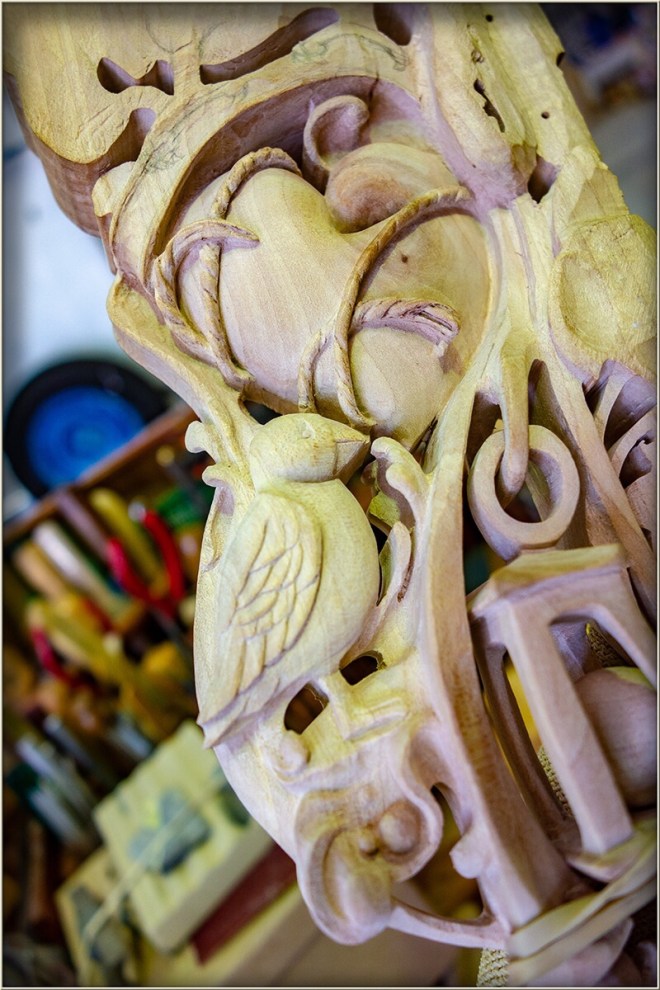
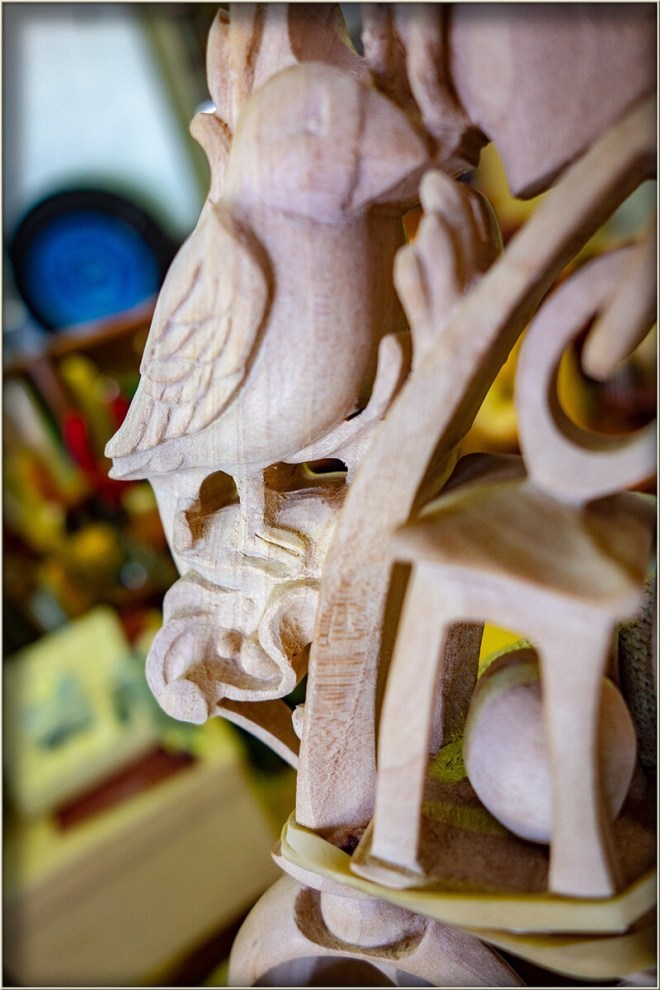
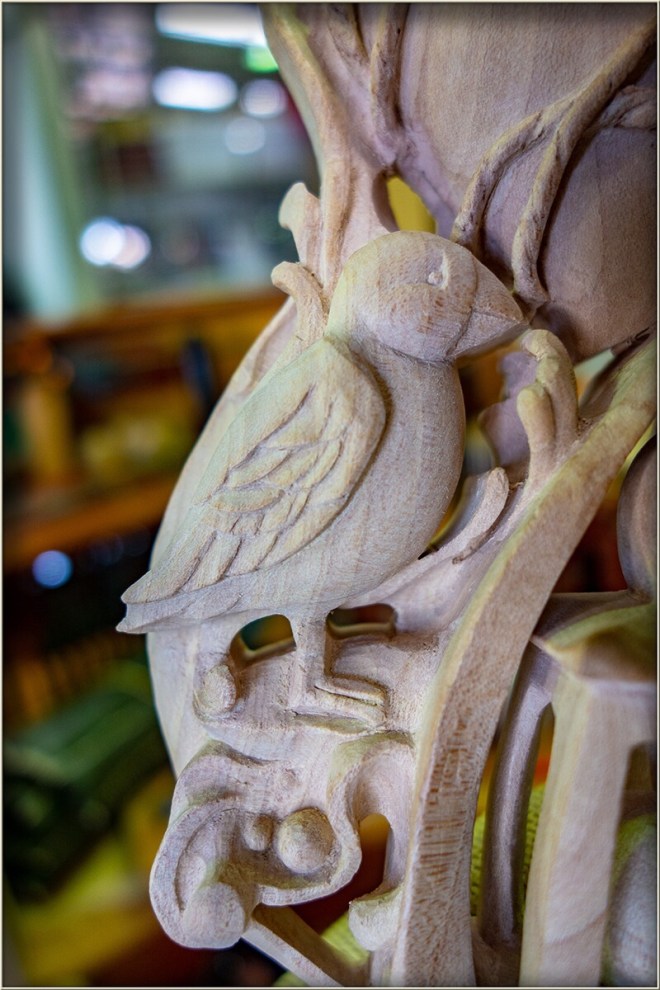
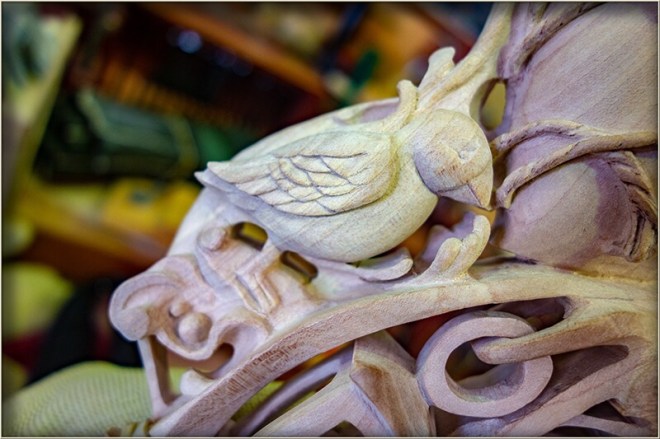
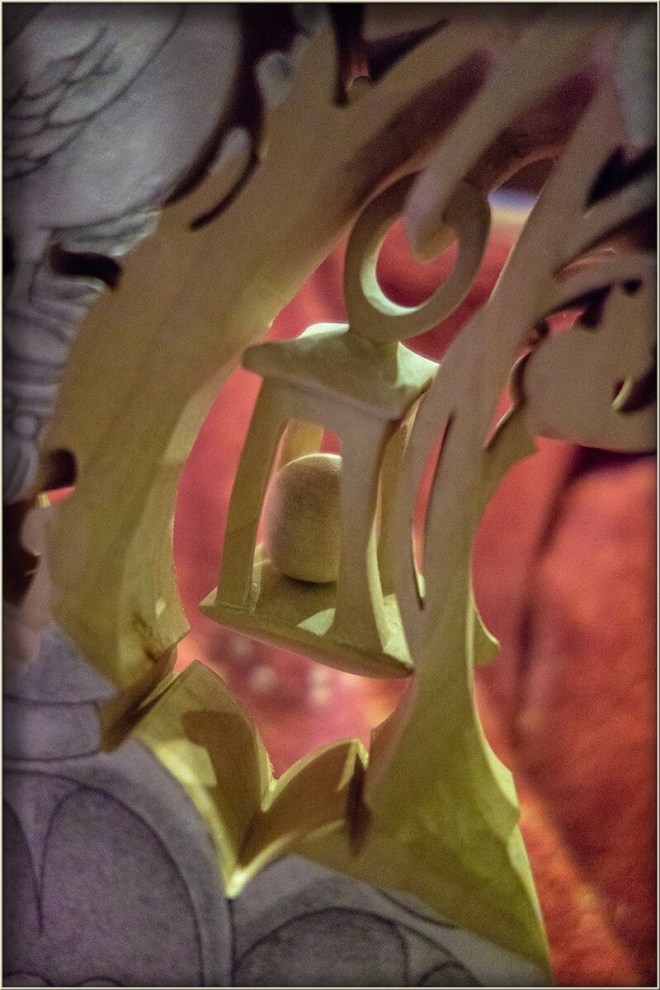
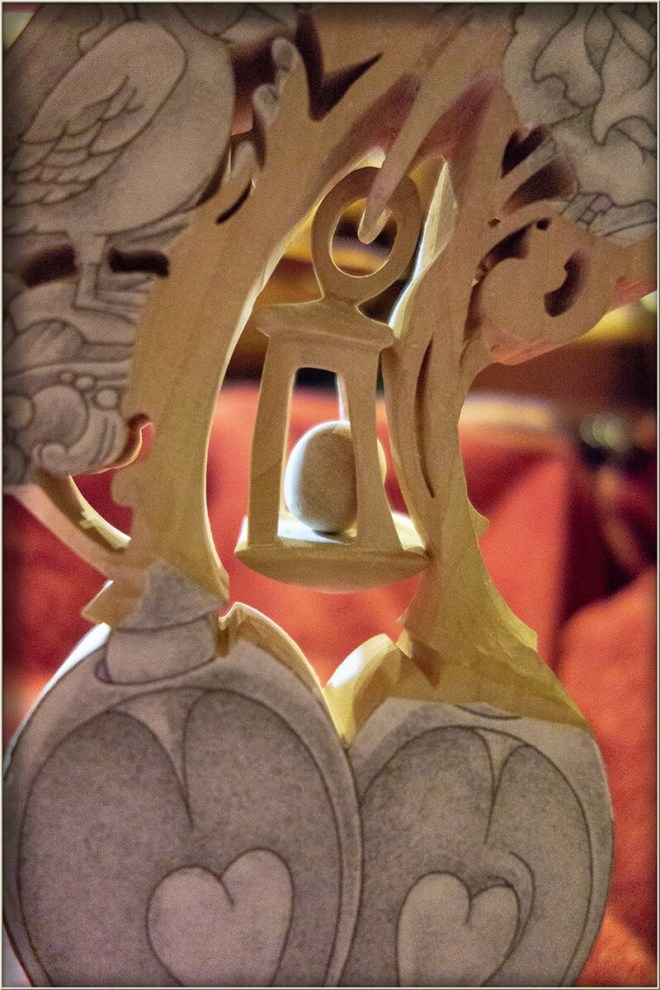
Crushed velvet, black in this case, also makes a useful background and I have used it here for these detail shots.

The necessary haste needed when photographing commissioned work due to be packaged and sent, usually results in rough and ready photography. Such is the case here. When there is time it is a good idea to go the ‘extra mile’ with the photography and use some more advanced techniques with specified intent.

A tripod can be used and then a more considered approach with lighting can be attempted. When using a tripod and if a good bit of time is available, stack-focusing in conjunction with suitable software, can provide photos that show sharp detail of the entire field of view.

Blur can present well also but a stack-focus result can show the work as it is meant to be seen, given that the lighting is directional enough to display the modelling and soft enough to reach into the depth of the forms. You don’t want it to look like a faint flat stain on a plank or like it has just been momentarily illuminated by a lightning flash in a horror movie. i.e. don’t use flash!.. A bit of motion blur due to not-quite-enough available light, would be better.

Another photography technique that can yield very good results, very specified, deliberate emphasis of featured detail, is ‘light painting’, the still life kind, not the line tracing in a night scene type. The two types have similarities but with a tripod and using layer and blending modes in a program like ‘Photoshop’ or perhaps ‘Procreate’. With a stack of identically positioned and focused long exposure shots from a tripod set-up, highlights can be ‘painted’ over the object with a small flashlight during a long exposure in dark or near dark. Selected parts from differently lit, but otherwise identical layers, can then be selectively and differentially combined into a result that emphasises detail and depth ‘to order’.

It requires time and the focused purpose of producing photos using these techniques however and that is often not possible and you have to make do with hand-held shots with a single light source from a window (very good) or whatever room lighting is available (hit and miss).

Most of the time I end up with window light or hit and miss techniques and it is only a few family-member-owned available lovespoons that have happened to be around during an ‘advanced photography mood ‘ that have received the advanced treatment.

For a partial silhouette effect, hand-held object (one hand) with hand-held camera (other hand) in bounced off the wall, available room-lighting can give you what you need for web use sometimes.

Provided some part of the image is sufficiently in focus a photo will be passable for use on the web.

But even then the light source needs to have the direction and quality to show the forms of the carving ‘in the right light’.

Bound-Heart Lovespoon WIP 9 Carving the Celtic Cross

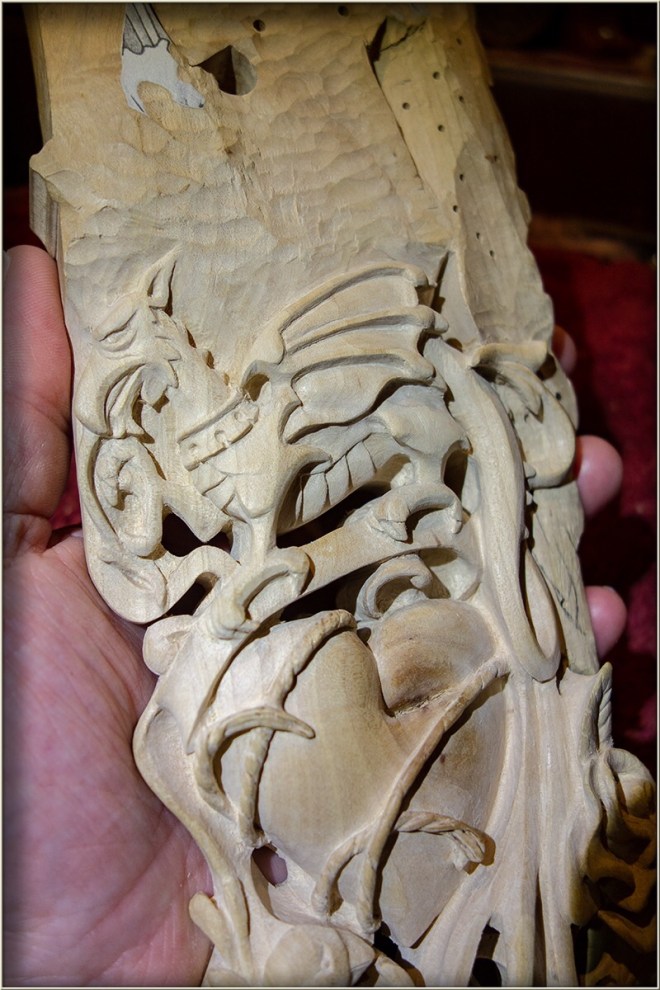
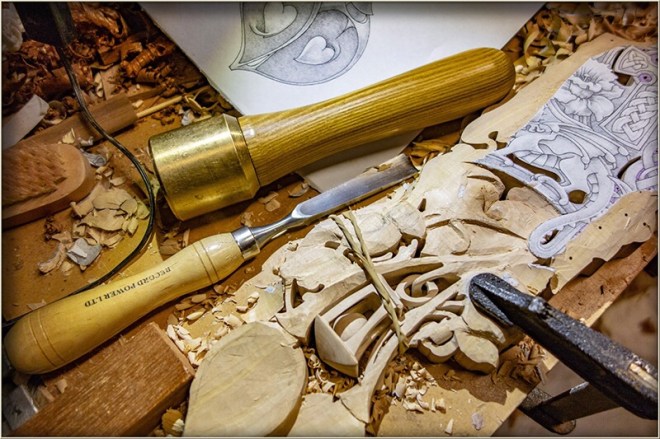
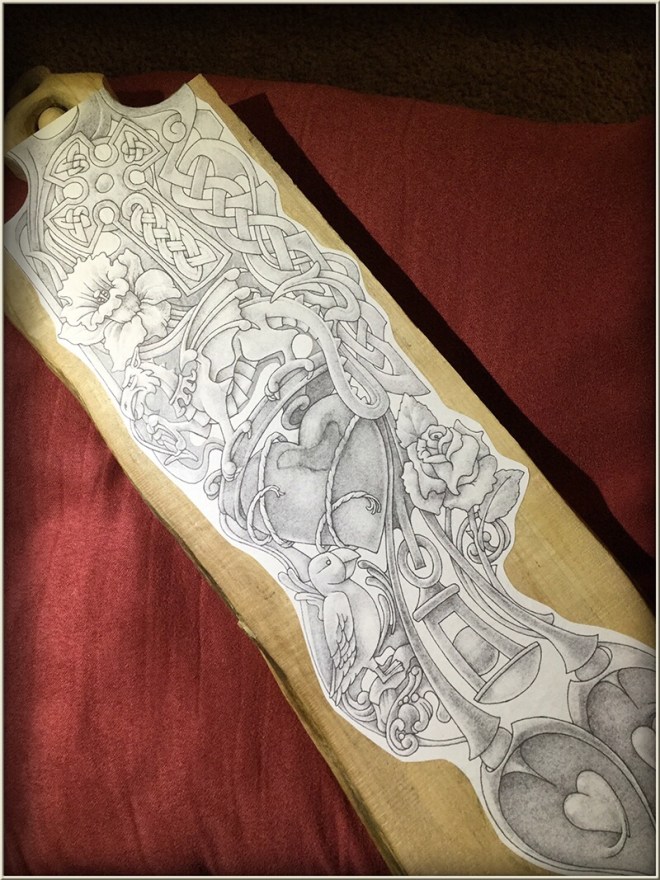
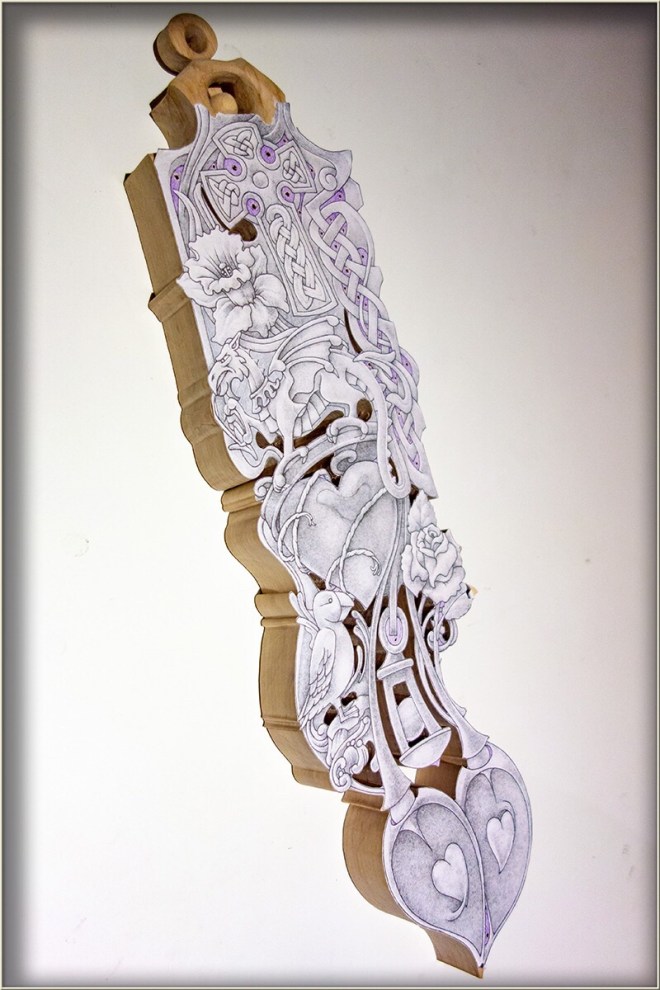
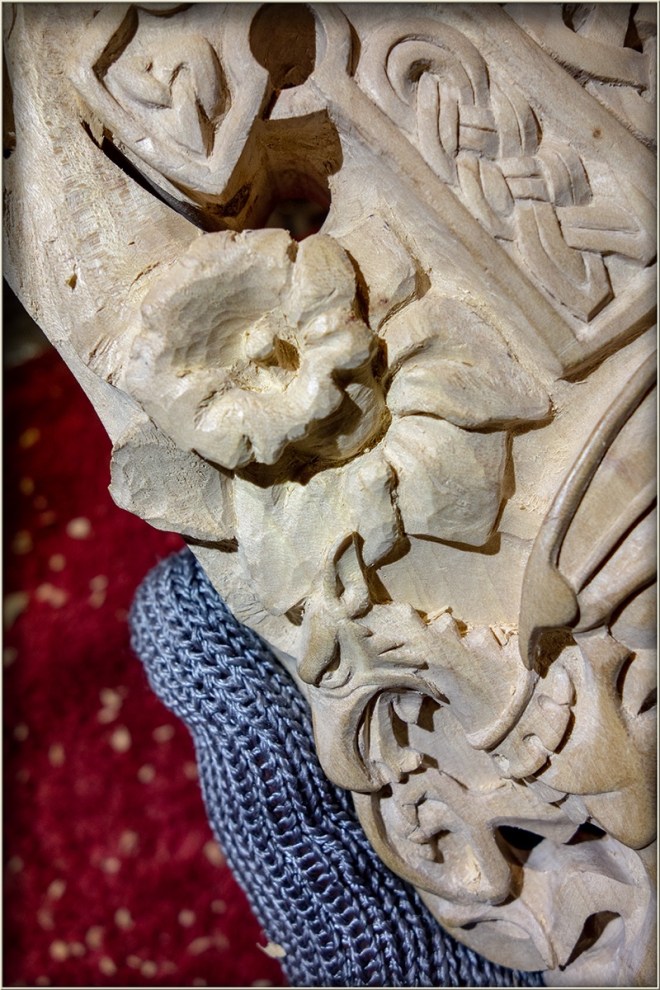
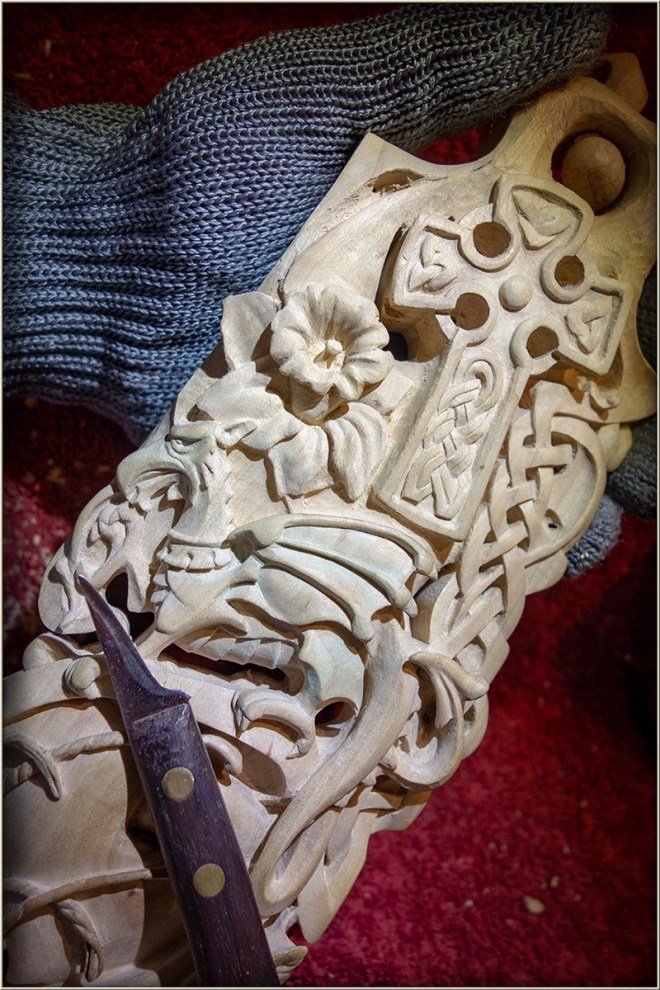
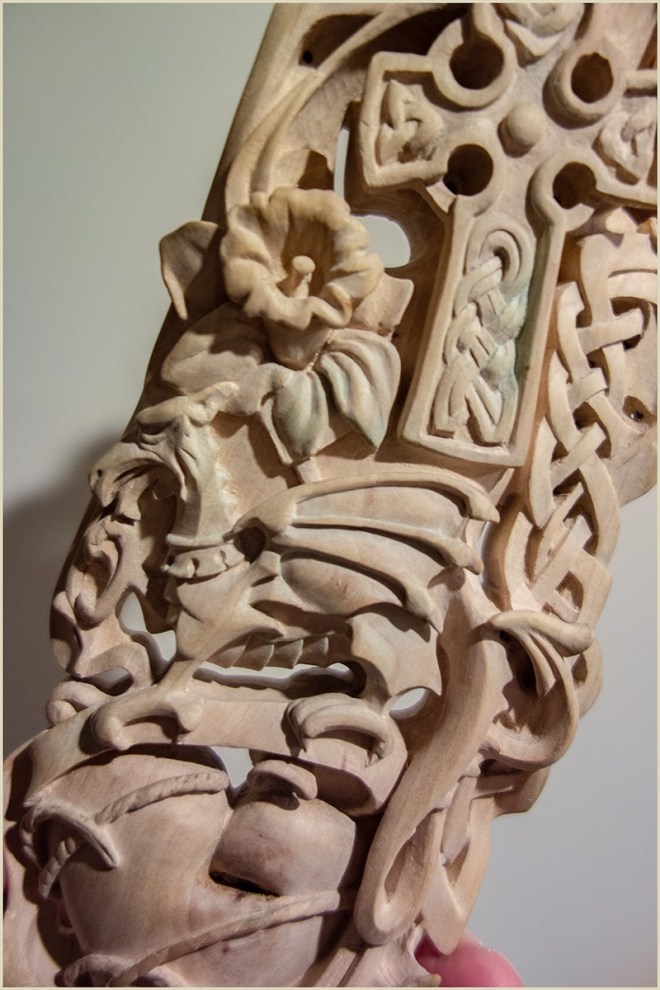
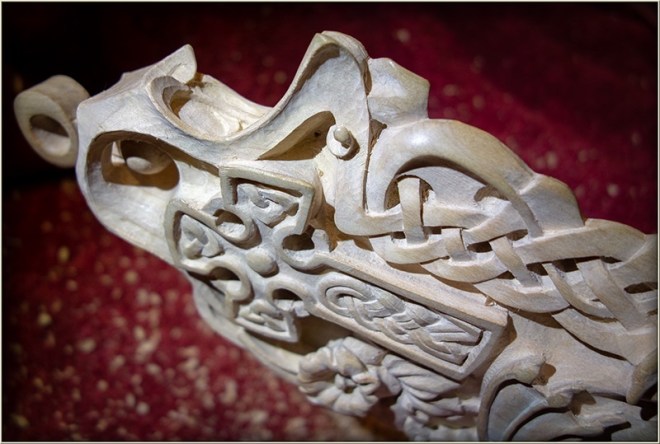
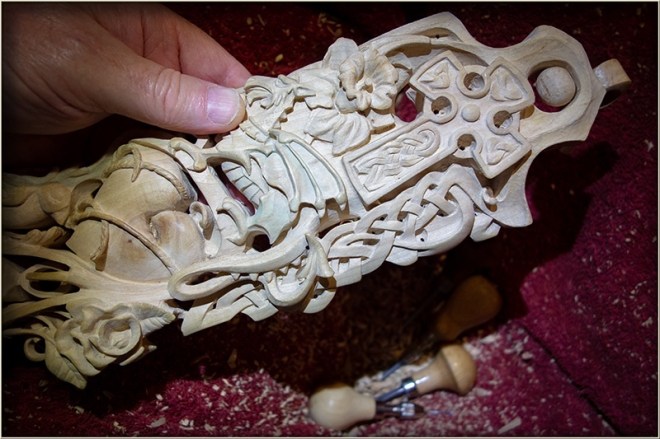
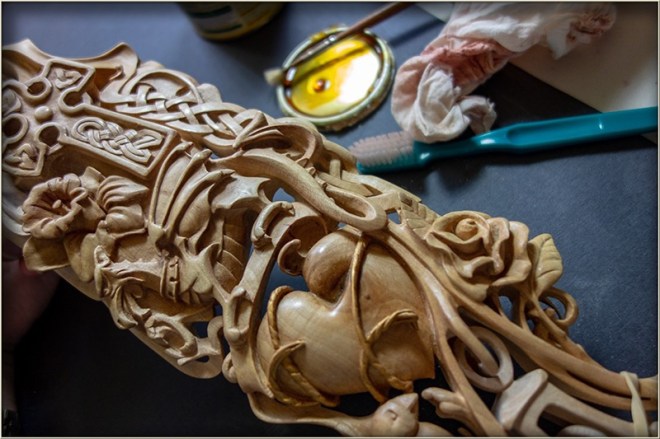
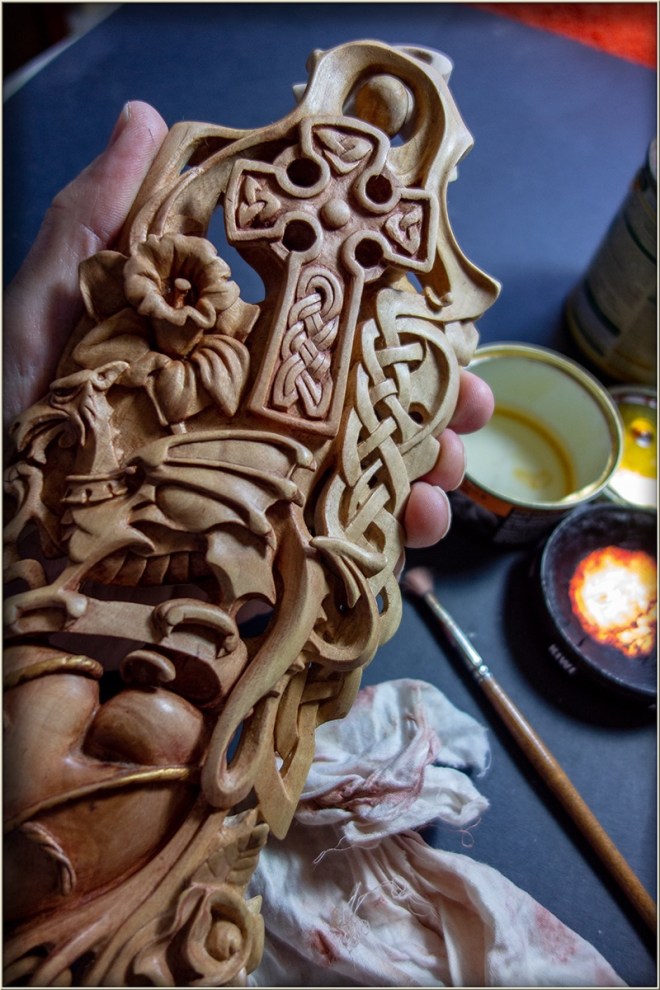
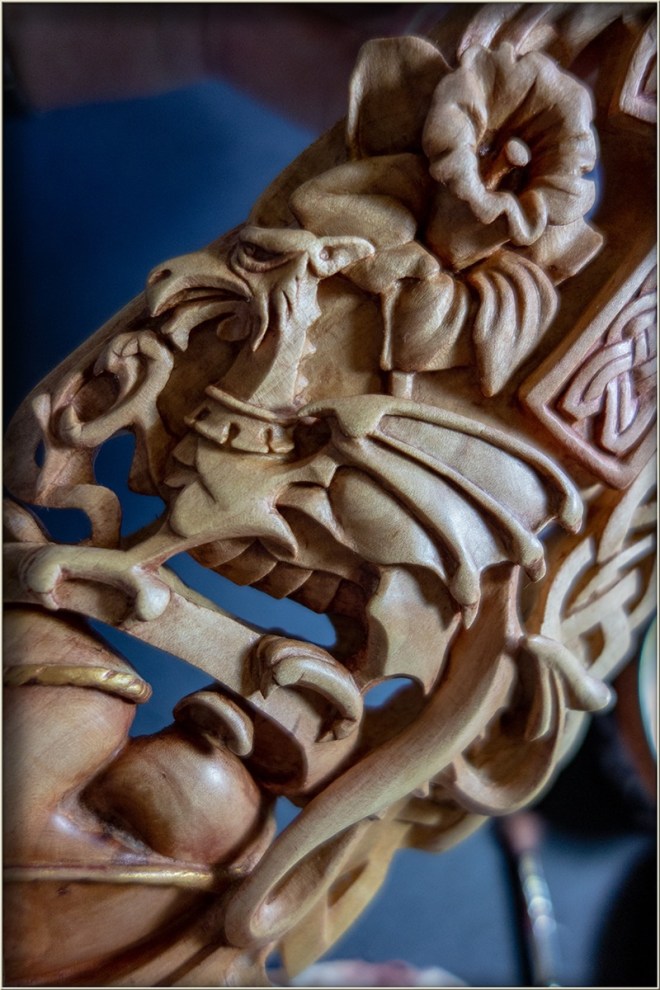
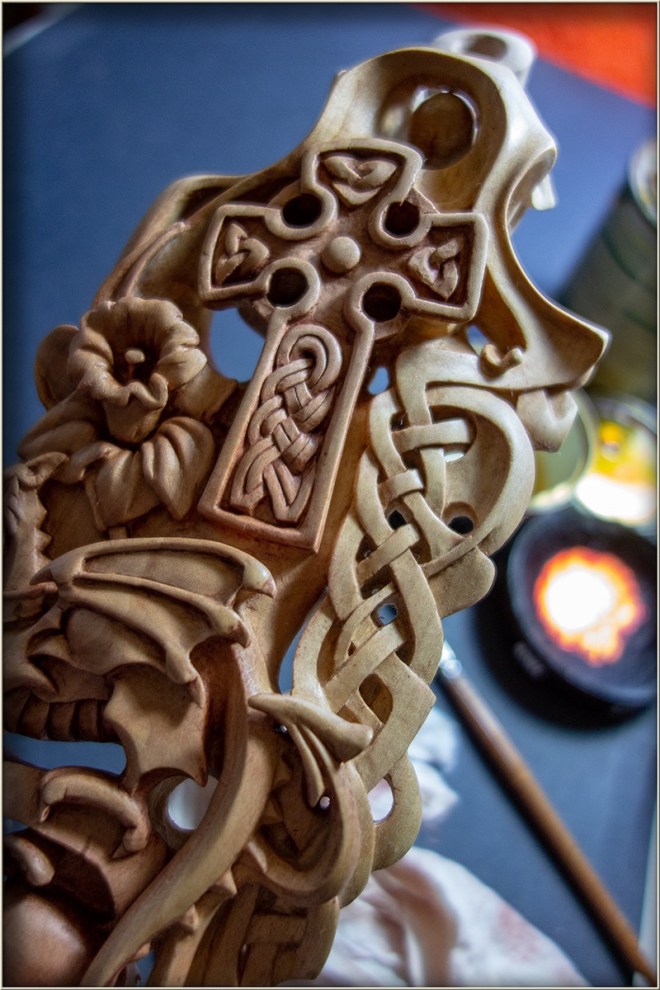
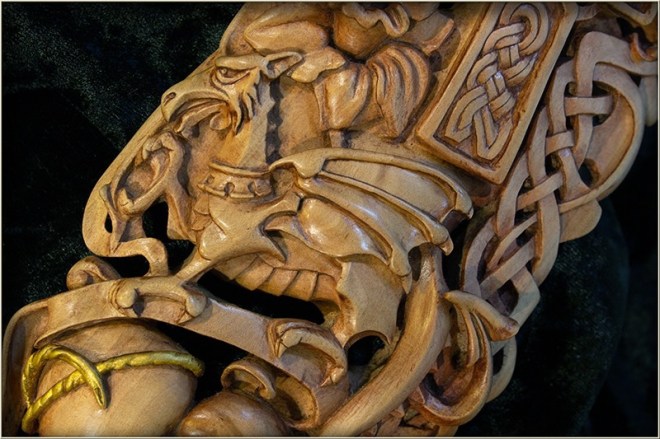
The Celtic cross, the daffodil and some unifying sculptural elements, in keeping with the art nouveau style adopted for this Lovespoon, are all the carved elements that remain to be completed on the front of the lovespoon. This will be the first time I have included the cross in any Lovespoon design. It is a Celtic Cross in this instance and together with the dragon and the daffodil, it signifies the Welsh heritage of the recipient.

Bound heart lovespoon Pattern Cross Detail 800W.jpg
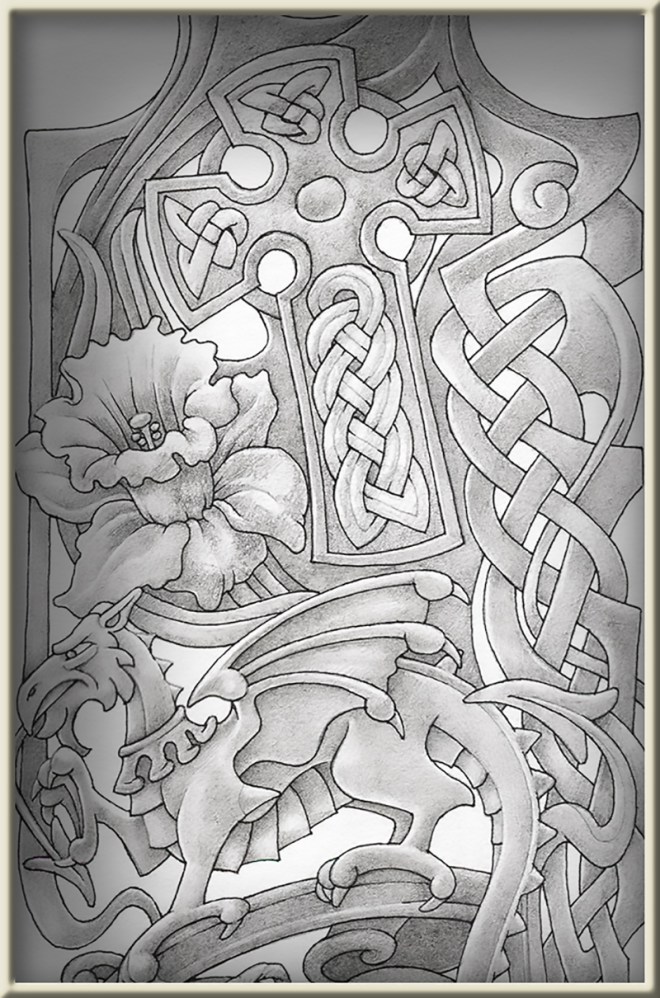
It was as a teenager in 1965 on a QANTAS staff -travel trip my father had organised for our family, back to his birthplace at Llantwit Major, that I encountered the Celtic knot-work on Celtic crosses for the first time. The crosses were displayed at the ancient St Illtud’s Church and made quite a visual impression. During a couple of other trips to Wales much later I don’t recall seeing much in the way of Celtic crosses at all, but the earlier experience does lead me to easily associate these monuments with Wales.

This file is licensed under the Creative Commons Attribution-Share Alike 2.0 Generic license

Attribution: John Salmon

In his landmark book on Lovespoon carving, The fine Art of Lovespoon Carving David Western makes note of  ‘the scarcity of spoons that include the cross as part of their design’ (regarding historic examples).  And this occurring at a time when ‘the chapel figured so prominently in daily life’ Whereas – ‘the cross is a common feature on modern-day lovespoons’.

I feel I can almost answer the conundrum as a Christian believer myself, in that I would tend to instinctively avoid crosses in my designs unless specifically asked for. I am not against portraying the cross, just not in a vacuum without explicit explanation of its meaning. A key to the reticence on the part of those for whom the ‘chapel’ figured prominently, is perhaps that word chapel. The Calvinistic Methodists were at the forefront of the Welsh revivals. Reformed in their theology and keenly evangelistic, they would instinctively, I think, baulk at mere symbols in place of explicit explanation and invitation .

The meaning of the cross is death and life for the believer. Firstly death – Death of death itself – Death of real moral guilt – Final judgement completed – Passed over. Then everlastingly – Life – Life through forgiveness and reconciliation once-for-all – Into bodily resurrection, new heavens and new earth to come .

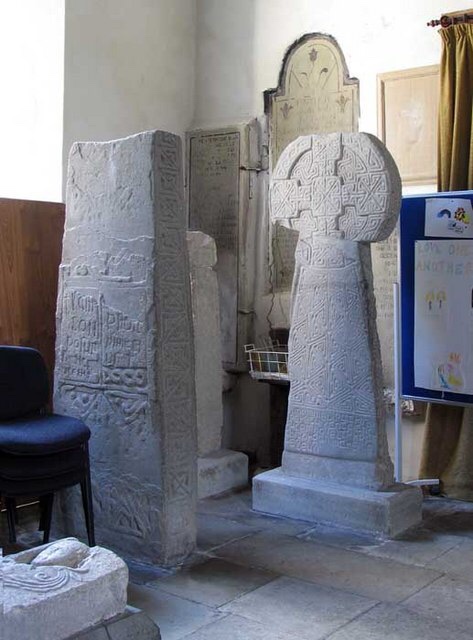
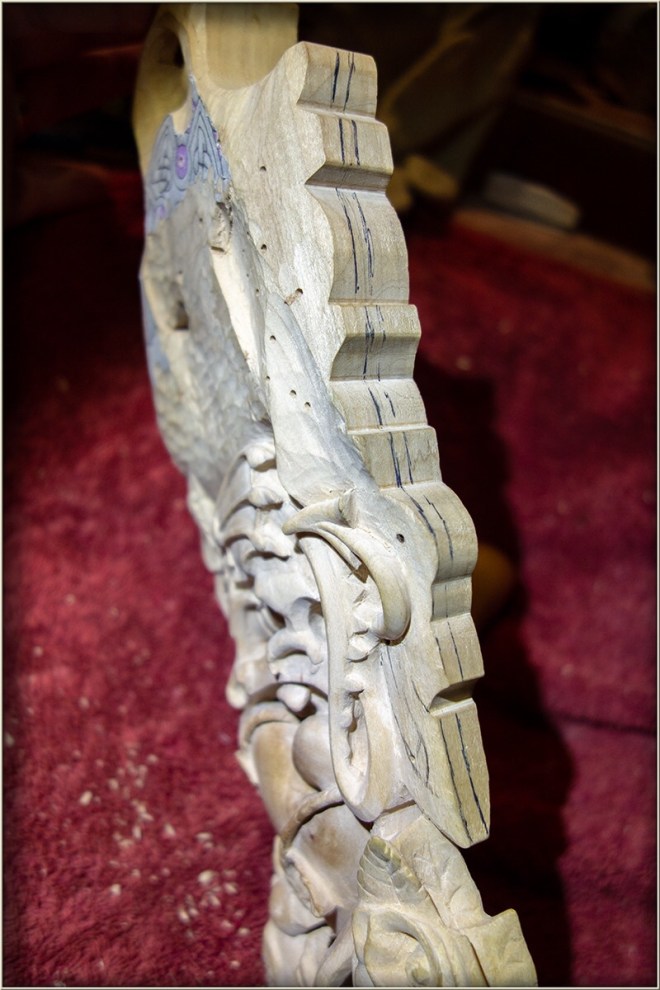
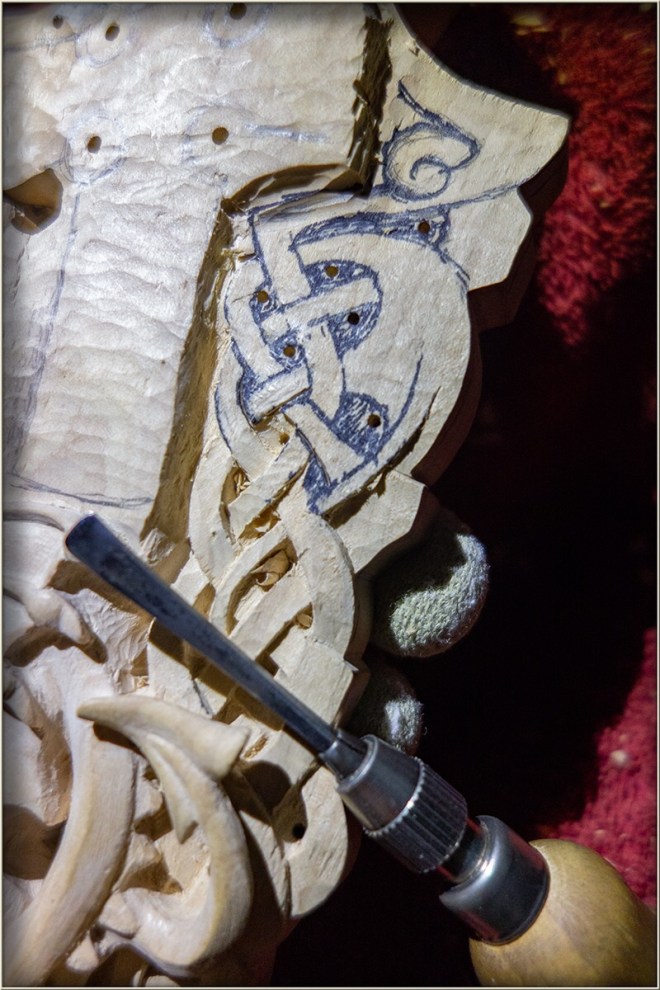
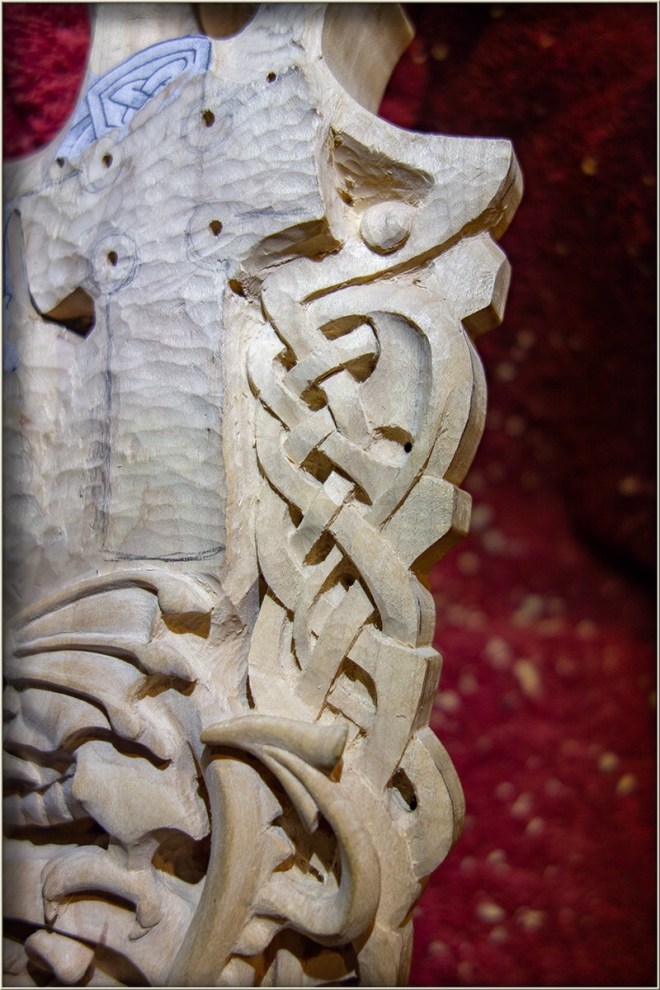
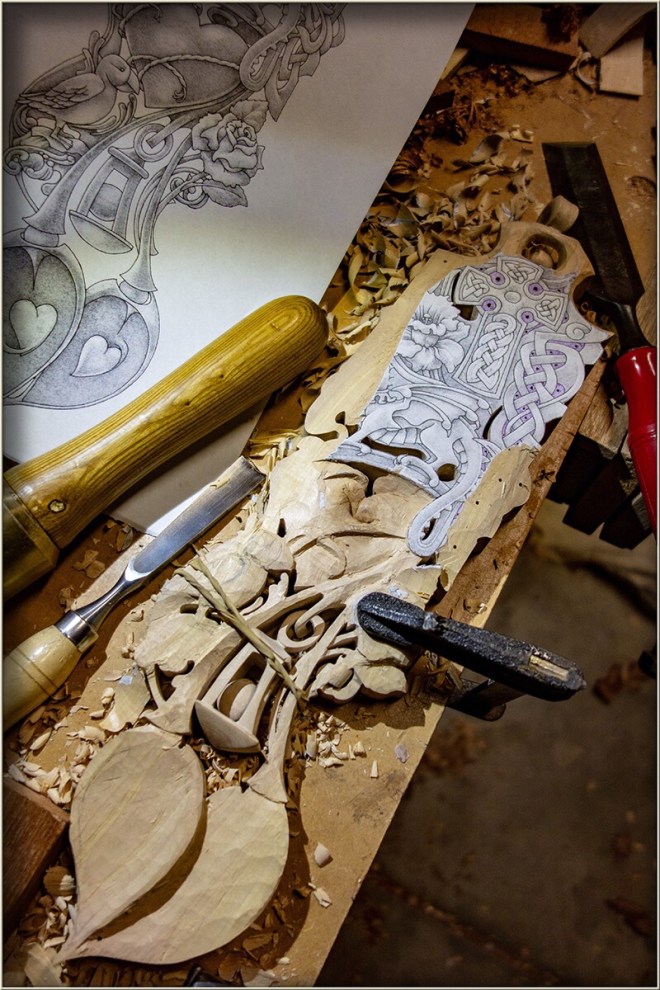
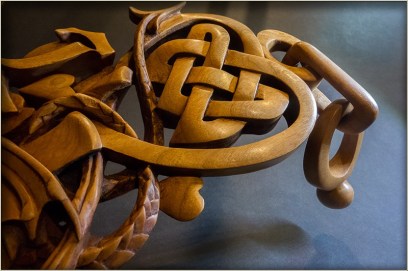
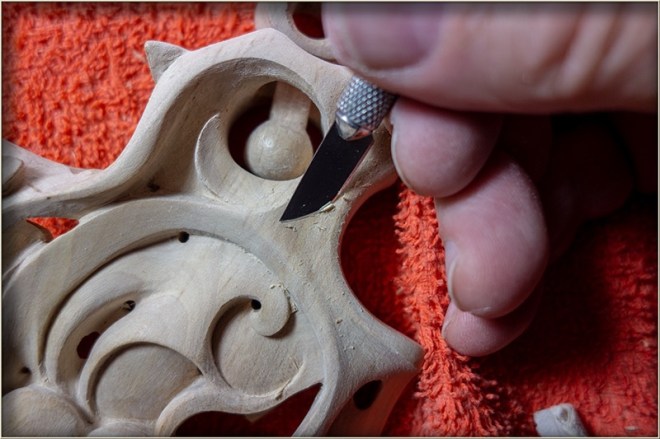
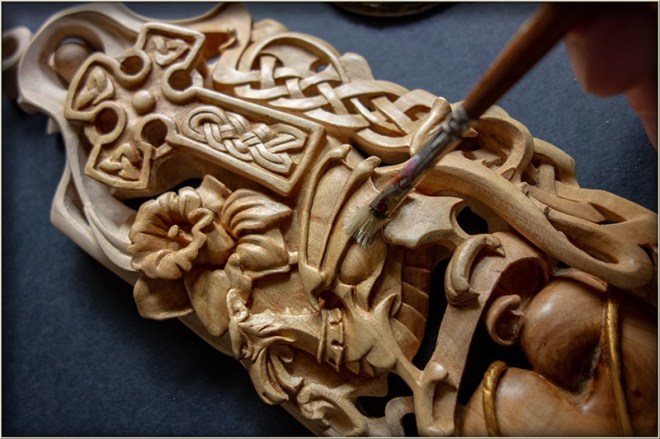
The form and orientation of the celtic cross motif on the lovespoon has been decided and its upper surface prepared for drawing in the knot work detail. The form of the cross is inclined slightly to the left and its long axis has a very slight curvature to the left. This is to maintain its relation to the slow serpentine curve along the axis of the entire design and in keeping with the general art nouveau style of the piece.

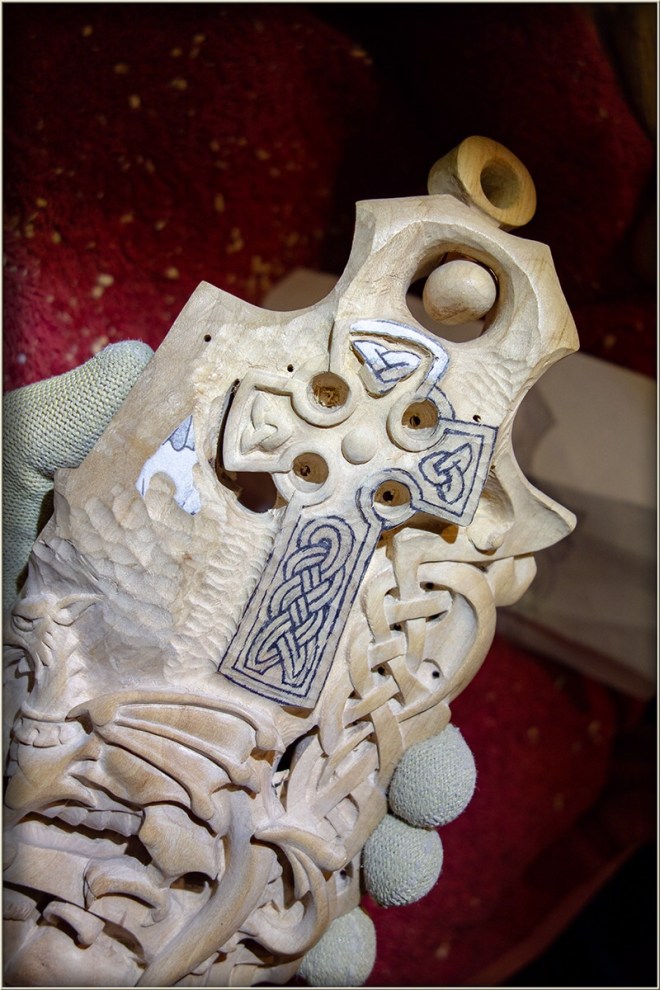
The celtic cross in this design is comparatively small and so the decorative knot work cannot approach the complexity of the real thing. So it needs to be simple enough to carve at this size but still give a recognisable impression of a celtic cross. The knots at the top and sides are ultra simple and in the one with the longer knot work I have attempted to give an illusion of complexity by making it double stranded. A border around the perimeter is meant to add to this effect.

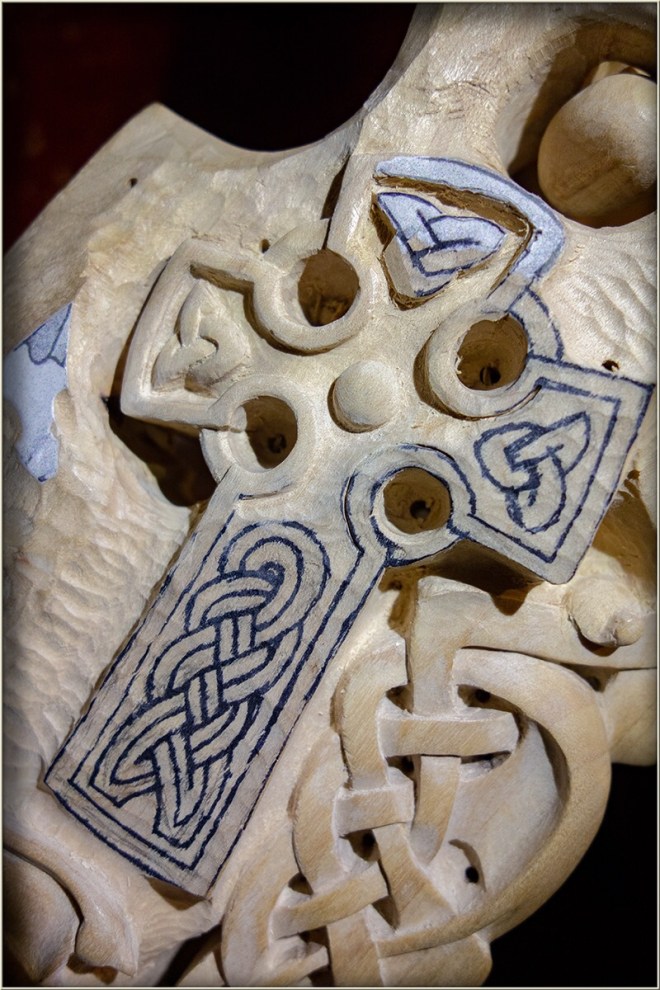
This Japanese maple timber has been very hard, as well as hard (tough) to carve but fortunately it holds detail well. The very narrow, in some places, areas that form the background to the decorative knot work can be deep enough to produce good shadow definition without compromising the integrity of the walls of the knot work and border. A bit of depth also allows for a very slightly domed effect on the background area for added visual interest.

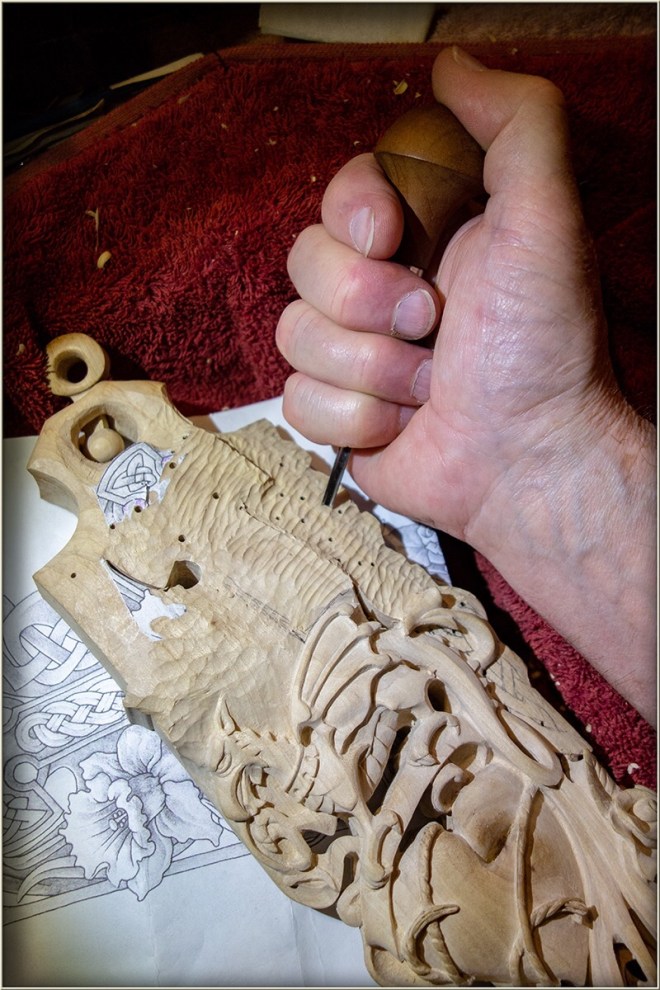
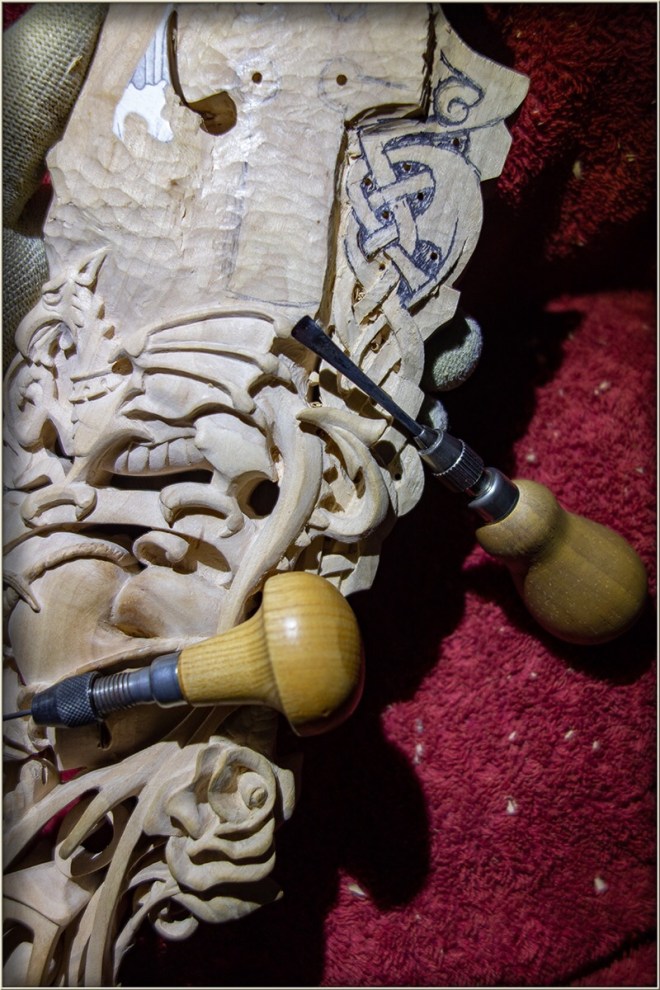
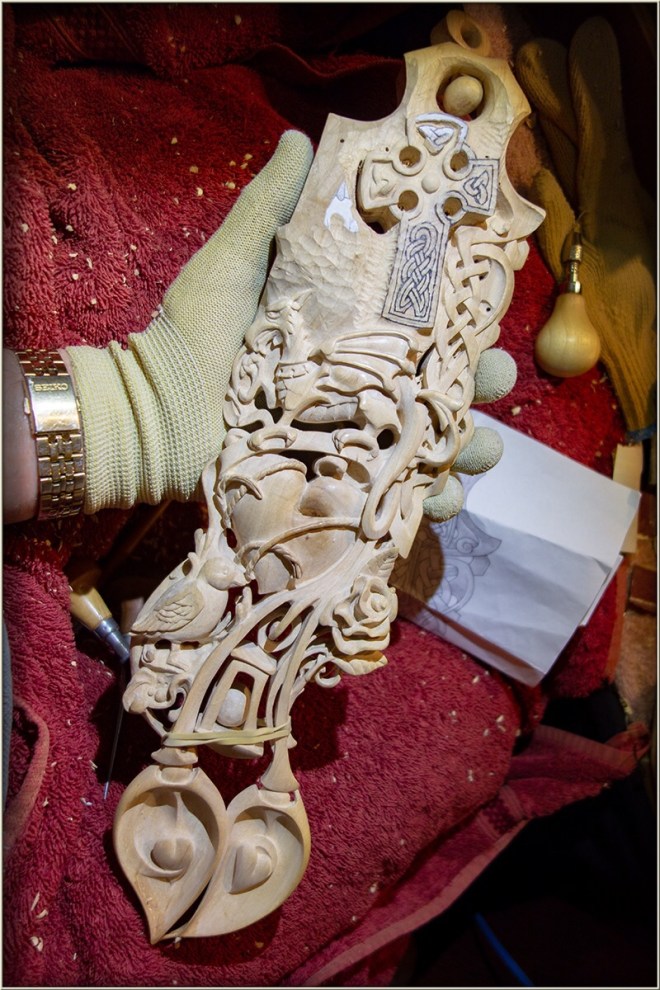
Once these levels of cutting over the general form are established it is then just a matter of working the details to their completed form. The small micro chisels (shaped and sharpened music wire) accomplish most of this work, building depth slowly while handled with a pencil grip for fine control and naturally limited force.

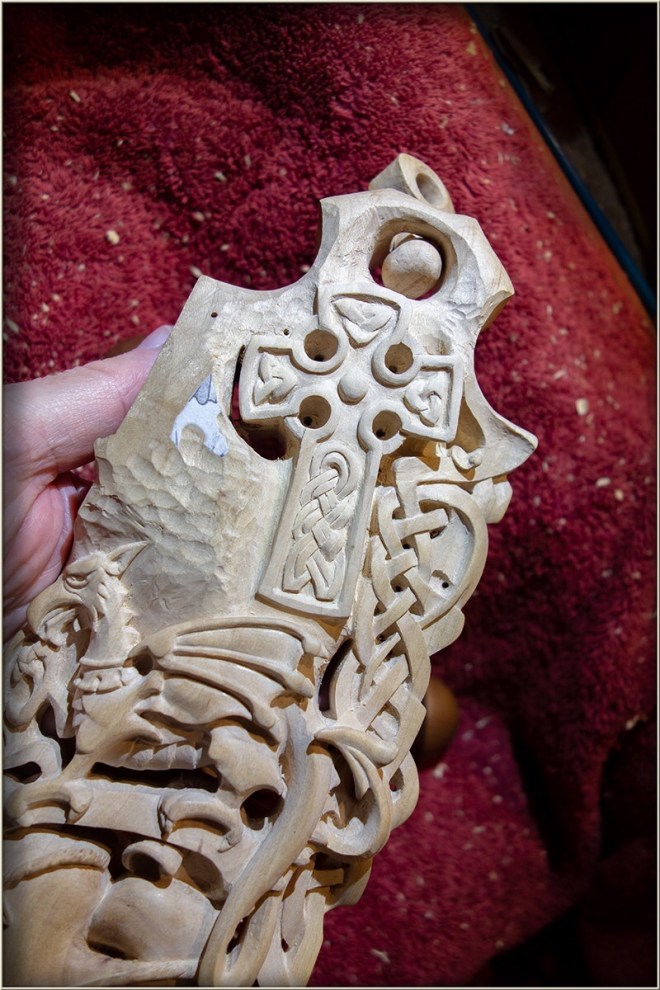
A small cranked bend in these tools, which, incidentally can be added to or straightened-out-of the tool, facilitates deft cutting up to stop cuts at knot-work intersections and crossovers.

Carving Tools 14_06_2015_002 800W.jpg
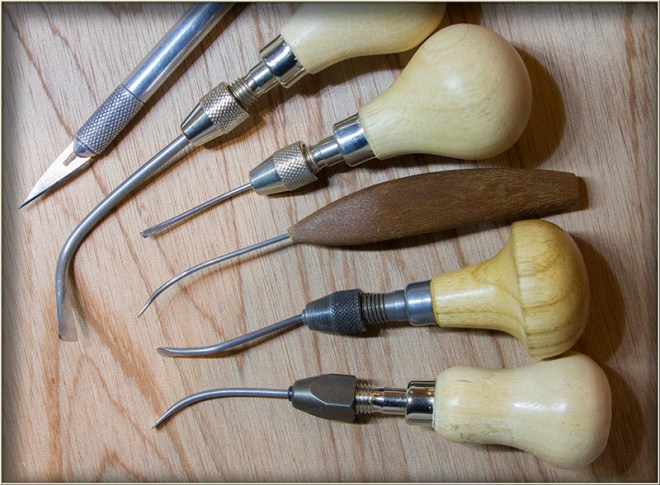
In the next post I will describe carving of the third typically Welsh signifying motif on this lovespoon, the daffodil.

The Bound Heart Lovespoon WIP 8 Carving the Celtic Knot-work

The next design element o be carved is the area of Celtic knot-work on the right hand side merging at the top portion that encapsulates the swivel at the top of the spoon. This knot-work panel at its right-most edge will describe a line that is the overall spoon’s profile leading up to the crowning swivel and ring at the top.

A considerable amount of material needs to be removed to reach the thin edge of the knot-work panel. This material needs to be removed carefully however so as to not compromise the positioning of the dragon’s tail below or the level and orientation of the Celtic cross toward the top centre of the lovespoon.

With these profile lines drawn in the level of both the knot-work and the surface of the Celtic cross are worked down to. By using a narrow but deep gouge with a stabbing-fist grip, considerable controlled cutting force removes the very hard timber down close to the required level.

When the level is approached close to the finished top of the knot-work and cross a shallower gouge can be used to to smooth the furrowed tool marks ready for re-drawing the knot-work.

With the knot-work drawn in and the negative spaces shaded, as a precaution, ready for carving. The edges are outlined with stop cuts to form the knot’s ribbon edges and the pierced openings between the knot ribbon strands.

I had decided not to fret out these openings because of the thickness of hard, dense timber at that point. I opted instead for holes drilled through the blank to expedite piercings with chisels. In retrospect It would have been more convenient to have done without these holes, as they offer little help and I now consider the option of not passing right through the blank preferable.

As the knot-work will not be shown in reverse on the spoon back the through holes will need to be utilised in the intended abstract ‘art nouveau’ forms on the other side.

The Celtic knot-work in relation to the dragon’s tail and the Celtic cross is established and now attention an be payed to the positioning of the Celtic cross and its spatial axis in that part of the overall spoon’s form.

To the left of the Celtic cross will be the daffodil, which will needs relating both to the Celtic cross and to the head of the dragon at the right level enabling a harmonious dimensional juxtaposition to them both. But for now the orientation of the left hand level of the Celtic cross will need carful consideration as this next element is layer out and carved.

Post-Christmas Season Catch-up with The Bound Heart Lovespoon WIP

I have had little time to devote to this project, or any carving leading up to and during the Christmas and New Year Season. However quite a bit of progress has been made on The Bound Heart Lovespoon since the last post. For this reason I will post mainly photos, to illustrate the WIP, with less written commentary until I reach the finishing process.

The dragon featured on this design is the traditional Welsh flag dragon except for his tail positioning, which overlays some of the Celtic knot-work, to be carved next. This overlaying is also intended to make the traditional heraldic style of the dragon fit with the overall art nouveau style of the lovespoon.

So as with the other carved elements in the design, the overall form of the dimensional space for the dragon to occupy, is shaped and then the dragon’s main forms are drawn over this prepared area, ready for carving the dragon’s form.

Levels are first established for the various parts and the carving proceeds downward through the form, re-drawing the various parts as their level is reached.

The ribbon structure upon which the dragon stands is carved in conjunction with the dragon as it bends downward around the left lobe of the heart. At the same time the dimensional travel of the doubled-over long ‘S’ bends of the tail, need to lay harmoniously and with fair curves over the intended knot-work on the right hand side.

Gradually the parts of the dragon form are carved with outlining stop cuts carved back to, with shallow gouges with sometimes direct chisel edged cuts, or at other times, long slicing cuts, almost parallel to the stop cut. The latter when cutting against the, often changing grain direction, makes it necessary.

With the main form of the dragon established and the bolder details added, it is time to leave the detailed refining of the dragon to a later stage. The next element for attention will be the Celtic knot-work and the overlaying dragon tail.

The Bound Heart Lovespoon WIP 6 Carving the Rose

71EAED91-99D2-440D-BD31-F8CC03FC684C

The rose element on the right hand side of the lovespoon is redrawn over the shaped  portion of the lovespoon where it is located. Before any actual carving of the rose’s basic form its level in the overall design needs to be established. In addition the overall form at that portion of the carving needs to be shaped into the volume that will be carved into the rose element.

Once the outlines of the rose’s main forms; petals, leaves and the underlying scrolling terminals of the tendril lines are drawn in, the deep undercutting is commenced from those lines.


A balance of depth, delicacy of form and the necessary inherent strength required for the unsupported rose element here on far right hand edge of the lovespoon, means erring on the ‘chunky’ side. There remains the possible refinement of form later after many more hours of turning gripping and handling have safely passed. Even then the refinement to the rose’s final form will need to be cautious and sparingly executed.

I could have opted for an ornamental and robustly geometric Tudor Rose in this situation but it seemed a more naturalistic, only slightly stylised rose, would fit the art nouveau style of the overall design better.

In the next post the carving of the Welsh Dragon will be described.

WIP 5 – Carving the Puffin

A number of ongoing projects and commitments including the carving of the Bound Heart Lovespoon has made it difficult to post regularly and a bank-up of WIP posts has developed so I will provide only brief descriptions with the next several posts beginning with carving the puffin.

The puffin is carved in deep relief nestled between the left hand spoon stem and a bounding curvilinear structure that partly frames the various carved elements of the lovespoon.

To carve the puffin I have first carved down to the level of the foremost point just below the wing shoulder. Then by re-drawing the outlines of the main forms carved down in stages from stop cuts made along the outlines to shape the various main forms. Simultaneous to this work on the puffin some of the background of the puffin is established and this determines the depth of relief that will be attempted.

The background includes some water splashes and stylised wave forms beyond the rock which provides the he puffin’s base.

A continuing process of carving and re-drawing gradually brings the puffin’s main form into being ready for details to be added.

The level within the carving where the puffin locates, in turn has its affect on the best levels through which a fair and pleasing curve of the spoon stem would travel on its course upward to the lantern hanging link.

The puffin’s eye and wing feather details are added using a variety of small chisels and gouges with just the right curve. Whenever that is possible. While any curve can be effectively followed in increments wit a narrow flat chisel or shallow gouge a larger gouge that fits a curve, or part of it is the best choice for efficiency and neatness.

With the main form established and details indicated the puffin is ready for tweaking and final finishing at a later stage.

The next post will be the carving of the rose on the lower right.

Carving the Bound Heart Lovespoon WIP 4 Carving the Heart

The Heart at the centre of this lovespoon design is the title piece of the carving. The carving blank chosen, a piece of Japanese maple, mostly clear, but with a conspicuous knot, became an integral part of the design. The design brief called for a now-robust heart that had received the healing that the loose binding golden cords had provided. The knot in the timber would provide some focused interest, with a burl like grain pattern, centred on the carved heart.

Additionally with unsound material removal from the centre of the knot, there would be an irregular wound-like void in the heart. A combination of removing material from the knot and working down to the heart surface level, below the cords enwrapping it, would show the location, area, direction and depth of this feature.

I needed the voided-knot to locate, without interference to the second diagonal cord strand, or to the heart-cleavage in any way that might compromise the full rounded ness of the heart. Careful placement of the pattern, together with a little tweaking of the pattern ‘before the fact’ has provided clearance enough for the Lower cord-strand and the heart piece seems to have form enough at this point.

You never know how deep or which directions the unsound material in a knot might go and so I envisaged using the option of some resin filler in this region. Whether or not this is necessary will depend on how prominent the knot-wound needs to be to fulfil its purpose in the design and how it affects the heart’s overall form.

I used a narrow #5 gouge to remove the material quickly down to the heart surface between the strands and along its right hand edge. From time to time the surface was smoothed with a #2 gouge to help envisage the form of the heart and how deep it should be taken on the sides, pointed end and the top under the dragon’s base ribbon.

To establish the form of the heart I have first located the level of the highest point on its surface just below the strands. Then gradually lowered the levels on the strands as they curve over the sides and top.

This in turn necessitates a little attention to some of the surrounding elements, like the trailing curled end of the dragon base ribbon at the top, the area surrounding the puffin’s head and the under-cut area behind the dragon’s tail. Also below the dragon’s tail the right hand edge of the heart needs to ‘disappear’ as it gives an appearance of curving around to its back face, behind the spoon’s stem which in turn slides past it up behind the dragon tail.

The edges of the heart need to go deep to provide the heart’s roundness and yet the heart is essentially carved in relief and will not appear on the back of the carving. At the same time the spoon stem touching the heart edge is already at a depth that relates correctly to the hanging lantern link. So deep under cutting of the spoon stem, met by a deep convex plunge of the heart’s right hand edge under it, will provide the contrasting shadow/highlight to indicate a full rounded heart, nestled into the crevice formed by the spoon stem.

To establish this ‘crevice’ area adjacent to the heart edge I have used a wide shallow gouge with the gouge’s heal-to-centre-of-edge, slid in an extreme slicing cut along the line of he crevice. A number of consecutive slicing cuts, each shaving a spiraling chip, eventually build to the beginnings of a form that can be further shaped by a more direct cutting over the heart surface to the crevice area as a stop-cut.

By using a stabbing grip on the palm gouge, considerable force can be applied with a high degree of control. Because the limited arc of travel in the wrist, is a natural restraint of, and stop to, the cutting action.

By continuing to place incremental small stop cuts, and larger ones when a gouge fits the curve, along the lines of the golden cords. The surface level of the he heart is worked down to, across the surface of the heart, by removing the material in cutting up to the stop cuts.

With the heart form largely established the overlaying cord strands are brought to their various levels and forms

Using a curved knife the twist detail in the cords is attempted. The large amount short grain encountered along the length of the strands however means break-out between these twists and each correction ends in a lowering of the depth of the strands. For this reason I have decided to aim at an ‘impression’ of twist along the cords, at this point at least. The painting and gilding stage will be a guide as to how much detail can be safely aimed at and what will look best.

With the heart close to its final form some attention has been paid to visualising the ribbon base ribbon hat the dragon perches upon. It will need to relate correctly to the dragon atop it and also follow a fair curve across the top of the heart.

Before tackling this however it will be best to work on the lower sections such as the puffin and its abstract water swirl background and then the art nouveau swirls and tendrils behind the rose.

In the next post I will describe the carving of the he Puffin and its surrounding background.

The Bound Heart Lovespoon, WIP 3 – Carving the Twin Bowls

The ball-in-cage hanging lantern has been carved and now it is time to tackle the twin bowls of the, lovespoon. The carving of the bowls will be next, not because it is the most critical part of the project after the hanging lantern, but because there is quite a bit of material to be removed and this means fairly heavy handling, especially with the toughness of this timber.

It is often necessary to make decisions about the order of doing things when carving, in order to minimise potential risks. At other times it is to make access available and at yet others, to be able to visualise the way forward.

Carving down to the line that marks the rim top in the bowl profile, is heavy going in this timber. So a smaller but deeper gouge is needed and only a little sliver at a time can be removed, even while using a fair amount of force.

A stabbing-fist grip provides the necessary force, together with the kind of control that the natural, limited travel, of wrist-arc provides. I find however that holding the work at its far end or at other non-vulnerable parts of the carving, is awkward from some angles, as I cope with the changing grain direction.

Most of my carving is done at my jeweller’s-bench-like carving station, with palm tools, knives and purpose-made tools for miniature carving. To shape the profiles of the overlapping bowls of the lovespoon I decided to use bench tools and mallet to remove the material more quickly, and in this case with more control.

I have taken the precaution of stabilising the lantern with a rubber band and the work is securely clamped to the bench. Almost the entire work piece is flat on the back and can be firmly clamped to the bench. A small piece of cedar presses against the upper bowl to prevent lateral movement as it is carved.

After carving down to the line of the bowl profile, it is time to carve the interior of each of the twin bowls. There is still a large amount of material to be removed from the bowl interiors but this time the material can only be carved away in small increments. This is mainly because the bowl interiors each contain features and details that need to be ‘crept-up-upon’ with deliberation.

Bound Heart Lovespoon WIP - 26_08_2018_02 800W 800W


The best I can do in order to speed the process is to use a 4mm #7 gouge to cut deep overlapping channels inside the bowls and around the hearts that emerge from the bowl interior. These emerging hearts are to be blended down to the bowl surface with a swirl connection in keeping with the general art nouveau style of the lovespoon.

The curved arises on these connecting swirls need to describe fair curves that are in turn, properly related with the bowl sides and the hearts they merge into. As the carving of these features proceeds, design decisions need to be made about the depth of the swirls, and the sharpness of the arises on the swirls, especially as they become ‘lost edges’ at their graduated blending points on the bowl surfaces and hearts.

Bound Heart Lovespoon WIP - 26_08_2018_03 800W 800W

Eventually these features are formed with appropriate sized gouges and cleaned up with a shallow round-ended gouge. With a freshly stropped edge and not much more force than the weight of the gouge, tiny slivers are shaved from the bowl surfaces. This is carried out with a necessarily high cutting angle, levering from the bowl rim. In this way the interior features, swirls, hearts and splines are adjusted in shape, form and surface quality, ready for final finish preparation much later.

Once the top bowl interior was shaped, the right hand outer surface could be partially carved, enough to define the left hand rim of the lower right hand bowl. At this point the interior of the second bowl could be carved along the same lines as the other.

The full depth of the bowl interiors is gradually approached in tandem with the form of the features the bowls contain. The lowering of level within the bowls, in turn alters the curves, depth of shadow and the general relationship of the features to the bowls, and this necessitates slowly working the one part and then the other.

With the interiors fully formed, the bulk of material, especially toward the front of the bowls is removed. The stems of the lovespoon around the junction of the bowls needs leaving fairly full, both for some precautionary strength in that region during the heavy work and for later options, with the details designed for that area.

To remove the material I began with the small deep gouge and eased the curves with the large flatter gouge.

When the juncture of the overlapping bowls is approached, the form of each bowl needs to be visualised and each bowl surface carved incrementally, in much the same way as was necessary with the bowl interiors and their included features.

By working right across the entire structure of the two bowls and not separately carving each bowl in turn, an integrity of the pair is easier to realise and the degree of separation of the two, at the point of rim contact, can be well defined.

As the work is continually turned and examined during the carving of the outer surfaces. The lines of the profile are able to be scrutinised for fairness of curve and adjusted accordingly. Likewise the whole form is worked to achieve a smooth flow of concave to convex surfaces and transitions from surface to edge.

The bottom of each bowl is pod-like in form, with splined edges at the tip and at the base of each bowl. The edges loose their sharpness gradually toward the centre of each bowl, where they are ‘lost’ in the continuous smooth curved surface at that point.

A tendril like detail joins the tip of both bowls and a similar detail on each bowl trails from the outer rim behind the love spoon stem. These details also include the lost and found shadow lines produced from the blended, sharp and smoothed edges. It is the proliferation of these various curves that produce the art nouveau styling of this piece. Some of these details have been planned at the beginning in the original design drawing, but there remains opportunity to include more such detail during the carving process.

Because carving is a subtractive method of forming the object, experimental details can be tried on the fly and left in place when they add to the aesthetic of the design. Tool marks themselves often suggest such details, and can be further developed or reproduced elsewhere in the design.

Though it is not generally good practice to use abrasives while edge tools are still being employed, ( left behind grit will dull their edge ) a wide abrasive face, working over a surface will reveal humps and hollows and even them out to a continuously smooth form. Larger discrepancies in the integrity of a fair surface can be revealed in this way, where they may have been camouflaged, in the light-scattering facets of tool marks. With some careful cleaning of the surface, edge tools can again be used subsequent to sanding, both to do the heavy work that that abrasives have shown necessary, and also to finesse detail that sanding has compromised.

dsc08122 dd mm yy (date)g 800w

Abrasive tools in the form of rasps, rifflers, files and various grit abrasive papers all have their place when highly polished surfaces are to be a feature in the carving. They even have a place as a useful aid to arriving at desirable form, before edge tools are used for a finishing that features a decorative textured network of tool marks, when that is the aim.

I tend to think of abrasive papers as tools in their own right, especially when attached to some substrate that will allow the deliberate and purposeful delivery of an effect. They have nevertheless, some undesirable side effects, because of their being, not perfectly precise, and so un-like the finely honed, stropped and polished edge of knife, chisel or gouge.

Abrasives tend to even things out, blur the edges, soften the detail. This can be the perfect foil, the perfect contrast to crisp detail, but the crisp detail will need restoring when abrasive softening has been applied.

Edge tools generally provide precise ,crisp definition, in contrast to the softening effect of abrasives. They provide it where surfaces intersect and they provide it when working their potentially beautiful tool-mark texture over a surface, from the dynamism of ocean-wave rippling texture to the tantalisingly, nearly but not quite, dead-smooth, yet paradoxically lively texture, of fine aged leather.

dsc08123 dd mm yy (date)h 800w

The inner beauty of timber on the other hand, the opalescent chatoyance not yet visible with timber ‘in the rough’, cannot be revealed without a perfectly smooth evenly formed surface. A surface that has been polished to the point of being a transparent window to what lies below. For such a surface, a series of abrasive ‘smoothings’ down to the thousands is necessary. The coarser abrasive tools prepare the ground work for this result and finer and finer grits with oils, thinned varnishes and waxes bring it to completion.


By orchestrating the achievable results obtained from edge tools for the most part and the additional aid that abrasive tools provide in achieving the forms of each element. The carving as a whole is prepared in stages working toward an integrated form ready for its final detailing and polish.


dsc08118 dd mm yy (date)d_1 800w

The basic forms of the twin bowls are now formed ready for the tidying up and detailing that will follow when all the elements of the work have been established.  The rounded-bead ends of the lovespoon’s twin stems are nestled into their coved recesses in the widening rims at the bases of each bowl. The flowing paths of the stems themselves now have to be considered and established as graceful slow curves, passing the hanging lantern and then merging beyond the lantern’s hanging point, up to the right hand side of the bound heart.

Likewise some lowering of the blank’s surface, toward the bottom portion of the dragon, the ribbon on which the dragon stands, the tail of the dragon and part of the celtic knot-work, will all need to carried out. These levels will establish working parameters that governing achieving the desired form for the bound heart.


A degree of twist will need to be imparted to the stems as they travel up to the heart, which will be the next object of attention. The final form of the stems, especially around the lantern’s hanging-link region will need blocking in first, in preparation for determining the levels and depth of carving of the heart.

So the form of the bowls is now established and while the bowl area is not the most prominent detail in the whole lovespoon, carving the bowl, or bowls in this case, are the crowning element. The bowl is always in any lovespoon, not an overly prominent element, but it is the definitive element. As such the twin bowls have commanded a great deal of attention and will continue to, in the finishing processes.

In the next post the title piece, the bound heart, will be carved into its location and at the level in the design, that relates it best in form and position to the other elements and the love spoon’s story..

‘The Bound Heart Lovespoon’ WIP 3 Carving the Ball-in-cage Lantern

In this post I will be describing the first stages of the actual carving of the ‘Bound Heart Lovespoon’. I am going to commence with the ball-in-cage lantern because it seems at this stage to be the most difficult, or at least the most fraught-with-danger element in the design.

It would be nice to think that with a bit of experience under my belt I might know what I am doing. However as I commence the carving I have no clear idea about how I will remove material all around the intended hanging lantern with the captured ball inside.

bound heart lovespoon wip - 21_08_2018_04 800w

As I mentioned in the previous post, a large part of the designing will take place during the carving process. The design, as it is, in this plan view for the ball-in-cage hanging lantern, has come about firstly as the simple requirement in the brief, for a ball-in-cage to represent the client’s daughter. Its location is due to some changes in earlier designs and the adoption of an overall asymmetrical art nouveau styling to the piece as a whole.

The art nouveau asymmetric styling of the design led to the twin bowls and consequently, the paired, sinuously-curving and merging stems. These stems in turn, provided an ideal cradling-space for the cage feature. The space is a tapered space however, and so the cage has taken on its lantern-like appearance. Now, being a lantern, it would look best if it were to hang free. A hanging point would also also help keep the individual integrity of the two stems as theorise to their point of convergence concealed and blended into the rest of the design.

All very well except for how enough access can be had to this feature, through the sides of the lantern piece, to carve the ball in-situ.  I have a few home-made crank-shafted carving  tools for accessing tight areas, but even these would need enough access past the twin spoon stems to work the ball in the cage.

After lowering the level on the front of the lantern a little and then a little more away from the centre of the ball, I then considered the profile of the love spoon on both sides. There would be a need to pare away with a knife, enough material from the top, of both spoon stems, for access to the lantern sides. But not so much as to interfere with the thickness and downward-to-upward sweep of the stems into the twin bowls below.

The carving/designing process at this point is a matter of ducking and weaving around the project looking for ways forward, measuring material available, weighing up options and then cautiously proceeding. By using a strip of paper to measure and mark off the profile of the ball and  lantern corner posts I had prepared to begin lowering the level between the lantern posts on one side down to the face of the ball. Then with sloping under cuts the beginnings of the ball shape began to be formed.

Every now and then a little more realestate is resumed from the material on the spoon stems to get more access and a little more of each stem’s own design is settled in the process.

Gradually, stubborn persistence provides an encouraging glimmer of hope, and a foolhardy venture pays off as the shape of the ball in the cage begins to form. The tools I have made from music wire, cut well enough when sharp and polished but the steel is still soft enough to allow some further bending of the shaft to facilitate reaching difficult regions of the work.

So having come close to shaping the ball on one side, front and back. I can now set about a repeat of the process on the other side, from the direction of the other spoon stem. Again, this is going to require some thought about how much material, and where, can be left around the left-hand spoon stem while still leaving enough options for the design of all the elements that will be located there.

Most of the carving at this point has been by small incremental piercing cuts with small tools or the very corner of the edge, on slightly larger ones. The paring cuts that I have so far made with the broader edge of the tools, indicate that this piece of Japanese maple is, or seems to me at this stage to be, quite a bit harder and tougher than the rock maple I am used to.

Furthermore, consistent with what some internet research suggests, by reference to its tendency to ‘skip’ over planing cutters, I am finding a kind of toughness in the timber that causes even sharp tools to burnish the path before them and skip out of the cut. Not a big problem, but small and cautious cuts will be continually necessary.

A good characteristic of the timber, arising from its hardness and toughness, is its ability to hold fine detail. Though it doesn’t allow cutting against the grain without tear-out, or tolerate cutting across the grain particularly well.

I am also guessing that another of this timber’s characteristics that will make up for the difficulty of carving is that it should have some great finishing properties, including some interesting colour variation, by way of bright yellow streaking through the grain in some areas.

Because I am not sure yet how deep into the timber the puffin and the waves are to be, I am using broad gouge cuts to open access space to the lantern on the left-hand side. Again due to the hardness of the timber, especially across end grain I am following up the shallow cuts with some small rasp work to avoid the transfer of too much stress to weaker connecting points. Using the rasp here is also a way of testing how the timber responds to this kind of working, in case I need to do this in other parts of the carving later.

Just as some of the design takes place during the carving process I also like to experiment with different tools as I go along.  Building a repertoire of techniques to draw upon in the future and along the way.

Little by little working around the captured ball, it is finally loose within the cage and ready for as much refinement to its shape as can be safely done, without making it too small. It is now time to take the task of cutting the connecting links that will allow the lantern to hang between the two stems of the twin spoon bowls. With a narrow crank-shafted chisel I can work from the hole drilled in the horizontal link, with stabbing stop cuts up to and around the vertical link that merges with the junction of the twin stems.

There is even less room to move in this area and less material can be removed from the area around the stems as they merge with the hanging point link. a couple of extra bends in the tool shaft help a little, but some paring of the stems’ width, just a hair’s breadth on either side and from the outside edge of the lantern’s link is necessary. I have sawn these links a little on the full side for this  purpose and now, just enough space can be obtained to cut the aperture through on the vertical hanging point link.

I only really know it to be, just enough, because eventually it was, and the lantern was able to hang free from the hanging point link. Along the way this required small, careful cuts with whatever tool could reach in and contribute by the removal of even a few fibres from the right place, without encroachment on what needed to remain in place.

A tapered paring of the lantern-top link to a suitable fit within the interior space on the hanging point link, opened the way of access. Opened just enough, that the joining material, when all cleanly removed, provided the freeing of the lantern. Therefore with the lantern free, access to its sides, for cleaning up the four posts and the side windows of the lantern was possible.

With the lantern free and able to swing right out of range from the spoon stems, toward the front and toward the back, there is access enough for tidying the interior of the lantern with smoother cuts, refining the shape of the ball and smoothing it. There will be a limit to how ’round’ The ball can be made following the constricted location where it was first shaped, but so far as it can be made smooth and gracefully spheroid or egg-shaped, that will be the aim later.

Following this, refinement on the form of the hanging lantern could be carried out and then a thinning of the connecting links. The connecting links are thinned in proportion to the massed, thin, sweeping curved lines of the spoon stems, plant stems and scrolling tendrils that drift upward behind.

Next, it will be time to tackle the carving of the twin bowls with the two extruded hearts within. The bowls are not being considered next so much because of perceived difficulty, but having experienced the hardness and toughness of the timber, I know that quite a bit of heavy work needs to take place here, at the far end of the spoon.  I will therefore need some stout stuff to grip and perhaps clamp safely, while the heavy work is done.

So now the profile of the spoon design needs considering again. In particular the way it is to transition into the twin bowls. I won’t be removing more material here than I have to, in order to maintain the strength of this connecting area. The basic curve and thickness will need to be pencilled in along the sweep of the spoon stems and bevelled cuts made down to these lines as much as possible while still keeping options for the various included elements.

In the following post I will describe the carving of the overlapping heart-encapsulating twin bowls.

The ‘Bound Heart’ Welsh Lovespoon Cutting the Carving Blank WIP 2

A4DE97DB-6187-4928-BFC4-EDFCBCE70451.jpeg

The printed pattern for the lovespoon is pasted with spray adhesive onto the selected timber blank and cutting of the lovespoon’s plan-view shape can commence. In this case I needed to locate the pattern in precise alignment over the feature knot in a way that would locate the knot within an area toward the top of the heart between the two to-be-gilded cords winding diagonally across it. (1) By pressing an indentation into the paper pattern in the region of the feature knot the correct location of the pattern on the blank is accomplished . Since there was very little room to move in locating this, really none at all, I just needed to hope for the best, in the attempt to get it right. Even a couple of millimeters would make a difference to the flow of the cord’s curved path over the surface of the heart.

Maintaining fair and graceful curves throughout the carving process is going to be a constant concern in this design. The relationship of the various lines that describe the edges will be crucial to the task of relating all these elements of the carving.

There will be many third dimension unknowns in the final design that await inclusion, as the two dimensional pattern is transformed at the keen, wilful edges of knives, chisels and gouges, through a variably-compliant timber’s, one inch thickness, to the Lovespoons final finished form. This finished form will be accomplished with many irreversible tool edge incisions as the carving and further design work proceed concurrently.

It would be possible to plan the design more thoroughly, so that the whole three dimensional form of the carving was a known quantity, but this would require producing a marque. Then with this three dimensional representation available, the carving process would be mostly a matter of copying what has already been decided.

My preferred method is to spend a fair bit of time on the plan view of the carving and then work more intuitively in the carving stage. I can, however, see some benefit in producing a marque in clay or even a paper and card model, and I might try this approach sometime.

As I mentioned earlier, doing a more carefully rendered drawing of the pattern, has helped a little in this way by ‘modelling’ each of the carving’s elements, conceptually at least, as the shading indicates how the third dimension of the form might go and as enough time is spent dwelling over each element to consider how it might be carved.

The nature of timber together with the special geometry of each carving tool’s cutting edge are useful additions to the vocabulary of describing the carved form as chisels and gouges leave their peculiar tool marks. As the tool marks and developmental forms emerge and intersect there are suggestions the proceeding work makes, that can lead he design imagination, in directions that would not otherwise occur. This dynamic design process has its dangers but also its benefits.

So in cutting the carving blank on the scroll saw I have cut as close to the outside of the line as I could around most of the perimeter of the design and have left a little more material in places where options might develop. I have used a ‘Flying Dutchman’ brand #7 modified geometry blade for the cutting the one inch thick blank. Cutting was quite slow and the Japanese, Maple seems to be a bit harder than the rock maple I am used to.

Inside cuts (shaded with purple coloured pencil) were then prepared for by drilling into the apertures. Because of the slow cutting which meant the possible wandering or bowing inside the cut I have only cut the larger of the inside cuts and have not cut as close to the line in critical areas. In some parts like the Celtic knot-work the apertures have not been cut at all. I might leave the cutting in these locations to when the timber is thinned at that point and then use a fret saw or piercing saw or perhaps just use the edge tools to work from the drilled holes.

When the cutting of the blank is complete the carving work and the continued design during that carving can get under way. With the carving work, I will commence with the elements that pose the most danger of failure. There are a few such areas in this design, the foremost being the loose-hanging ball-in-cage lantern. In the next post I will describe the roughing out of access to the area for this feature and the carving of this feature.