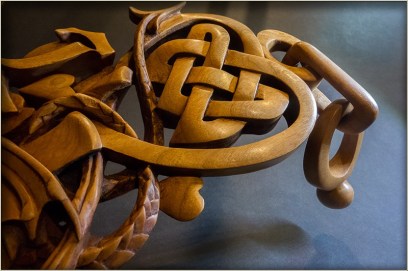
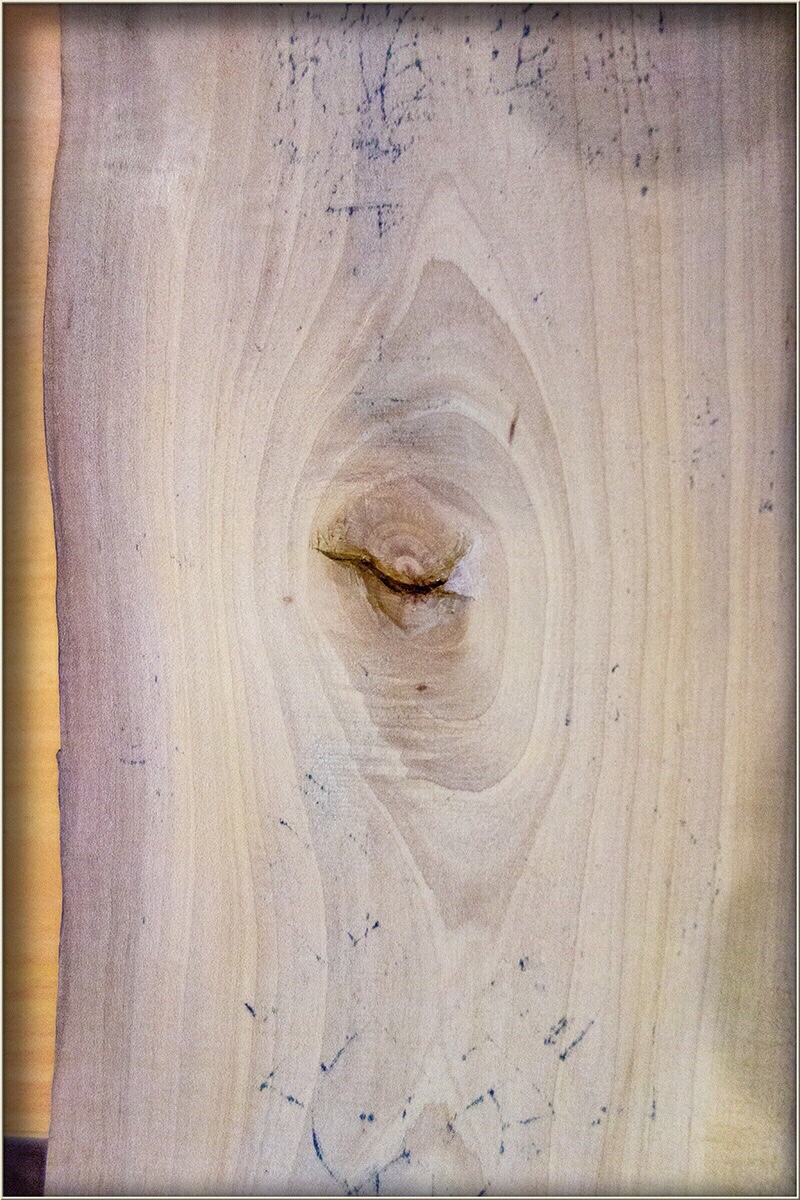
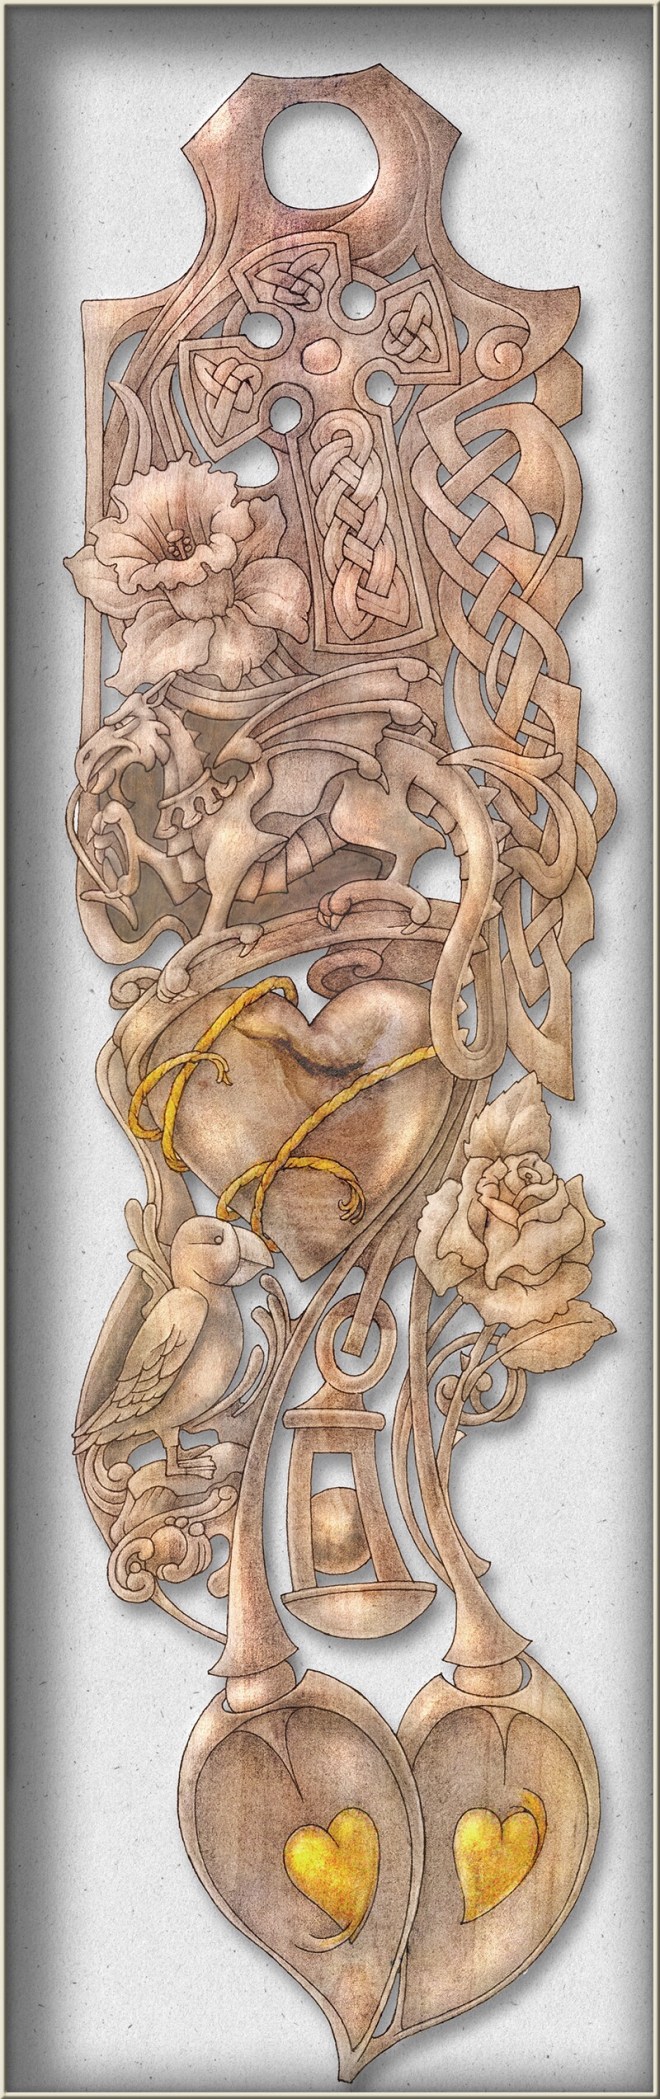
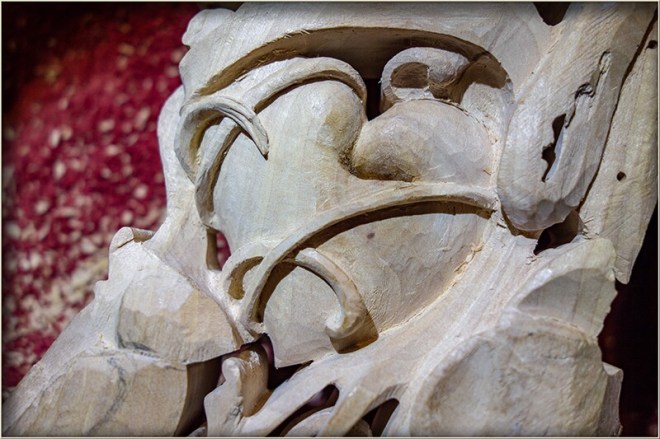
The Heart at the centre of this lovespoon design is the title piece of the carving. The carving blank chosen, a piece of Japanese maple, mostly clear, but with a conspicuous knot, became an integral part of the design. The design brief called for a now-robust heart that had received the healing that the loose binding golden cords had provided. The knot in the timber would provide some focused interest, with a burl like grain pattern, centred on the carved heart.
Additionally with unsound material removal from the centre of the knot, there would be an irregular wound-like void in the heart. A combination of removing material from the knot and working down to the heart surface level, below the cords enwrapping it, would show the location, area, direction and depth of this feature.
I needed the voided-knot to locate, without interference to the second diagonal cord strand, or to the heart-cleavage in any way that might compromise the full rounded ness of the heart. Careful placement of the pattern, together with a little tweaking of the pattern ‘before the fact’ has provided clearance enough for the Lower cord-strand and the heart piece seems to have form enough at this point.
You never know how deep or which directions the unsound material in a knot might go and so I envisaged using the option of some resin filler in this region. Whether or not this is necessary will depend on how prominent the knot-wound needs to be to fulfil its purpose in the design and how it affects the heart’s overall form.
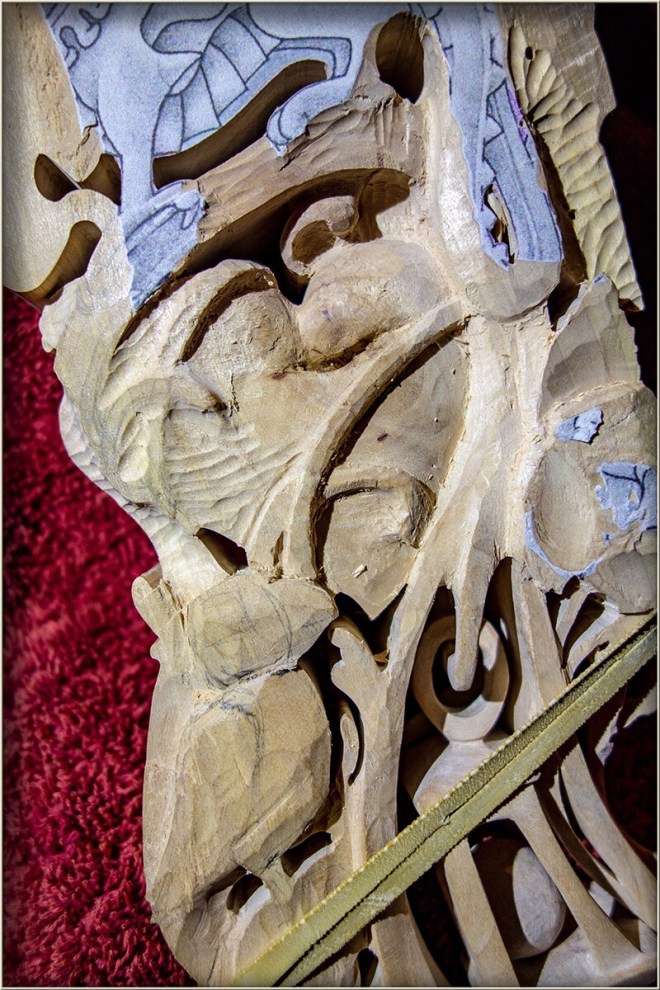
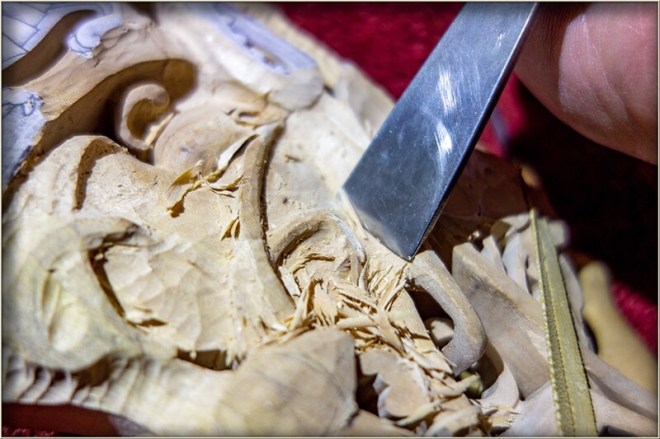
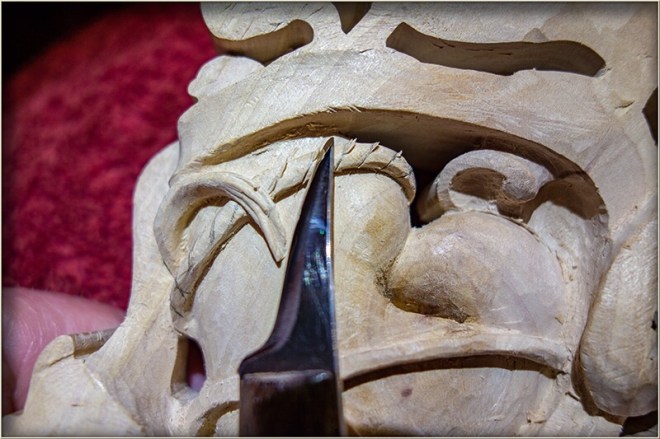
I used a narrow #5 gouge to remove the material quickly down to the heart surface between the strands and along its right hand edge. From time to time the surface was smoothed with a #2 gouge to help envisage the form of the heart and how deep it should be taken on the sides, pointed end and the top under the dragon’s base ribbon.
To establish the form of the heart I have first located the level of the highest point on its surface just below the strands. Then gradually lowered the levels on the strands as they curve over the sides and top.
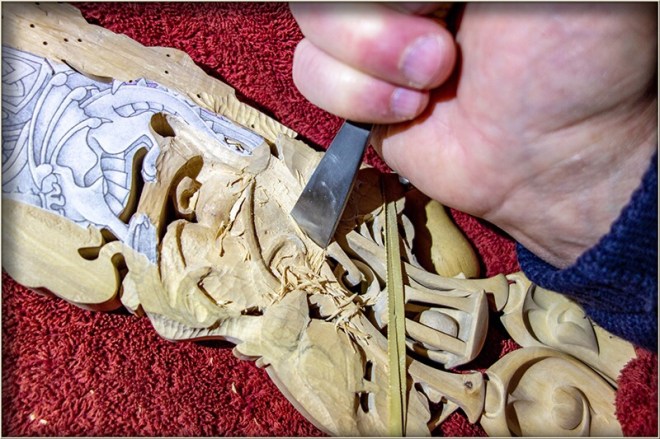
This in turn necessitates a little attention to some of the surrounding elements, like the trailing curled end of the dragon base ribbon at the top, the area surrounding the puffin’s head and the under-cut area behind the dragon’s tail. Also below the dragon’s tail the right hand edge of the heart needs to ‘disappear’ as it gives an appearance of curving around to its back face, behind the spoon’s stem which in turn slides past it up behind the dragon tail.
The edges of the heart need to go deep to provide the heart’s roundness and yet the heart is essentially carved in relief and will not appear on the back of the carving. At the same time the spoon stem touching the heart edge is already at a depth that relates correctly to the hanging lantern link. So deep under cutting of the spoon stem, met by a deep convex plunge of the heart’s right hand edge under it, will provide the contrasting shadow/highlight to indicate a full rounded heart, nestled into the crevice formed by the spoon stem.

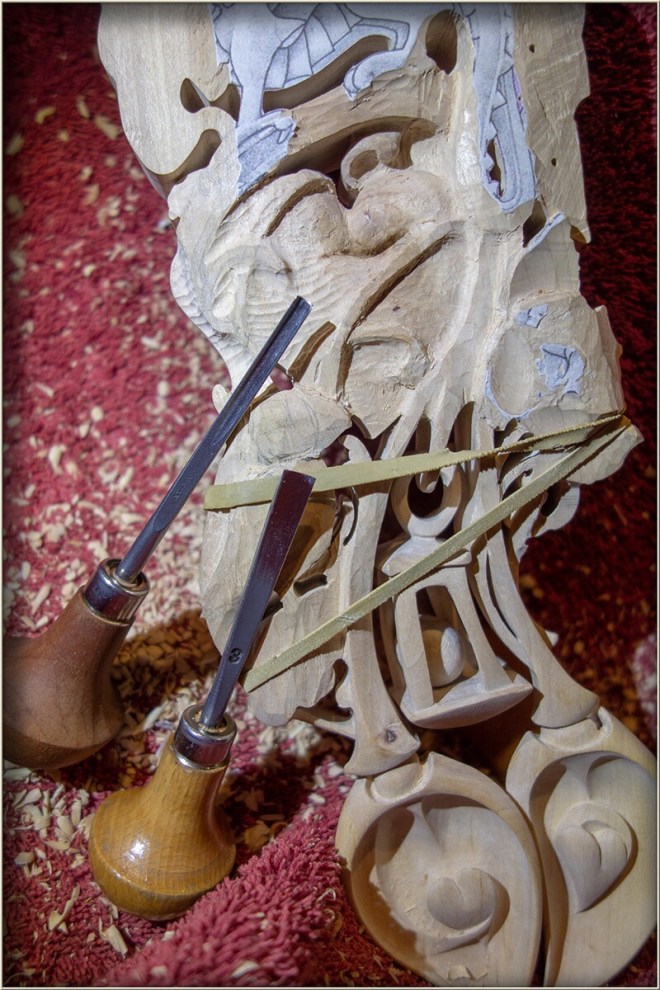
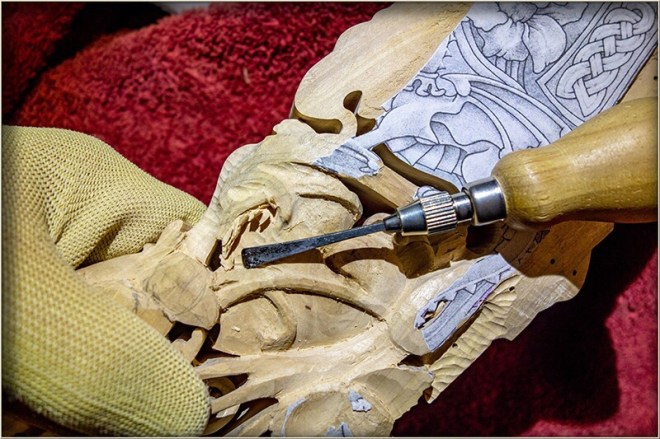
To establish this ‘crevice’ area adjacent to the heart edge I have used a wide shallow gouge with the gouge’s heal-to-centre-of-edge, slid in an extreme slicing cut along the line of he crevice. A number of consecutive slicing cuts, each shaving a spiraling chip, eventually build to the beginnings of a form that can be further shaped by a more direct cutting over the heart surface to the crevice area as a stop-cut.
By using a stabbing grip on the palm gouge, considerable force can be applied with a high degree of control. Because the limited arc of travel in the wrist, is a natural restraint of, and stop to, the cutting action.
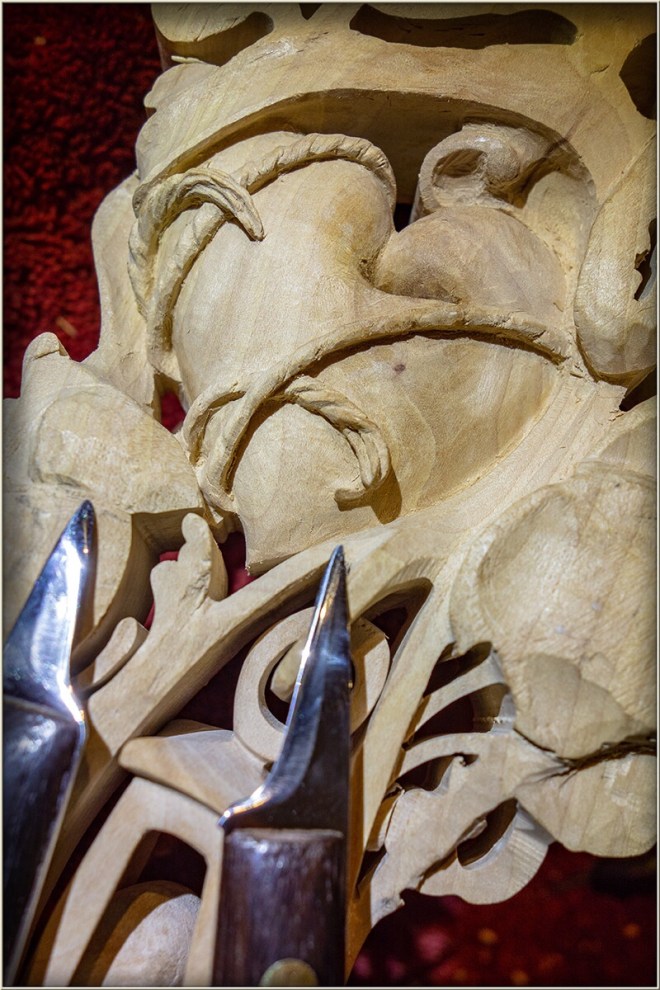
By continuing to place incremental small stop cuts, and larger ones when a gouge fits the curve, along the lines of the golden cords. The surface level of the he heart is worked down to, across the surface of the heart, by removing the material in cutting up to the stop cuts.
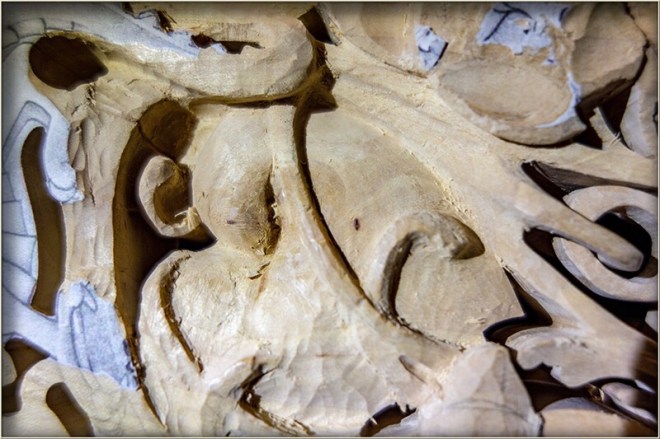
With the heart form largely established the overlaying cord strands are brought to their various levels and forms
Using a curved knife the twist detail in the cords is attempted. The large amount short grain encountered along the length of the strands however means break-out between these twists and each correction ends in a lowering of the depth of the strands. For this reason I have decided to aim at an ‘impression’ of twist along the cords, at this point at least. The painting and gilding stage will be a guide as to how much detail can be safely aimed at and what will look best.
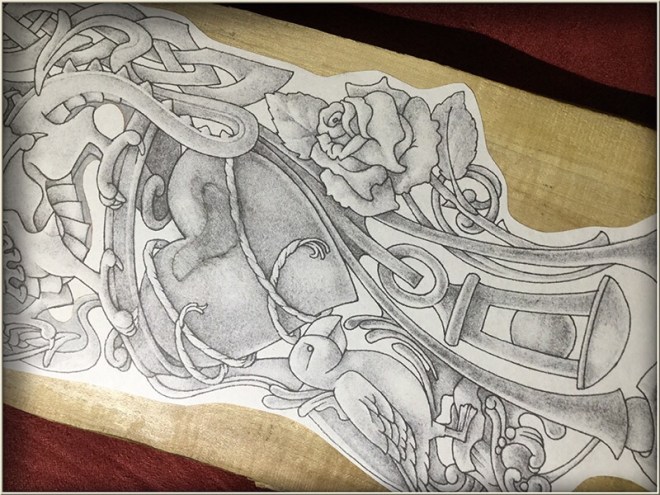
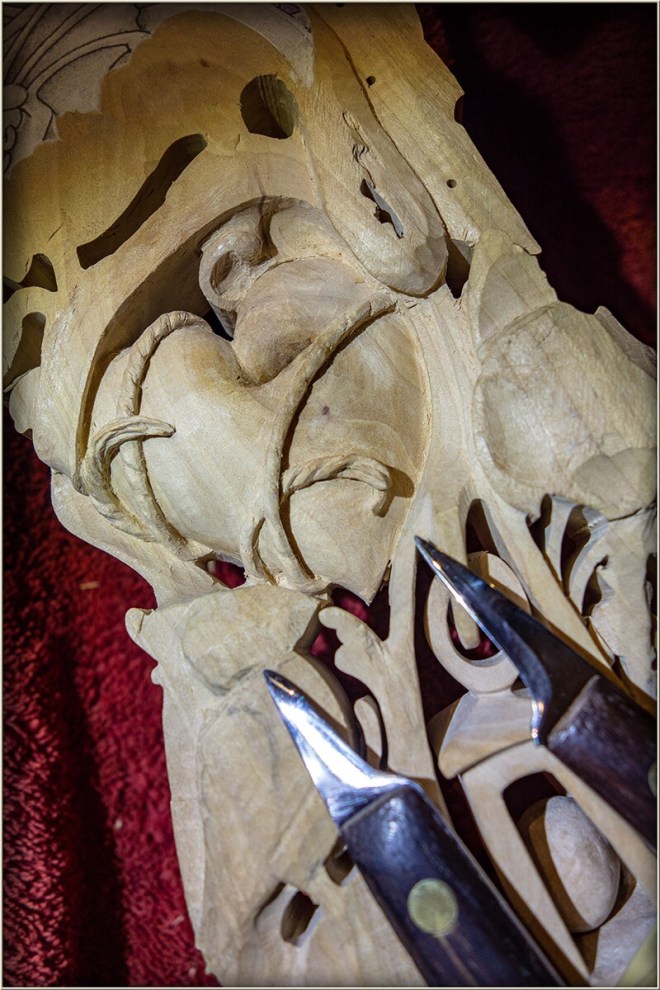
With the heart close to its final form some attention has been paid to visualising the ribbon base ribbon hat the dragon perches upon. It will need to relate correctly to the dragon atop it and also follow a fair curve across the top of the heart.
Before tackling this however it will be best to work on the lower sections such as the puffin and its abstract water swirl background and then the art nouveau swirls and tendrils behind the rose.
In the next post I will describe the carving of the he Puffin and its surrounding background.
