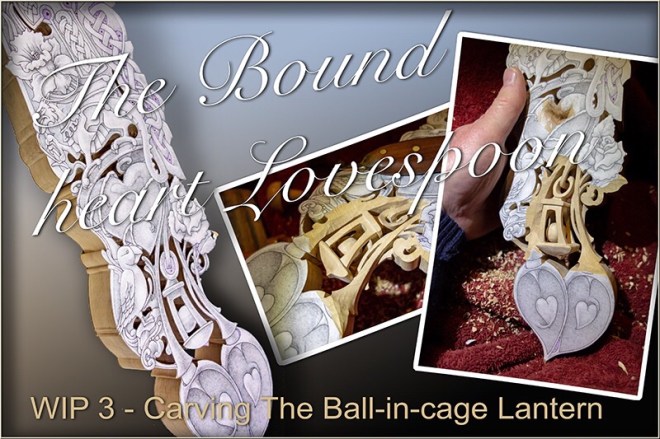
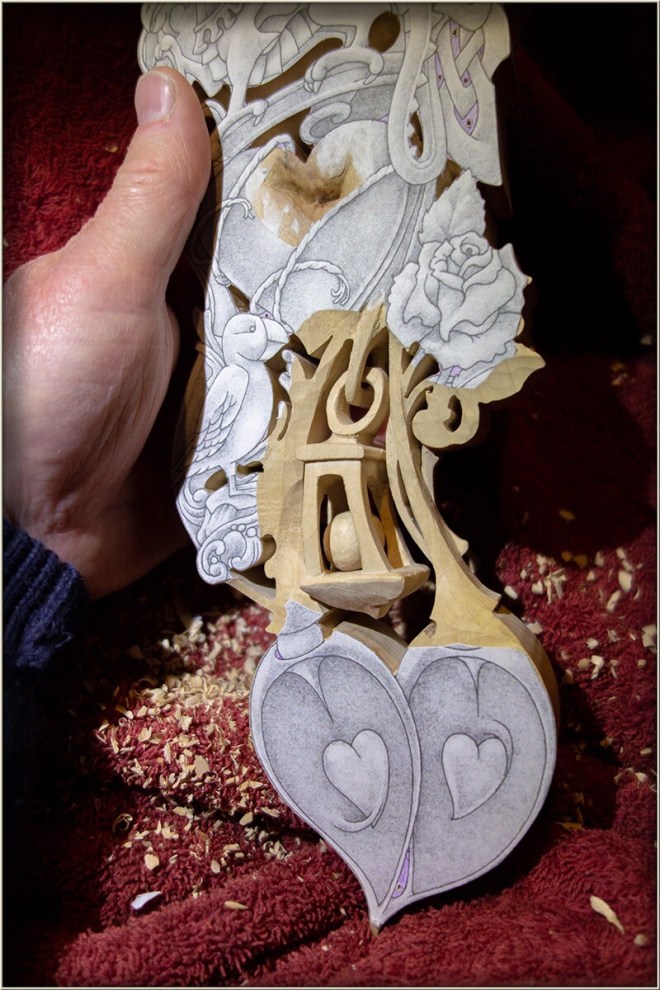
In this post I will be describing the first stages of the actual carving of the ‘Bound Heart Lovespoon’. I am going to commence with the ball-in-cage lantern because it seems at this stage to be the most difficult, or at least the most fraught-with-danger element in the design.
It would be nice to think that with a bit of experience under my belt I might know what I am doing. However as I commence the carving I have no clear idea about how I will remove material all around the intended hanging lantern with the captured ball inside.
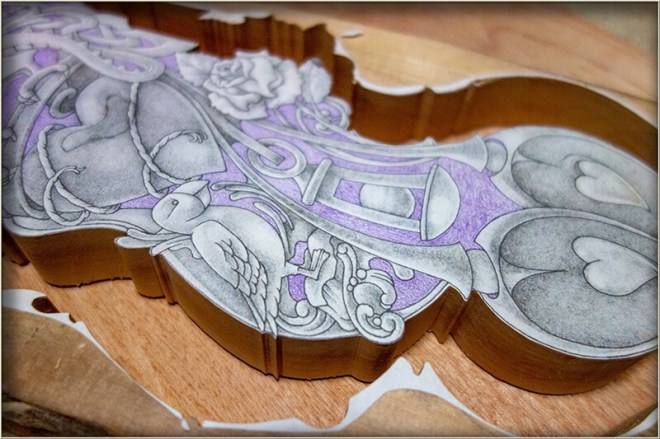
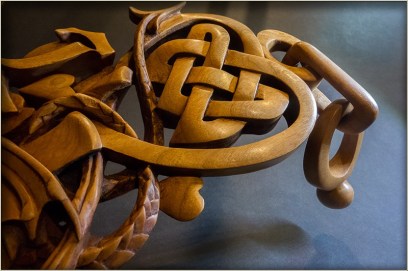
As I mentioned in the previous post, a large part of the designing will take place during the carving process. The design, as it is, in this plan view for the ball-in-cage hanging lantern, has come about firstly as the simple requirement in the brief, for a ball-in-cage to represent the client’s daughter. Its location is due to some changes in earlier designs and the adoption of an overall asymmetrical art nouveau styling to the piece as a whole.
The art nouveau asymmetric styling of the design led to the twin bowls and consequently, the paired, sinuously-curving and merging stems. These stems in turn, provided an ideal cradling-space for the cage feature. The space is a tapered space however, and so the cage has taken on its lantern-like appearance. Now, being a lantern, it would look best if it were to hang free. A hanging point would also also help keep the individual integrity of the two stems as theorise to their point of convergence concealed and blended into the rest of the design.
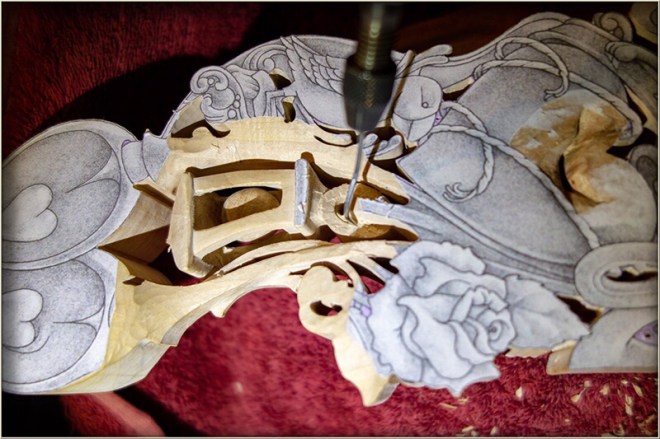
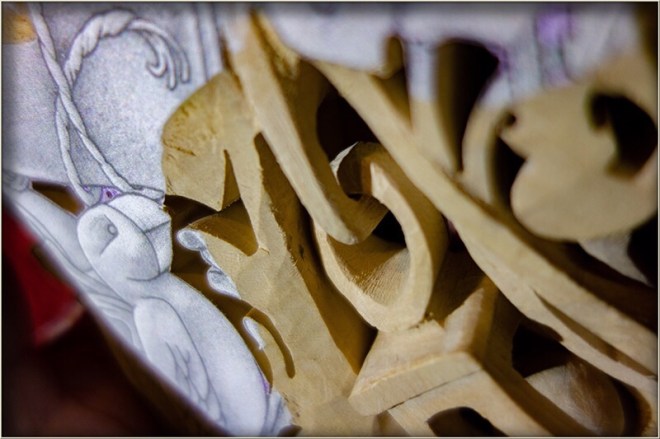
All very well except for how enough access can be had to this feature, through the sides of the lantern piece, to carve the ball in-situ. I have a few home-made crank-shafted carving tools for accessing tight areas, but even these would need enough access past the twin spoon stems to work the ball in the cage.
After lowering the level on the front of the lantern a little and then a little more away from the centre of the ball, I then considered the profile of the love spoon on both sides. There would be a need to pare away with a knife, enough material from the top, of both spoon stems, for access to the lantern sides. But not so much as to interfere with the thickness and downward-to-upward sweep of the stems into the twin bowls below.
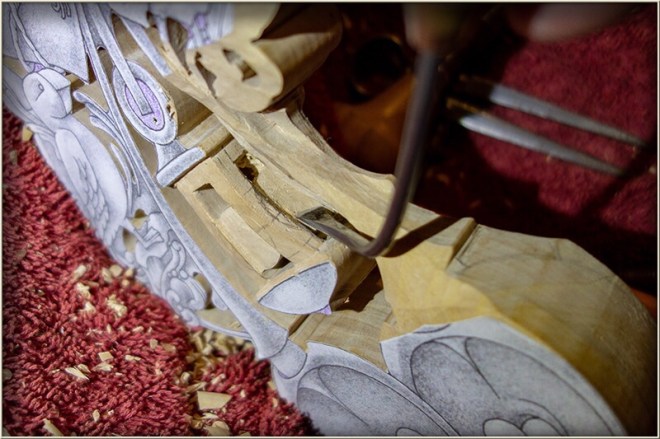
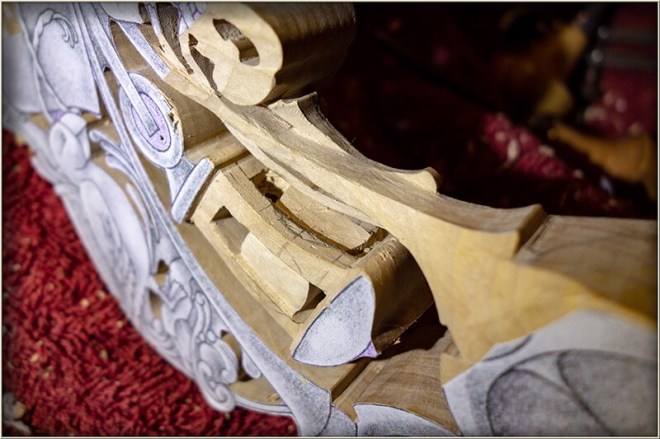
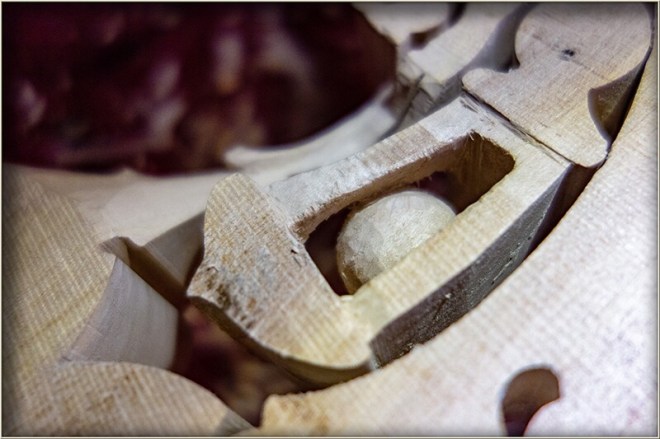
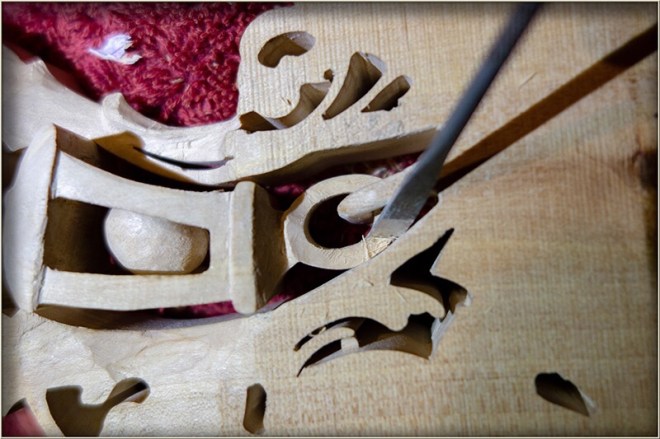
The carving/designing process at this point is a matter of ducking and weaving around the project looking for ways forward, measuring material available, weighing up options and then cautiously proceeding. By using a strip of paper to measure and mark off the profile of the ball and lantern corner posts I had prepared to begin lowering the level between the lantern posts on one side down to the face of the ball. Then with sloping under cuts the beginnings of the ball shape began to be formed.
Every now and then a little more realestate is resumed from the material on the spoon stems to get more access and a little more of each stem’s own design is settled in the process.
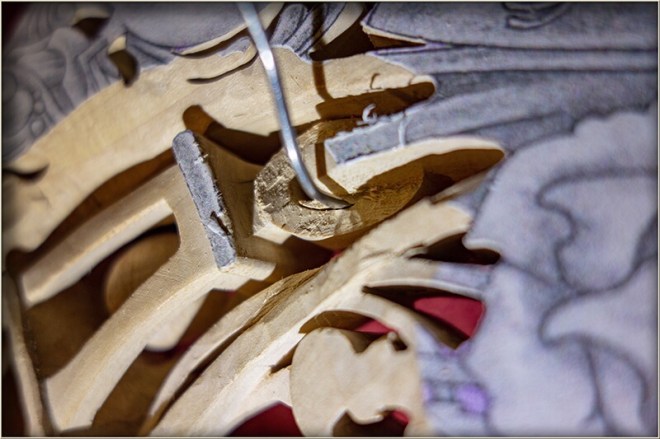
Gradually, stubborn persistence provides an encouraging glimmer of hope, and a foolhardy venture pays off as the shape of the ball in the cage begins to form. The tools I have made from music wire, cut well enough when sharp and polished but the steel is still soft enough to allow some further bending of the shaft to facilitate reaching difficult regions of the work.
So having come close to shaping the ball on one side, front and back. I can now set about a repeat of the process on the other side, from the direction of the other spoon stem. Again, this is going to require some thought about how much material, and where, can be left around the left-hand spoon stem while still leaving enough options for the design of all the elements that will be located there.
Most of the carving at this point has been by small incremental piercing cuts with small tools or the very corner of the edge, on slightly larger ones. The paring cuts that I have so far made with the broader edge of the tools, indicate that this piece of Japanese maple is, or seems to me at this stage to be, quite a bit harder and tougher than the rock maple I am used to.
Furthermore, consistent with what some internet research suggests, by reference to its tendency to ‘skip’ over planing cutters, I am finding a kind of toughness in the timber that causes even sharp tools to burnish the path before them and skip out of the cut. Not a big problem, but small and cautious cuts will be continually necessary.
A good characteristic of the timber, arising from its hardness and toughness, is its ability to hold fine detail. Though it doesn’t allow cutting against the grain without tear-out, or tolerate cutting across the grain particularly well.
I am also guessing that another of this timber’s characteristics that will make up for the difficulty of carving is that it should have some great finishing properties, including some interesting colour variation, by way of bright yellow streaking through the grain in some areas.
Because I am not sure yet how deep into the timber the puffin and the waves are to be, I am using broad gouge cuts to open access space to the lantern on the left-hand side. Again due to the hardness of the timber, especially across end grain I am following up the shallow cuts with some small rasp work to avoid the transfer of too much stress to weaker connecting points. Using the rasp here is also a way of testing how the timber responds to this kind of working, in case I need to do this in other parts of the carving later.
Just as some of the design takes place during the carving process I also like to experiment with different tools as I go along. Building a repertoire of techniques to draw upon in the future and along the way.
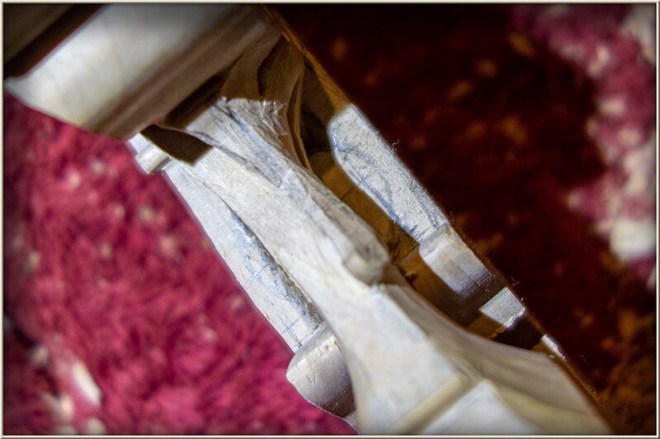
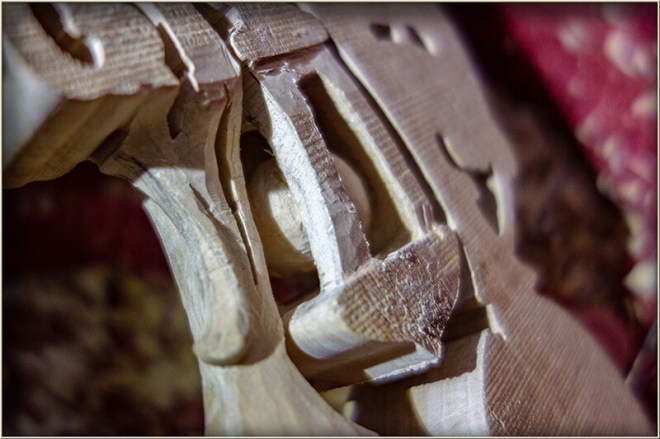
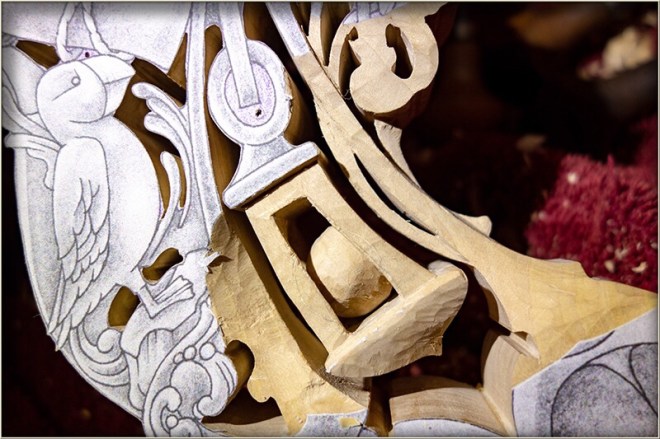
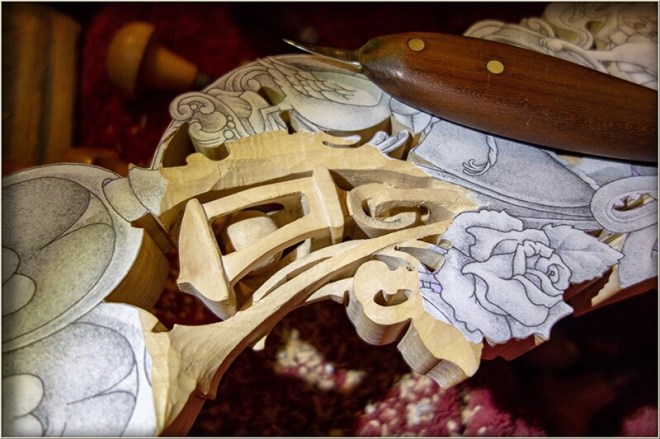
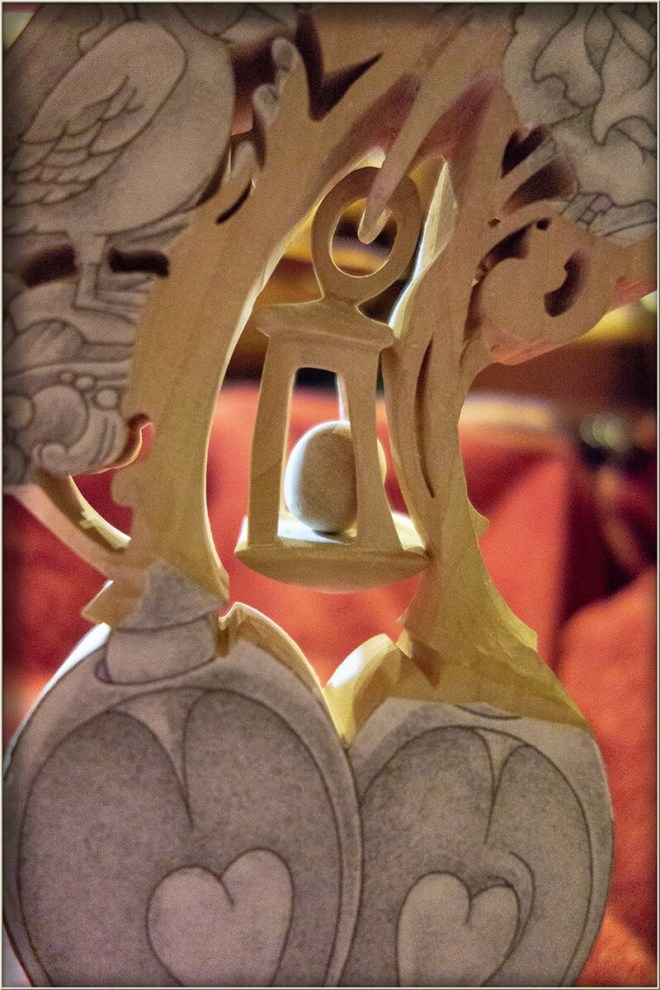
Little by little working around the captured ball, it is finally loose within the cage and ready for as much refinement to its shape as can be safely done, without making it too small. It is now time to take the task of cutting the connecting links that will allow the lantern to hang between the two stems of the twin spoon bowls. With a narrow crank-shafted chisel I can work from the hole drilled in the horizontal link, with stabbing stop cuts up to and around the vertical link that merges with the junction of the twin stems.
There is even less room to move in this area and less material can be removed from the area around the stems as they merge with the hanging point link. a couple of extra bends in the tool shaft help a little, but some paring of the stems’ width, just a hair’s breadth on either side and from the outside edge of the lantern’s link is necessary. I have sawn these links a little on the full side for this purpose and now, just enough space can be obtained to cut the aperture through on the vertical hanging point link.
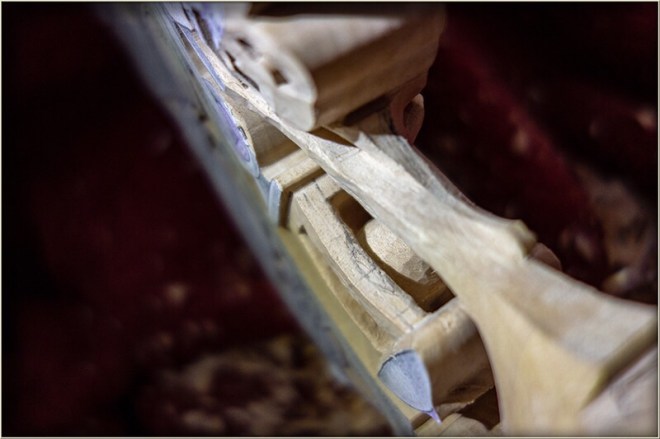
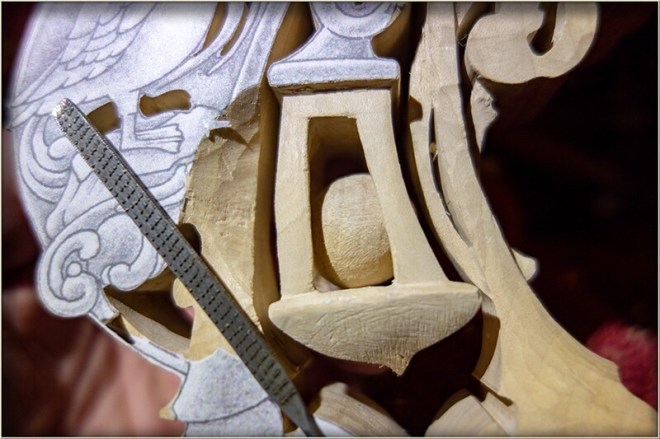
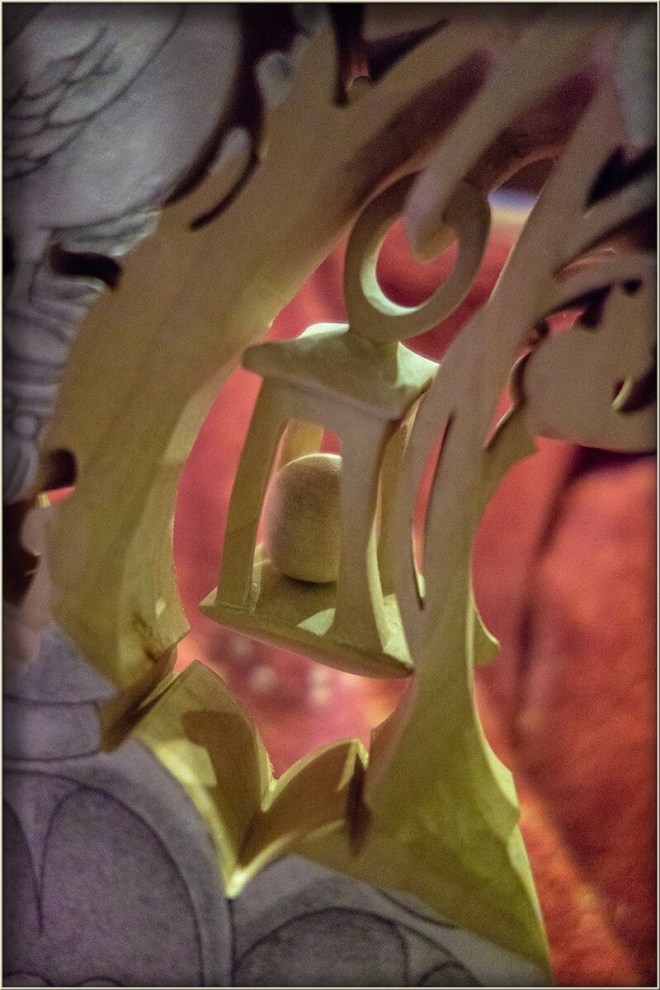
I only really know it to be, just enough, because eventually it was, and the lantern was able to hang free from the hanging point link. Along the way this required small, careful cuts with whatever tool could reach in and contribute by the removal of even a few fibres from the right place, without encroachment on what needed to remain in place.
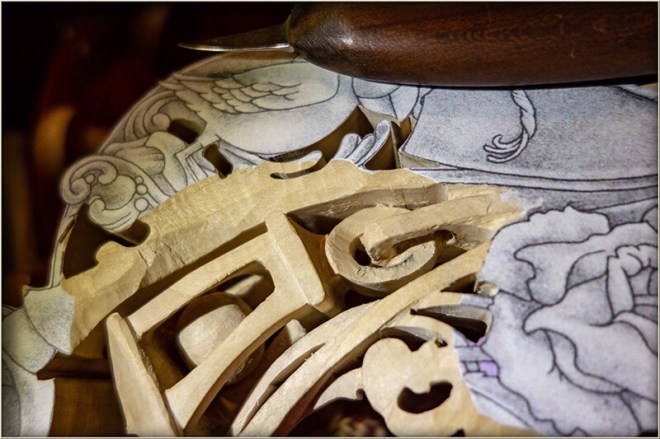
A tapered paring of the lantern-top link to a suitable fit within the interior space on the hanging point link, opened the way of access. Opened just enough, that the joining material, when all cleanly removed, provided the freeing of the lantern. Therefore with the lantern free, access to its sides, for cleaning up the four posts and the side windows of the lantern was possible.
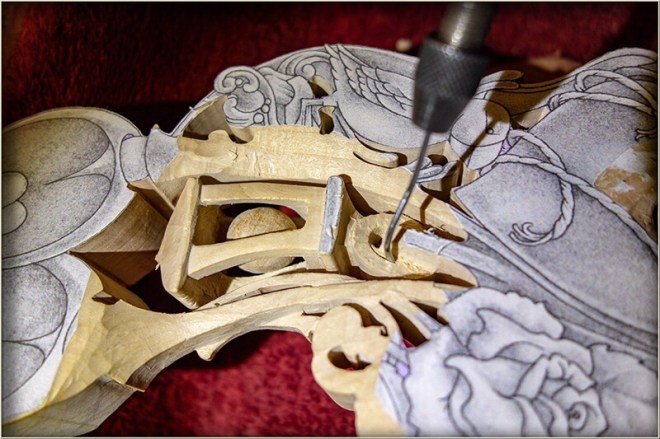
With the lantern free and able to swing right out of range from the spoon stems, toward the front and toward the back, there is access enough for tidying the interior of the lantern with smoother cuts, refining the shape of the ball and smoothing it. There will be a limit to how ’round’ The ball can be made following the constricted location where it was first shaped, but so far as it can be made smooth and gracefully spheroid or egg-shaped, that will be the aim later.
Following this, refinement on the form of the hanging lantern could be carried out and then a thinning of the connecting links. The connecting links are thinned in proportion to the massed, thin, sweeping curved lines of the spoon stems, plant stems and scrolling tendrils that drift upward behind.
Next, it will be time to tackle the carving of the twin bowls with the two extruded hearts within. The bowls are not being considered next so much because of perceived difficulty, but having experienced the hardness and toughness of the timber, I know that quite a bit of heavy work needs to take place here, at the far end of the spoon. I will therefore need some stout stuff to grip and perhaps clamp safely, while the heavy work is done.
So now the profile of the spoon design needs considering again. In particular the way it is to transition into the twin bowls. I won’t be removing more material here than I have to, in order to maintain the strength of this connecting area. The basic curve and thickness will need to be pencilled in along the sweep of the spoon stems and bevelled cuts made down to these lines as much as possible while still keeping options for the various included elements.
In the following post I will describe the carving of the overlapping heart-encapsulating twin bowls.
